AWS Public Sector Blog
Transform DevOps practice with Kiro AI-powered agents
You’re a DevOps specialist juggling continuous integration and deployment (CI/CD) pipelines, infrastructure provisioning, and developer productivity services in an Amazon Web Services (AWS) environment. You’ve probably asked yourself: “With all these generative artificial intelligence offerings, is there a service that can actually make my job run more smoothly?”
The answer is yes. In this post, I introduce you to Kiro, an agentic AI development service, and show you how it can save you hours on your daily automation tasks. Learn how the Kiro command line interface (CLI) transforms DevOps automation with AI-powered agents that install, configure, and deploy infrastructure using natural language commands in minutes.
Kiro brings intelligent automation directly to your terminal. Although Kiro offers both an integrated development environment (IDE) and a CLI, this post focuses on the Kiro CLI. I will show you how to create a specialized agent that can perform DevOps activities to manage AWS infrastructure, create Terraform scripts, and deploy Amazon Elastic Kubernetes Service (Amazon EKS) cluster with best security and architectural practices in mind.
Prerequisites
Before your newly created agent can interact with AWS, you need to configure AWS CLI on your machine. If you haven’t already set this up, install the AWS CLI following the official installation guide. The agent relies on model context protocol (MCP) servers. Follow installation instructions to install required uv and python packages locally. To deploy Terraform scripts from your machine you will need to install Terraform. To manage Kubernetes clusters you will need to install kubectl tool.
Getting started with Kiro CLI
First, install Kiro on your machine. The installation process is straightforward and takes less than a minute. Open your terminal and run this command:
curl -fsSL https://cli.kiro.dev/install | bash
After installation is complete, log in using your AWS Builder ID or alternative identity providers, such as Google or GitHub. Kiro is available at no cost, but I recommend upgrading to the paid pro versions to unlock higher usage limits.
After you’re logged in, verify your installation by running:
kiro-cli --help
A list of available commands and options will be displayed. Now you’re ready to create your first DevOps agent.
Creating your DevOps agent
Kiro agents are customizable AI assistants that you can configure for specific tasks. For DevOps automation, you can create an agent with access to specific tools that can manage local files, create deployment scripts, execute API commands and interact with your AWS environment.
Create a local agent directory in your project:
mkdir -p .kiro/agents
Now create your DevOps agent configuration file:
With this configuration, your agent can make AWS CLI calls to interact with your cloud resources and use enhanced DevOps capabilities with the tools from the referenced model context protocol (MCP) servers.
Log in to Kiro
Now you can log in to Kiro using this command:
kiro-cli login
You can log in using AWS Builder ID or other social network providers. Approve Kiro’s access and authorize your device in the browser’s pop-up window.
Enhancing your agent with MCP servers
MCP servers extend agent capabilities by providing access to specific tools and resources. Although Kiro’s CLI includes built-in tools for AWS, file operations, and bash execution, you can add specialized MCP servers for advanced functionality. For our DevOps agent, we added tools from AWS Terraform MCP server and Amazon EKS MCP server. You can explore other available MCP servers from AWS and add the ones you may need to your Kiro agent.
Running your DevOps agent
After things are configured, put your agent to work. Start by creating a new working folder to store the DevOps-related script files that the agent will generate:
mkdir devops
cd devops
Start a chat session with your newly created DevOps agent:
kiro-cli chat --agent devops-agent
After the Kiro agent starts, you can see a prompt where you can interact with the agent using natural language.
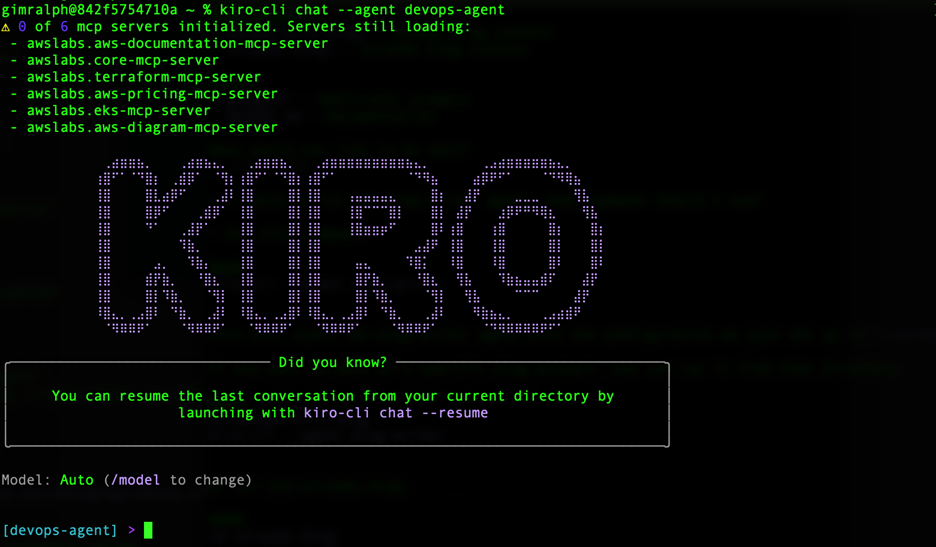
Figure 1. Kiro-cli prompt to chat with DevOps agent.
Check the MCP servers that you added into the configuration file earlier. Run this command to see them:
/mcp
After the list of configured MCP servers is displayed and loading of the MCP servers is confirmed, the agent has access to the services available using MCP servers that can help automate various DevOps tasks.
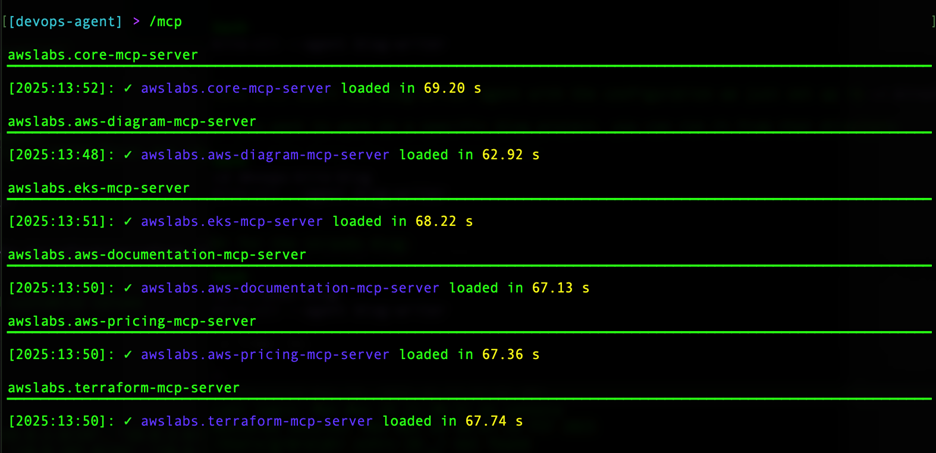
Figure 2. Output of /mcp command that shows available MCP servers.
Real-world DevOps automation examples
You can test your new agent with practical scenarios you might encounter in daily DevOps work.
Example 1: Infrastructure discovery
Ask your agent to describe your AWS infrastructure:
Describe my AWS infrastructure in the us-east-1 Region
Your agent uses the AWS CLI to list resources such as Amazon Elastic Compute Cloud (Amazon EC2) instances, Amazon Simple Storage Service (Amazon S3) buckets, AWS Lambda functions, and Amazon Relational Database Service (Amazon RDS) databases. It presents the information in an organized, readable format.
Example 2: Resource analysis
Get detailed information about specific resources:
List all EC2 instances in my account and show their status, instance type, and tags
The agent runs the appropriate AWS CLI commands and formats the output to help you quickly understand your infrastructure state.
Example 3: Infrastructure as code generation
Provide description of your application and ask the agent to generate the deployment script:
Create a Terraform script to deploy a web application with an application load balancer, two EC2 instances in different Availability Zones, and an RDS database
Your agent generates complete Terraform configuration files, including provider configuration, Amazon Virtual Private Cloud (Amazon VPC) and networking resources, security groups with appropriate rules, EC2 instances with user data scripts, an RDS database with more secure configuration, and a load balancer with health checks.
Example 4: Test creation and validation
After generating infrastructure code, verify that it conforms to best practices:
Create tests to validate that the deployed architecture includes proper security groups, health checks, and database connectivity
The agent generates test scripts using services such as AWS CLI, Terraform validate, or specialized testing frameworks. When you’re ready to deploy, enter something like the following prompt:
Review the Terraform plan and apply the changes to deploy the infrastructure
Your agent walks you through the deployment process, showing you what will be created and asking for confirmation before making changes.
Example 5: Deploy a 3-tier application on AWS EKS infrastructure using Terraform scripts
In a more complex scenario, you may want to deploy a 3-tier application to Amazon EKS cluster with enabled Auto Mode on AWS using EKS best practices. In that case, use the following sample prompt and modify it to fit your application:
I have a 3 tier .NET application that needs to be deployed to Amazon EKS following best security and architectural practices. Create a Terraform script to stand up an EKS cluster with Auto Mode enabled, and guide me through the process of deploying the application.
Give the agent a few minutes to produce Terraform script and you will see an output like this:

Figure 3. DevOps agent’s output for 3 tier application deployment to Amazon EKS.
When you’re ready to deploy, modify variables.tf file with your required parameters and ask the agent to deploy created Terraform scripts. Later you can check that your application is running in your AWS environment.
Cleanup
Kiro CLI required several packages to be installed locally. If you would like to completely remove all prerequisites and installed packages: uninstall AWS CLI, uninstall uv and python, uninstall Terraform, and remove kubectl from your computer. Uninstall Kiro CLI using instructions in the installation guide
Best practices for production-ready operations
Although your DevOps agent is powerful, you can follow these practices for enterprise-grade operations:
- Version control integration – Connect your agent to GitHub or GitLab You can save generated infrastructure code to source control, track changes over time with commit history, enable code review processes, and maintain audit trails for compliance.
- Security and compliance – Configure your agent with appropriate permissions. In particular, use AWS Identity and Access Management (IAM) roles with least-privilege access, enable Multi-Factor Authentication (MFA) for sensitive operations, review generated code before deployment, and implement approval workflows for production changes.
- Documentation and knowledge sharing – Use Kiro’s knowledge management feature to store common patterns and solutions, share best practices across your team, build a searchable knowledge base of infrastructure patterns, and document troubleshooting procedures.
- Iterative improvement – Start small and expand. Begin with read-only operations to build confidence, gradually enable write operations as you validate behavior, create specialized agents for different environments (development, staging, production), and customize prompts based on your team’s specific needs.
Cost optimization with your DevOps agent
Your Kiro agent can help identify cost-saving opportunities in your AWS infrastructure using these prompts:
Analyze my EC2 instances and identify any that are oversized or underutilized
Review my S3 buckets and recommend lifecycle policies to reduce storage costs
Check for unused Elastic IPs, unattached EBS volumes, and idle load balancers
The agent examines your resources and provides actionable recommendations with estimated cost savings.
Troubleshooting common issues
Common issues you might encounter include:
- Agent can’t access AWS resources – Verify your AWS CLI configuration with
aws sts get-caller-identity. Confirm your credentials have appropriate permissions for the operations you’re attempting. - Commands need approval – If you’re prompted to approve every command, adjust your agent’s
toolsSettingsto enableautoAllowReadonlyfor read-only operations. - MCP servers not loading – Check MCP server status with
kiro-cli mcpand verify your configuration file syntax.
Taking your DevOps automation further
You’ve created a functional DevOps agent that can help with infrastructure management, code generation, and deployment automation. You can expand agent’s capabilities by adding more MCP servers for specialized tasks such as monitoring, logging, or security scanning. You can create other specialized agents to handle different responsibilities, such as a security-focused agent for compliance checks, a cost-optimization agent for resource analysis, a deployment agent for production safeguards, and others.
Integrate with your workflow by connecting your agent to your existing services and processes. Use it alongside your CI/CD pipelines, monitoring systems, and incident response procedures. Document your agent configurations and share them with your team to create a repository of proven patterns and configurations that everyone can use.
Conclusion
Kiro can transform how you approach DevOps automation, facilitating the use of natural language to accomplish complex tasks. Instead of remembering dozens of CLI commands, API calls, and configuration syntaxes, you can describe a desired outcome and let your DevOps agent handle the details.
The time savings add up quickly: Tasks that previously took 30 minutes of searching documentation and crafting commands can take 2 minutes of conversation with your agent. Over a week, that’s hours back in your day for more strategic work.
Dive deeper into features of Kiro and start creating custom agents to assist with software development flow, architectural tasks, and specific business-related needs. You can further explore Kiro’s experimental features and custom hooks that will allow you to automate business tasks and make your work even more productive.