.NET on AWS Blog
Bob’s Used Books: Build a .NET Serverless Application on AWS, Part 1: Deployment and Setup
Introduction
Bob’s Used Books is an eCommerce application developed to provide the .NET community with a real world .NET application sample that uses multiple AWS frameworks and services. The original monolithic version of Bob’s Used Books was discussed in a previous blog series, Bob’s Used Books: A .NET Sample Application (Part1, Part2 and Part3), with its complete source code available in the bobs-used-bookstore-sample repository.
The serverless version of Bob’s Used Books demonstrates the process of modernizing a .NET API with serverless frameworks and Infrastructure as Code using AWS Cloud Development Kit (AWS CDK). Modernizing legacy applications to serverless architectures offers numerous benefits including cost optimization and improved scalability.
This post guides you through deploying Bob’s Used Books serverless application on AWS. It covers setting up the AWS CDK environment, deploying authentication and API infrastructure, and testing the application endpoints. By the end, you have a fully functional application with secure user management and efficient API services. This application modernization focuses on API development, yet it integrates seamlessly with any front-end framework to build real world applications.
Prerequisites
The following prerequisites are required on your system to deploy this application:
- Install the latest Long Term Support (LTS) version of Node.js
- Create an AWS account if you don’t have one already
- Install Microsoft Visual Studio (or your preferred .NET IDE)
- Install .NET SDK
- Install AWS Command Line Interface (AWS CLI)
Following are the AWS Services used in this application:
- Amazon API Gateway for API management
- AWS Lambda for serverless function execution
- Amazon DynamoDB for data storage
- Amazon Cognito for user authentication and management
- Amazon Simple Storage Service (Amazon S3) for object storage
- AWS Systems Manager Parameter Store for configuration management
- Amazon CloudFront for content delivery optimization
- Amazon Verified Permissions for fine-grained authorization
Understanding AWS CDK deployment process
The AWS CDK helps you to define AWS infrastructure in multiple languages including C#, and provision them using an Infrastructure as Code (IaC) approach (AWS CDK for C#). Bob’s Used Books Serverless is written in C# using the AWS CDK.
The AWS CDK deployment process consists of three phases; each phase serves a specific purpose in preparing and deploying your infrastructure.
- Bootstrap your AWS environment (one-time setup)
- Synthesize your AWS CDK code into CloudFormation templates
- Deploy your application
1. Bootstrap Phase
Bootstrapping is the process of preparing your AWS environment for use with AWS CDK. This is a one-time setup required for each AWS account and region where you plan to deploy AWS CDK stacks.
To bootstrap your AWS account, run the following command:
cdk bootstrap
2.Synthesis Phase
The CDK synthesis process turns AWS CDK code into AWS CloudFormation templates. AWS CloudFormation templates represent the resources and infrastructure defined in code.
The AWS CDK synthesis performs the following steps:
- Validation: Checks the AWS CDK code for syntactical correctness and has all necessary parts.
- Package Building: If the AWS CDK application includes any assets (such as Lambda function code or Docker images), the AWS CDK, packages these assets and prepares them for deployment.
- Template Generation: The AWS CDK synthesizes your application into one or more AWS CloudFormation templates.
The synthesis process generates a cdk.out directory containing the CloudFormation templates and other artifacts required to deploy your AWS CDK application to AWS. The cdk
synth command is optional for deployment as the deploy command handles it internally. This step is helpful to review the CloudFormation templates before the deployment.
3. Deployment Phase
The cdk deploy command deploys the resources defined in your AWS CDK stack.
cdk deploy TestStack --profile my-profile --require-approval never
This command deploys TestStack defined in the AWS CDK code with AWS credentials profile my-profile.
–require-approval Parameter
The –require-approval never parameter instructs the AWS CDK to automatically approve all modifications to your AWS account, including changes affecting permissions and access. Use it with caution in production environments. This is an optional parameter.
–profile Parameter
The –-profile parameters instructs the AWS CDK to use a specific profile. This is also an optional parameter. AWS CDK picks the profile name “default” if the command does not include it.
Verify if your selected profile includes the target region configuration. For example:
For more details on profile setup using AWS CLI, refer to Configuration and credential file settings.
Application Deployment
Bob’s Used Books Serverless application deploys a sample use case on Book Inventory API. API Gateway receives API requests and directs them to Lambda functions, which interact with DynamoDB for the book information and Amazon S3 for images.
To keep the application secure, Amazon Cognito checks if the user is valid and Amazon Verified Permissions checks if the user can perform the action.
Application uses two AWS CDK stacks to provision all the required resources.
- AuthenticationStack – Provisions a User pool in Amazon Cognito with defined roles.
- BookInventoryServiceStack – Provisions API Gateway, Lambda functions and DynamoDB for the API setup.
BookInventoryServiceStack uses resources from AuthenticationStack. Deploy AuthenticationStack first and then deploy BookInventoryServiceStack.
Step 1: Setup Code Repository
Clone the bobs-used-bookstore-serverless repository. Open a command-line shell and navigate to the application solution directory (containing BobsBookstore.sln).
Step 2: Bootstrap the Environment
To bootstrap your AWS environment, run:
cdk bootstrap
Step 3: Deploy AuthenticationStack
The AuthenticationStack creates user authentication infrastructure using Amazon Cognito, run:
cdk deploy AuthenticationStack —require-approval=never —app "dotnet run —project cdk/src/AuthenticationStack/AuthenticationStack.csproj“
This command synthesizes the AWS CDK application cdk/src/AuthenticationStack/AuthenticationStack.csproj.
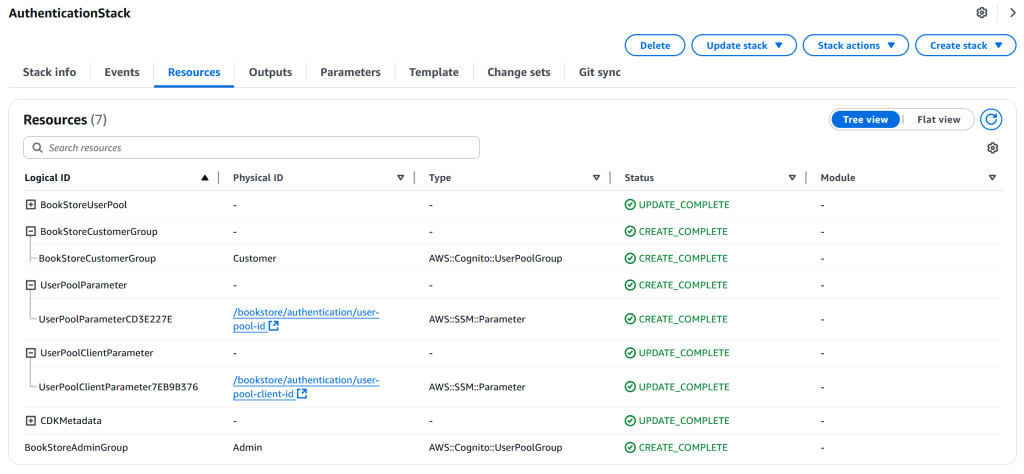
Figure 1: AuthenticationStack deployment
Step 4: Deploy BookInventoryServiceStack
The BookInventoryServiceStack creates API infrastructure and database resources. Run this command:
cdk deploy BookInventoryServiceStack —require-approval=never —app "dotnet run —project cdk/src/BookInventoryApiStack/BookInventoryApiStack.csproj“
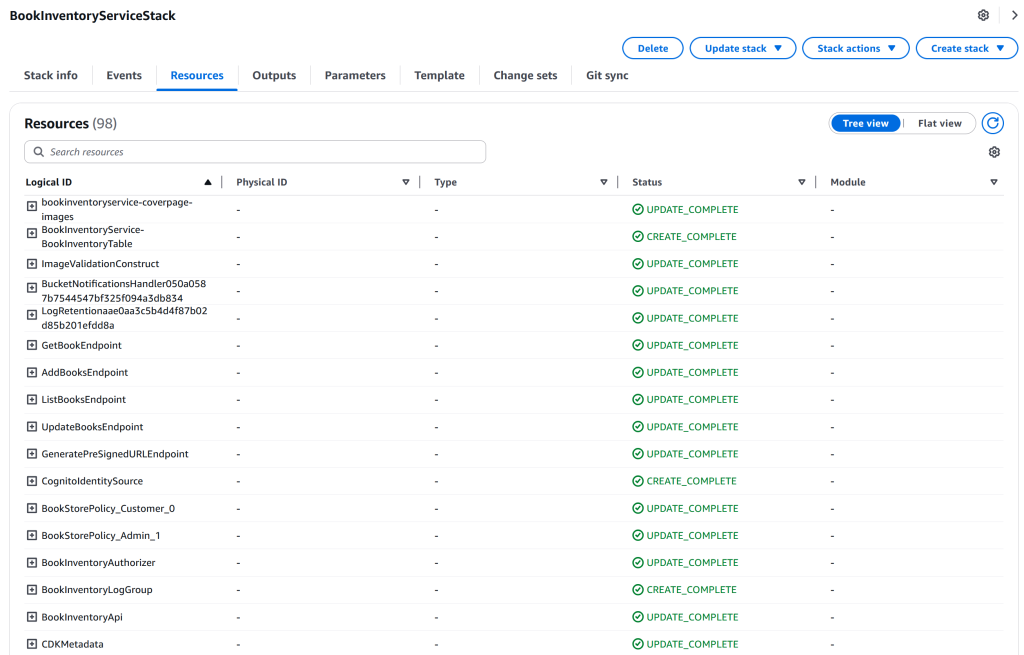
Figure 2: BookInventoryServiceStack Deployment
Testing Application
After successful deployment, configure users and test API functionality. This section guides you through user setup and API validation.
Step 1: Create new user
API Gateway uses Amazon Cognito for user management and authentication. Setup new user in Amazon Cognito to access the application.
AWS CLI command to create new user:
aws cognito-idp admin-create-user --user-pool-id <USER_POOL_ID> --username <USER_NAME> --user-attributes Name="given_name",Value="<FIRST_NAME>" Name="family_name",Value="<LAST_NAME>"
Replace the placeholders with your specific information:
<USER_POOL_ID>: Your Cognito User Pool ID. Refer outputs of AuthenticationStack in AWS CloudFormation<USER_NAME>: The desired username (typically an email address)<FIRST_NAME>: The user’s first name (given name)<LAST_NAME>: The user’s last name (family name)
Step 2: Setup User Password
Run the AWS CLI command to setup password for the newly created user:
aws cognito-idp admin-set-user-password --user-pool-id <USER_POOL_ID> --username <USER_NAME> --password "<PASSWORD>" --permanent
Replace the placeholders:
<USER_POOL_ID>: Your Cognito User Pool ID<USER_NAME>: The username of the created user<PASSWORD>: The desired password (must meet Cognito password requirements)
Step 3: Assign to User Groups
User pool consists of two groups: “Customer” and “Admin”. API endpoints use group information to grant access.
The application uses two user groups with different permissions:
1. Customer Group
- Add and update books
- Upload cover page images
- View all books
2. Admin Group
- Update books
- View all books
Steps to assign users to the group:
- Login to AWS Console
- Navigate to Amazon Cognito
- Select your User Pool
- Select the user you created
- Under “Group memberships”, add the user to either “Customer” or “Admin” group
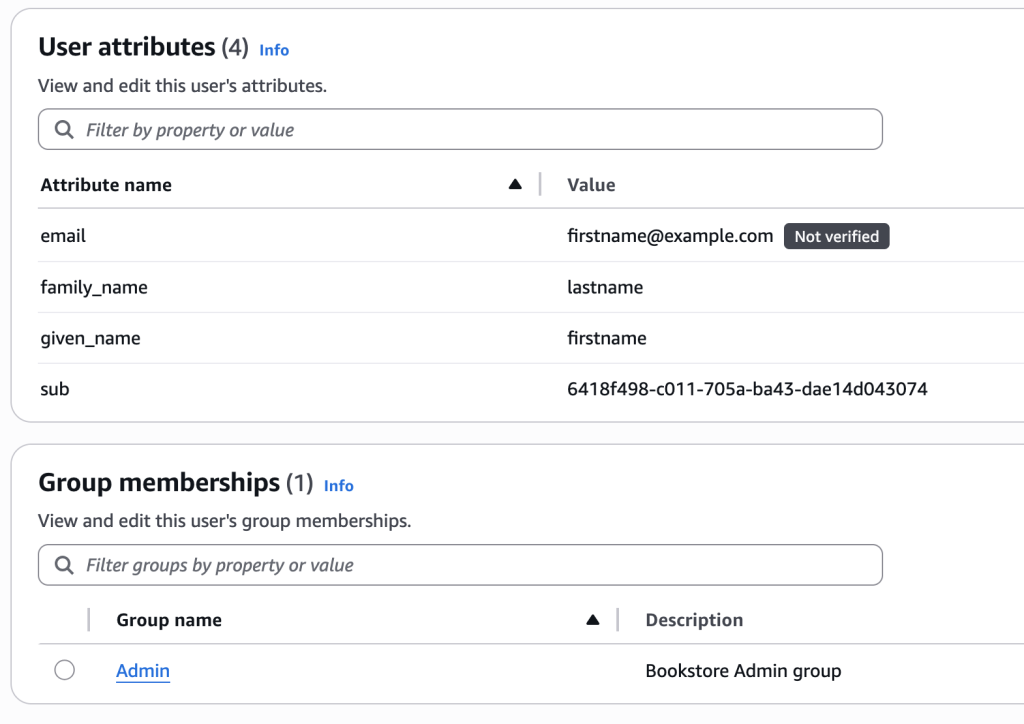
Figure 3: User attributes and group assignment
Step 4: Generate Authentication Token
APIs require user token in the request header to authorize user.
1. Create auth.json file with following configuration:
{
    "UserPoolId": "<USER_POOl_ID>",
    "ClientId": "<CLIENT_ID>",
    "AuthFlow": "ADMIN_NO_SRP_AUTH",
    "AuthParameters": {
        "USERNAME": "<USER_NAME>",
        "PASSWORD": "<PASSWORD>"
    }
}
Replace the placeholders:
<USER_POOL_ID>: Your Cognito User Pool ID, Refer outputs of AuthenticationStack in AWS CloudFormation<CLIENT_ID>: Application client id, Refer outputs of AuthenticationStack in AWS CloudFormation<USER_NAME>: Username of the newly created user<PASSWORD>: Password of the newly created user
2. To generate authentication token, run:
aws cognito-idp admin-initiate-auth --cli-input-json file://auth.json
This command returns ID token, an Access token and Refresh token. Refer to User pool tokens for more information on tokens.
Step 5: API Testing
Test the API endpoints using the tools like Postman. Each endpoint requires specific request formats and authentication headers. Refer to bobs-used-bookstore-serverless README file for the detailed API documentation and sample requests.
For testing API URL, refer to outputs of the BookInventoryServiceStack in AWS CloudFormation
The API provides both public and protected endpoints.
- Public Endpoints (No Authorization Required):
- Search books
- List books
- Protected Endpoints (Authorization Token Required):
- Add book (Customer group)
- Update book details (Customer and Admin groups)
- Upload cover page (Customer group)
Protected endpoints expect the authorization token in request header to verify group membership permissions. Use Access token to test the API endpoints.
API authorization policies are defined in Amazon Verified Permissions. The API Gateway Lambda authorizer uses Amazon Verified Permissions to validate the access token and verify user permissions.
Cleanup Process
To remove deployed resources, execute the following commands in the order:
Destroy BookInventoryServiceStack
cdk destroy BookInventoryServiceStack --require-approval=never --app "dotnet run --project cdk/src/BookInventoryApiStack/BookInventoryApiStack.csproj"
Destroy AuthenticationStack
cdk destroy AuthenticationStack --require-approval=never --app "dotnet run --project cdk/src/AuthenticationStack/AuthenticationStack.csproj"
DynamoDB table and Amazon S3 bucket require manual deletion. Review the stacks after cleanup to identify any remaining resources. Use –-require-approval=never with caution as it bypasses confirmation prompts.
Conclusion
This first post in the Bob’s Used Books serverless series shows how to modernize a .NET application using serverless architecture on AWS. By modernizing a monolithic application into microservices, you gain the benefits of serverless computing: automatic scaling, reduced operational overhead, and pay-per-use pricing. Through AWS CDK deployment, Amazon Cognito authentication, and Amazon API Gateway integration, you established a foundation for modern cloud-native applications.
Future posts in this series will present the application architecture and design patterns for building scalable serverless applications.
For those interested in exploring the code, the complete source is available in Bob’s Used Books Serverless repository.