Task 3: Create the instance
Overview
In this task, you will create an S3 access grants instance, register a location, and set up an access grant for the S3 bucket you’ve created in the previous task.
Implementation
Create an S3 Access Grants instance
1. Open the console
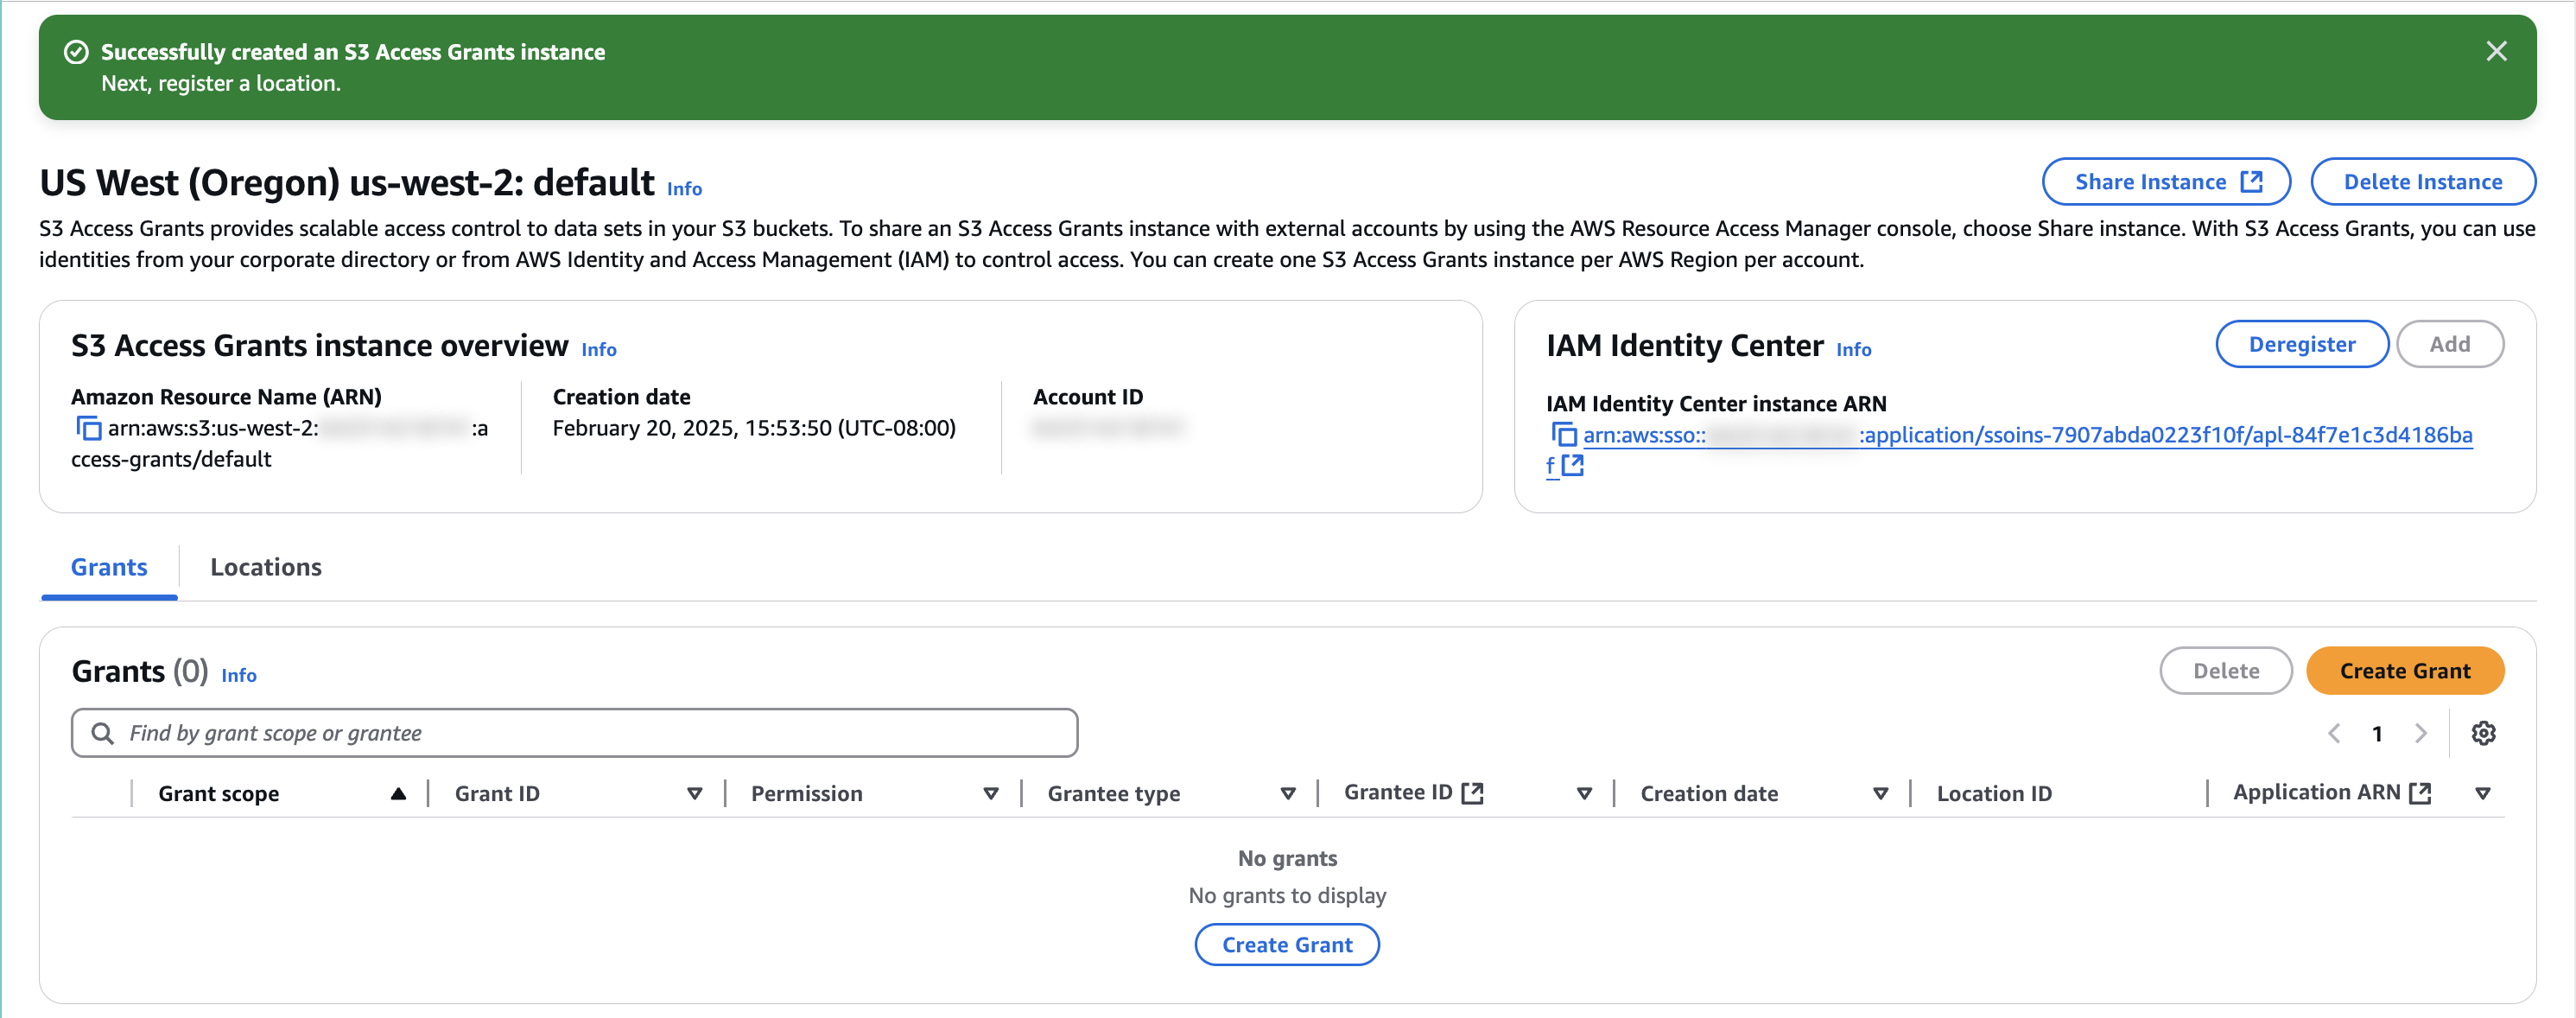
Open Amazon S3 Access Grants console, and choose Create S3 Access Grants instance.

2. Add Identity Center instance ARN
Select Add IAM Identity Center instance. For IAM Identity Center instance ARN, enter the InstanceARN you copied in Task 1 and choose Next.

3. Create the instance
Choose Next to create an S3 Access Grants instance.
Select Cancel. (Note: This is for ease of creating a new IAM Role).
Register a location
1. Open Locations
Choose the Locations tab.

2. Configure location
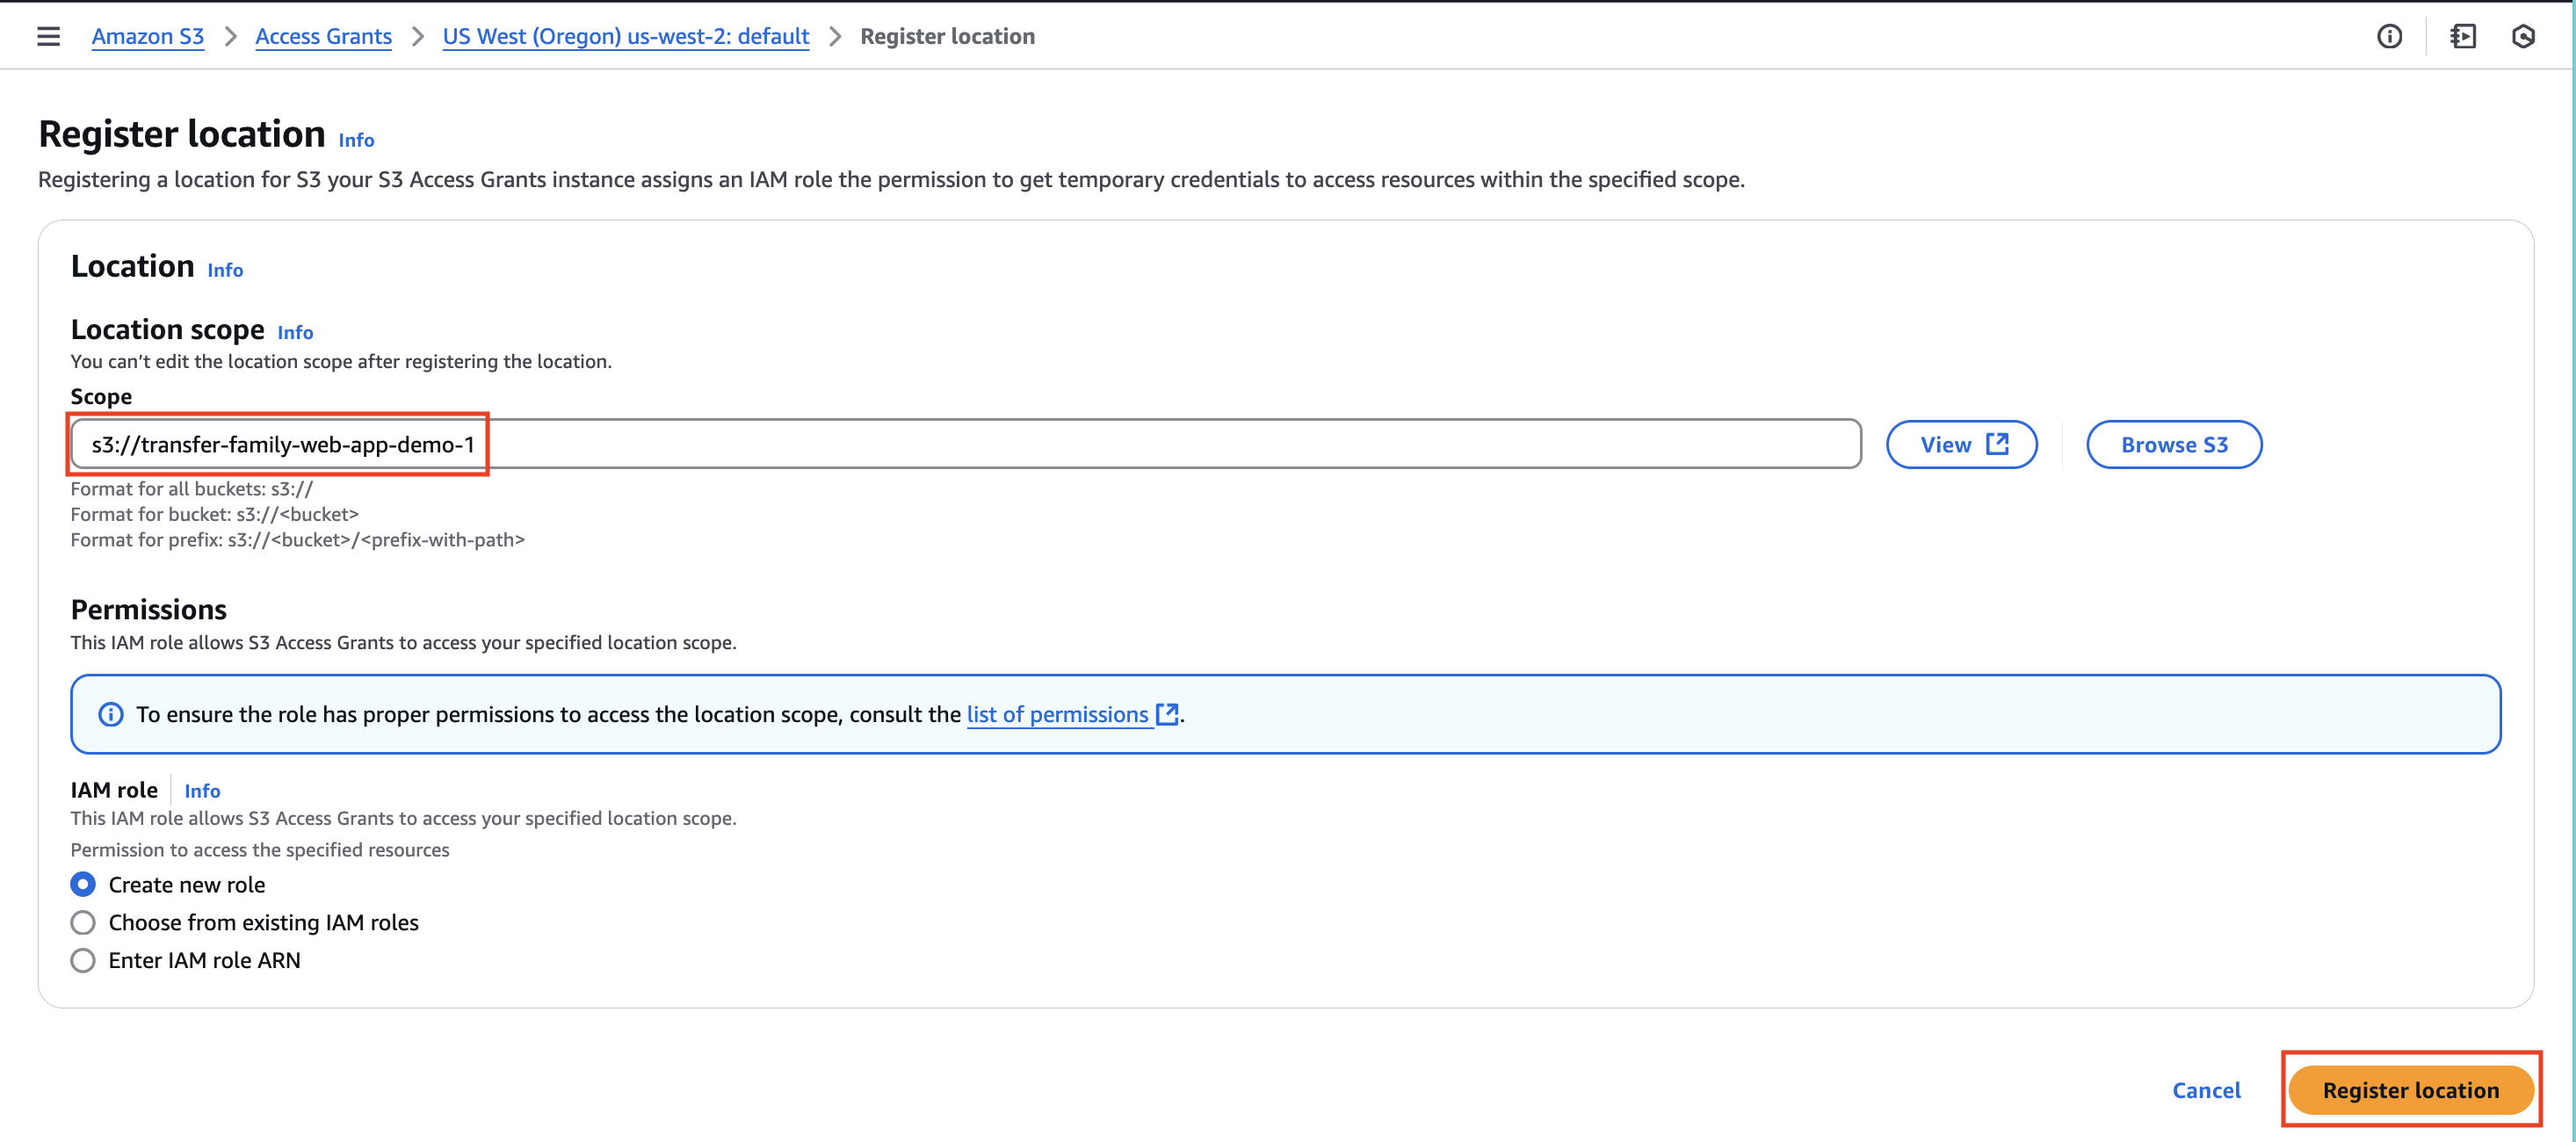
On the Register location page, do the following:
For the Scope, select Browse and choose your bucket.
Note that the scope begins with the string s3://.
For the IAM role, choose Create new role.
This role allows S3 Access Grants to access your specified location scope.
Choose Register location to continue.
Create grant
1. Create a grant
Choose Create Grant.

2. Choose location
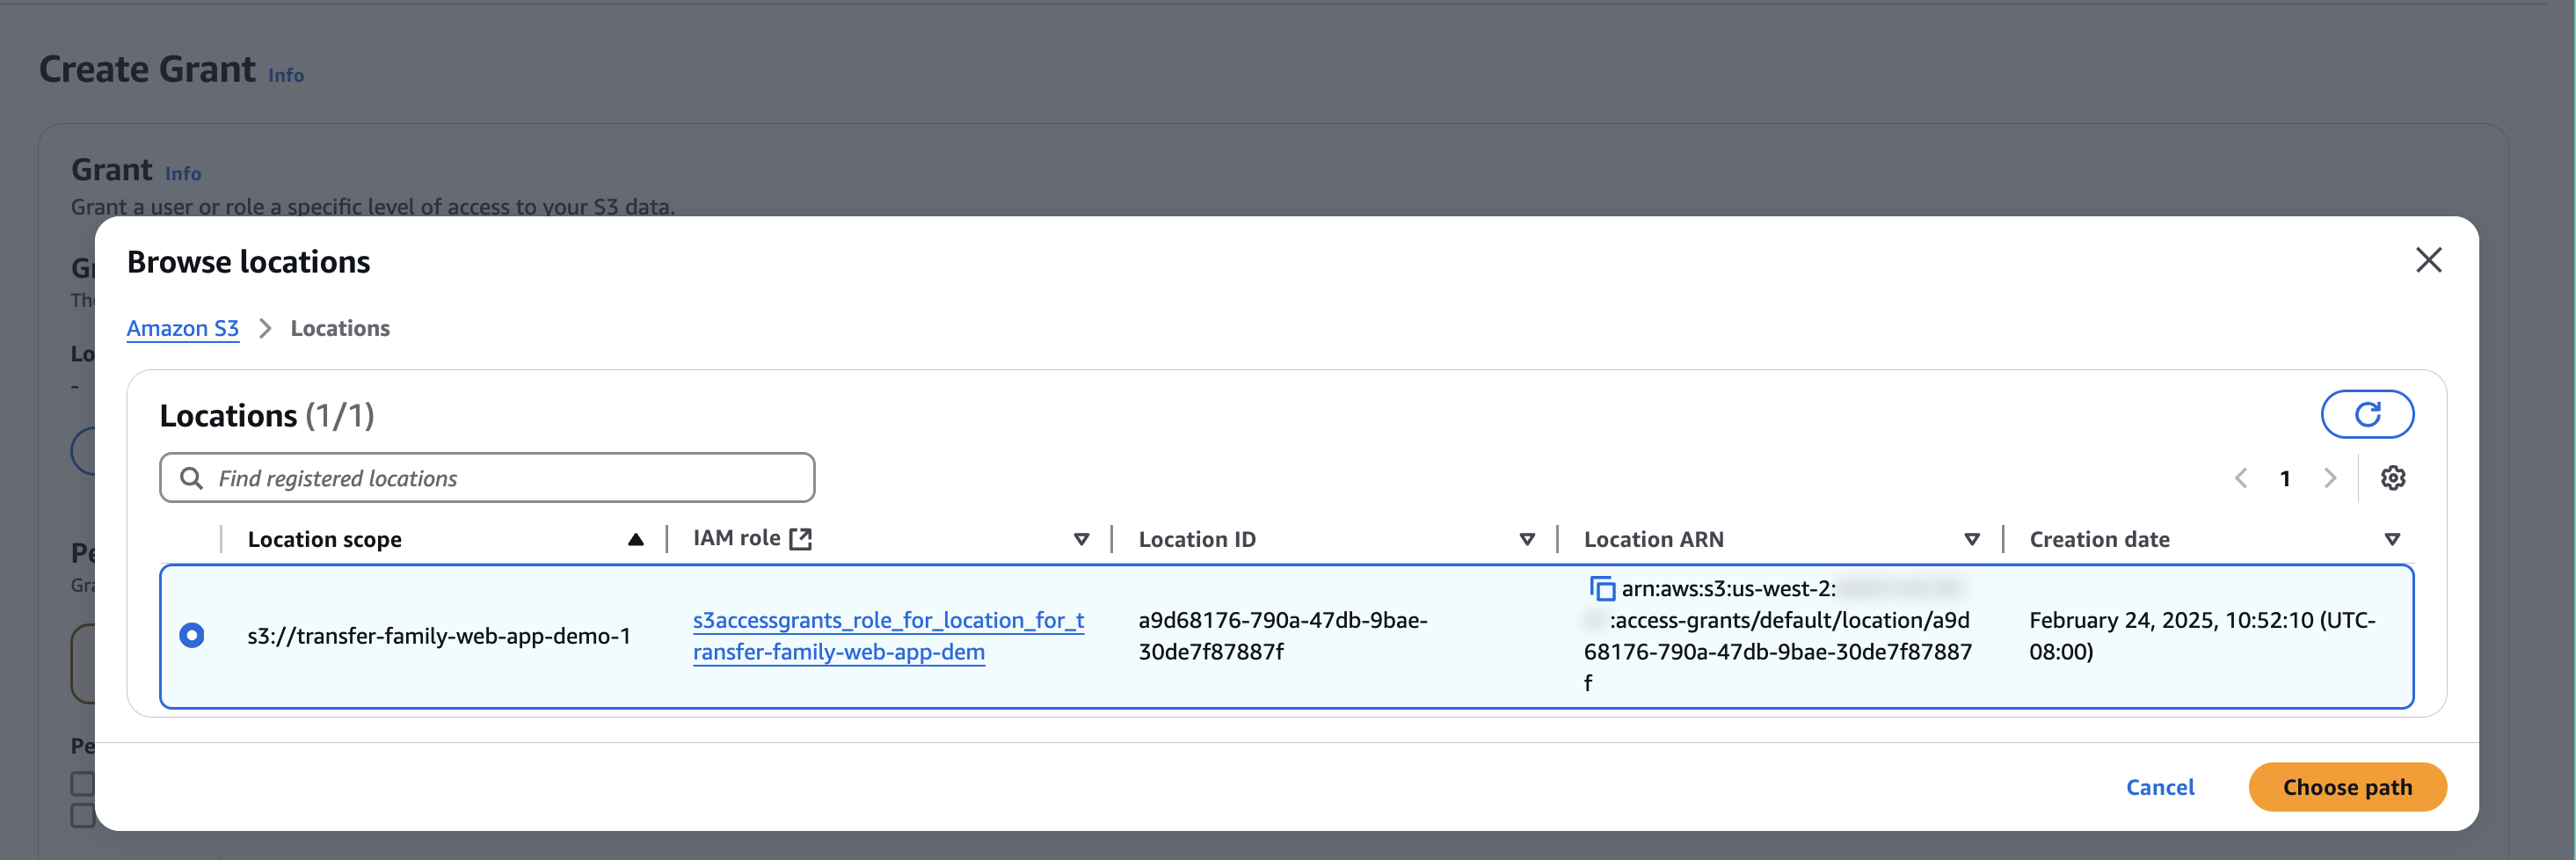
For Location, choose Browse locations, then choose the location that you registered in the Register a location section.
Then select Choose path.
3. Configure and create grant
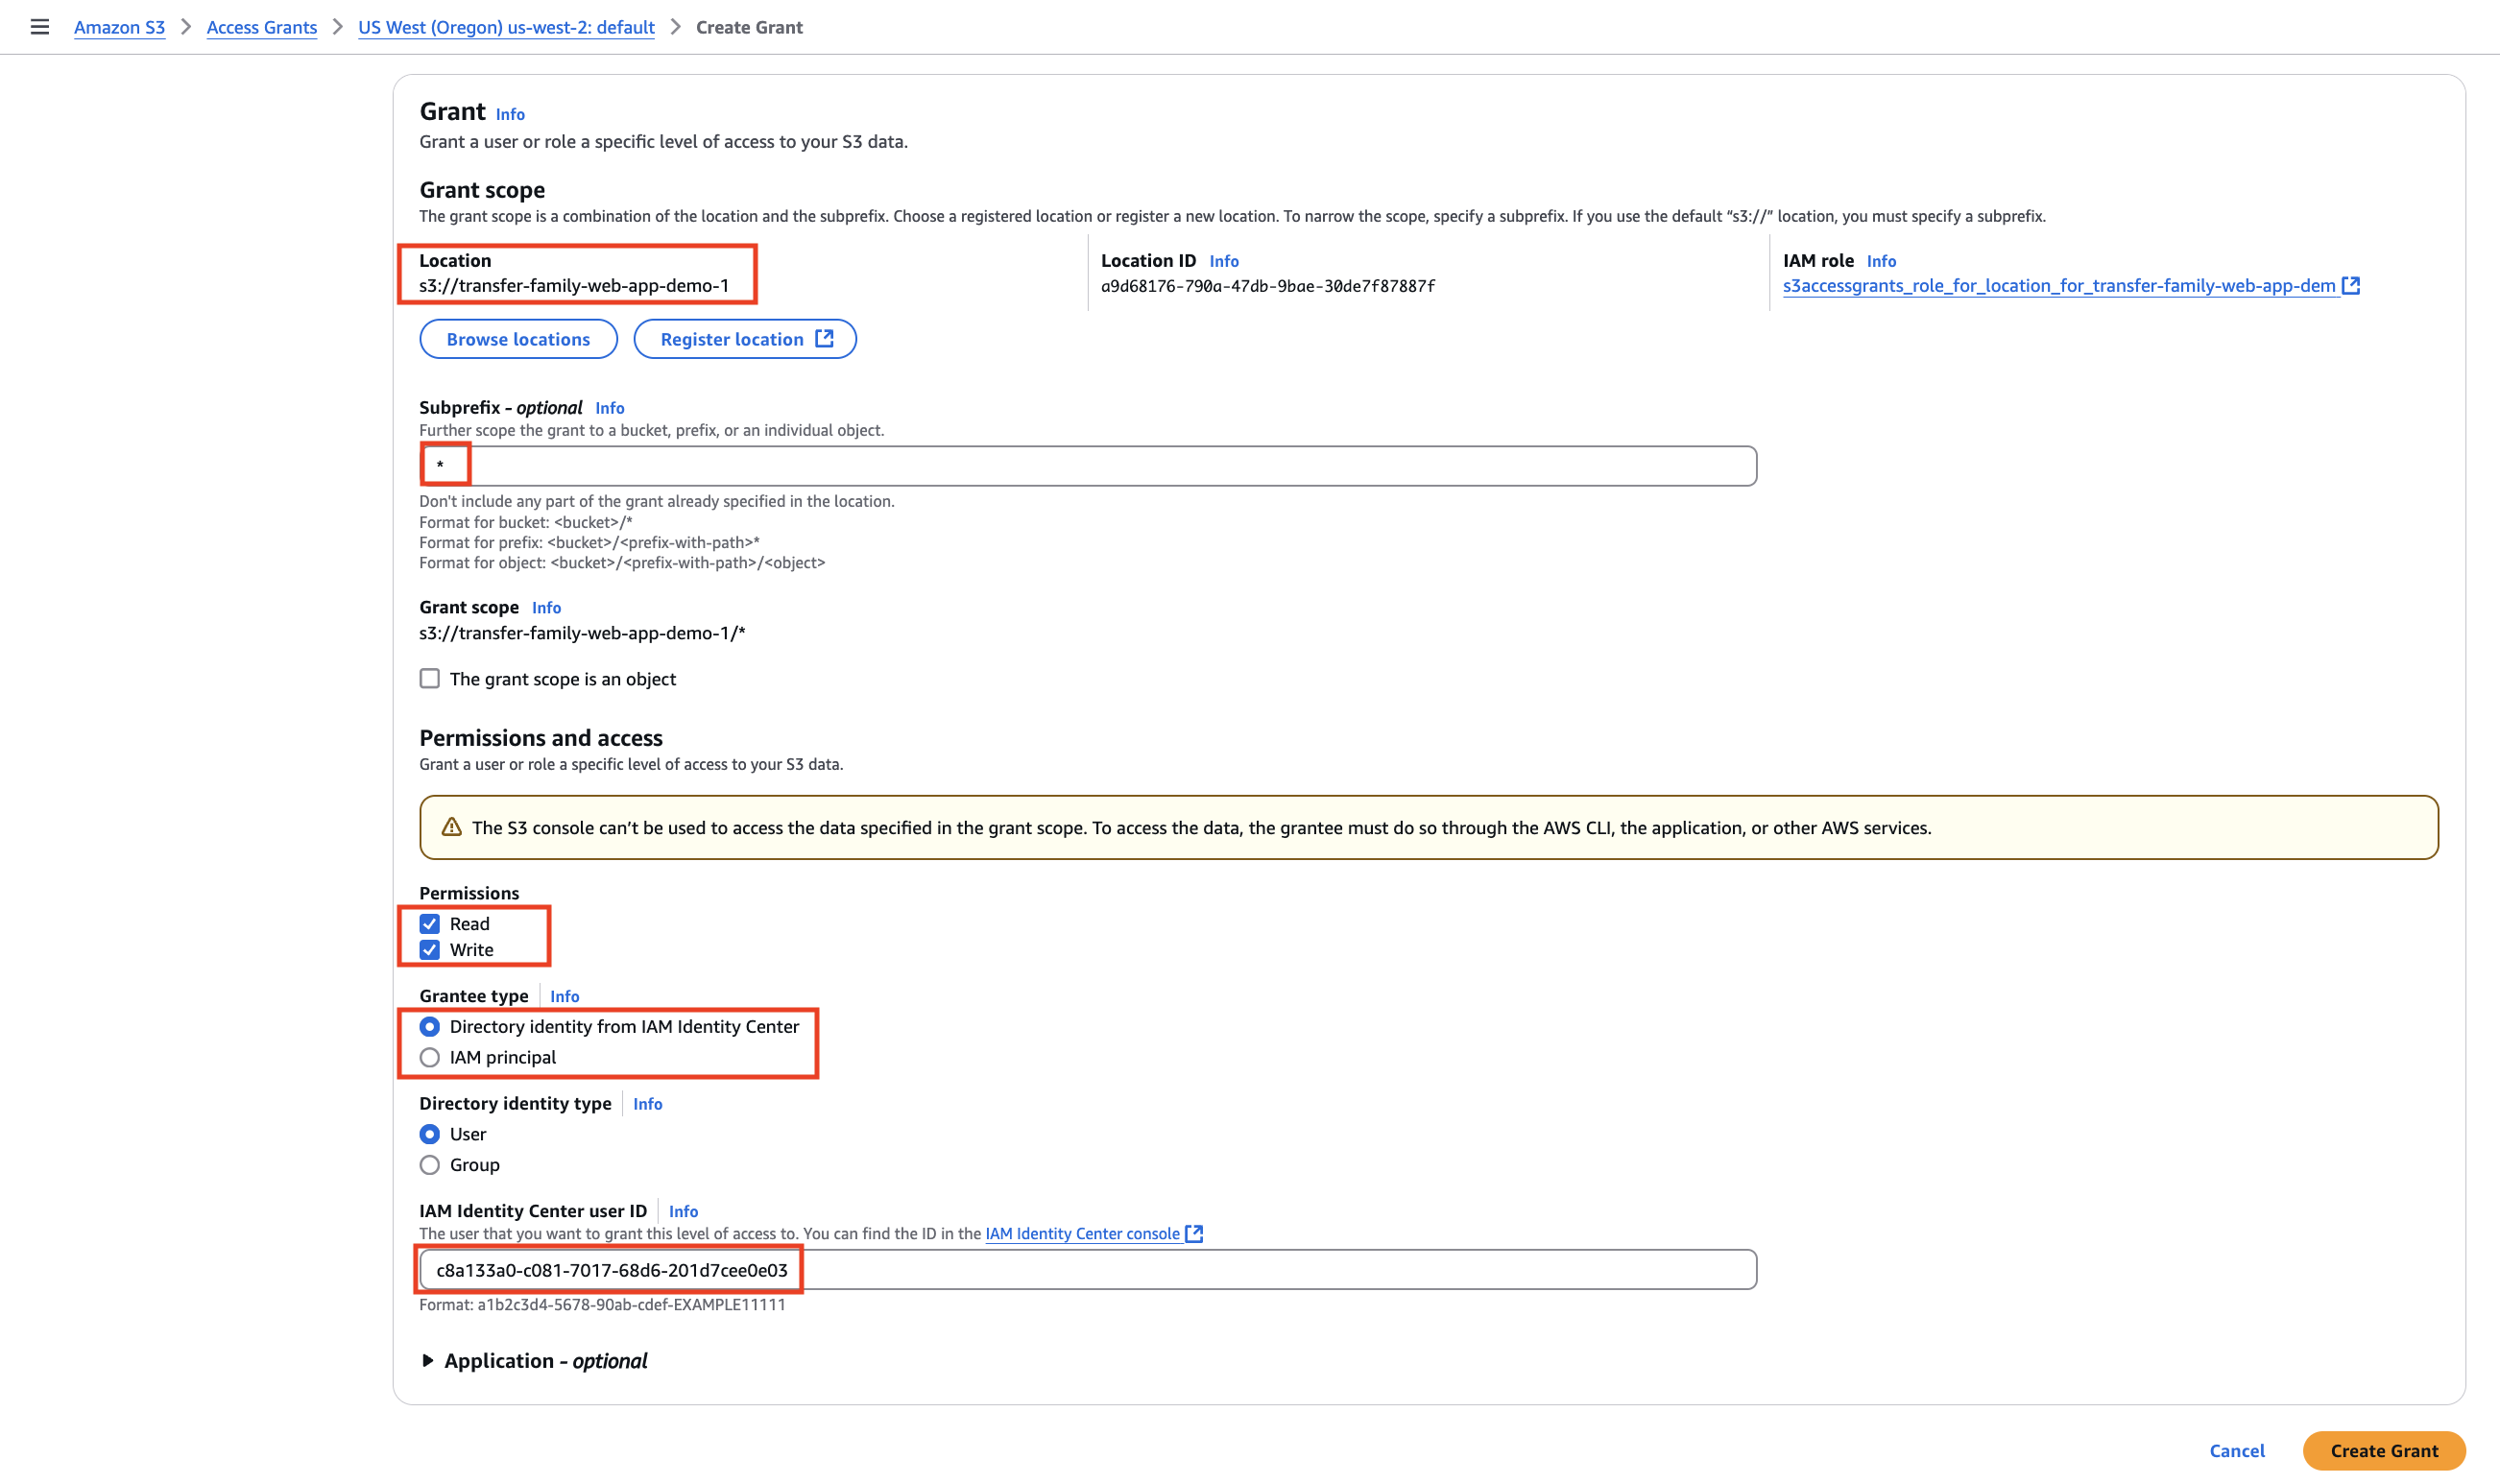
On the Path page, do the following:
For Subprefix, enter * to indicate that the access grant applies to the entire bucket.
For Permissions, select Read and Write.
For Grantee type, select Directory identity from IAM Identity Center.
For Directory identity type, select User.
For IAM Identity Center user ID, enter the user ID you copied in Task 1.
Choose Create Grant.
Conclusion
Task 4: Access your AWS Transfer Family web app
Task 4: Access your AWS Transfer Family web app
Did you find what you were looking for today?
Let us know so we can improve the quality of the content on our pages