Artificial Intelligence
Bringing your own custom container image to Amazon SageMaker Studio notebooks
June 2025: This post was reviewed and updated for accuracy.
Amazon SageMaker AI Studio is the first fully integrated development environment (IDE) for machine learning (ML). SageMaker AI Studio lets data scientists spin up JupyterLab Space where you can leverage JupyterLab application to explore data, build models, launch Amazon SageMaker AI training jobs, and deploy hosted endpoints. JupyterLab Space come with a set of pre-built images, which consist of the Amazon SageMaker Python SDK and the latest version of the IPython runtime or kernel. You can also bring your own custom images to Amazon SageMaker AI Studio. These images are then available to all users authenticated into the domain. In this post, we share how to bring a custom container image to JupyterLab Space in SageMaker AI Studio.
Developers and data scientists may require custom images for several different use cases:
- Access to specific or latest versions of popular ML frameworks such as TensorFlow, MxNet, PyTorch, or others.
- Bring custom code or algorithms developed locally to JupyterLab Space for rapid iteration and model training.
- Access to data lakes or on-premises data stores via APIs, and admins need to include the corresponding drivers within the image.
- Access to a backend runtime, also called kernel, other than IPython such as R, Julia, or others. You can also use the approach outlined in this post to install a custom kernel.
In large enterprises, ML platform administrators often need to ensure that any third-party packages and code is pre-approved by security teams for use, and not downloaded directly from the internet. A common workflow might be that the ML Platform team approves a set of packages and frameworks for use, builds a custom container using these packages, tests the container for vulnerabilities, and pushes the approved image in a private container registry such as Amazon Elastic Container Registry (Amazon ECR). Now, ML platform teams can directly attach approved images to the Studio domain (see the following workflow diagram). You can simply select the approved custom image of your choice in Studio. You can then work with the custom image locally in your Studio JupyterLab Space. With this release, a single Studio domain can contain several custom images, with the option to add a new version or delete images as needed.

We now walk through how you can bring a custom container image to SageMaker AI Studio JupyterLab using this feature. Although we demonstrate the default approach over the internet, if you’re using SageMaker AI Studio to build your Docker image and wish to use your private VPC to securely bring your custom container, you can configure VPC endpoints for the services you will be interacting with. For more information, refer to Connect to Amazon services using AWS PrivateLink in Amazon SageMaker blog post.
Prerequisites
Before getting started, you need to make sure you meet the following prerequisites:
- Have an AWS account.
- To build the container image, you can either use a local Docker client or create the image from SageMaker AI Studio directly. We will use local Docker client to build the container image used in this blog. To see how you can build your container image using SageMaker AI Studio, see Using the Amazon SageMaker Studio Image Build CLI to build container images from your Studio notebooks.
- Install the AWS Command Line Interface (AWS CLI) on your local machine. For instructions, see Installing the AWS.
- Have a SageMaker AI Studio domain. To create a domain, see Use quick setup for Amazon SageMaker AI.
- Have an Amazon Elastic Container Registry (Amazon ECR) private repository. To create it, see Creating an Amazon ECR private repository to store images.
Creating your Dockerfile
To demonstrate the common need from data scientists to experiment with the newest frameworks, we use the following Dockerfile, which uses the TensorFlow 2.19.0 version as the base image. You can replace this Dockerfile with a Dockerfile of your choice. Currently, SageMaker AI Studio supports a number of base images, such as Ubuntu, Amazon Linux 2023, and others. The Dockerfile installs the IPython runtime required to run Jupyter notebooks, and installs the Amazon SageMaker Python SDK and boto3.
In addition to notebooks, data scientists and ML engineers often iterate and experiment on their local laptops using various popular IDEs such as Visual Studio Code or PyCharm. You may wish to bring these scripts to the cloud for scalable training or data processing. You can include these scripts as part of your Docker container so they’re visible in your local storage in SageMaker AI Studio. In the following Dockerfile, we copy the train.py script, which is a base script for training a simple deep learning model on the MNIST dataset. You may replace this script with your own scripts or packages containing your code.
The below code is the train.py script:
Instead of a custom script, you can also include other files, such as Python files that access client secrets and environment variables via AWS Secrets Manager or AWS Systems Manager Parameter Store, config files to enable connections with private PyPi repositories, or other package management tools.
Pushing your custom container image to ECR
To push your custom image, complete the following steps:
- On the Amazon ECR console go to the repository that you have created.
- On the Private Registry, select View push commands.
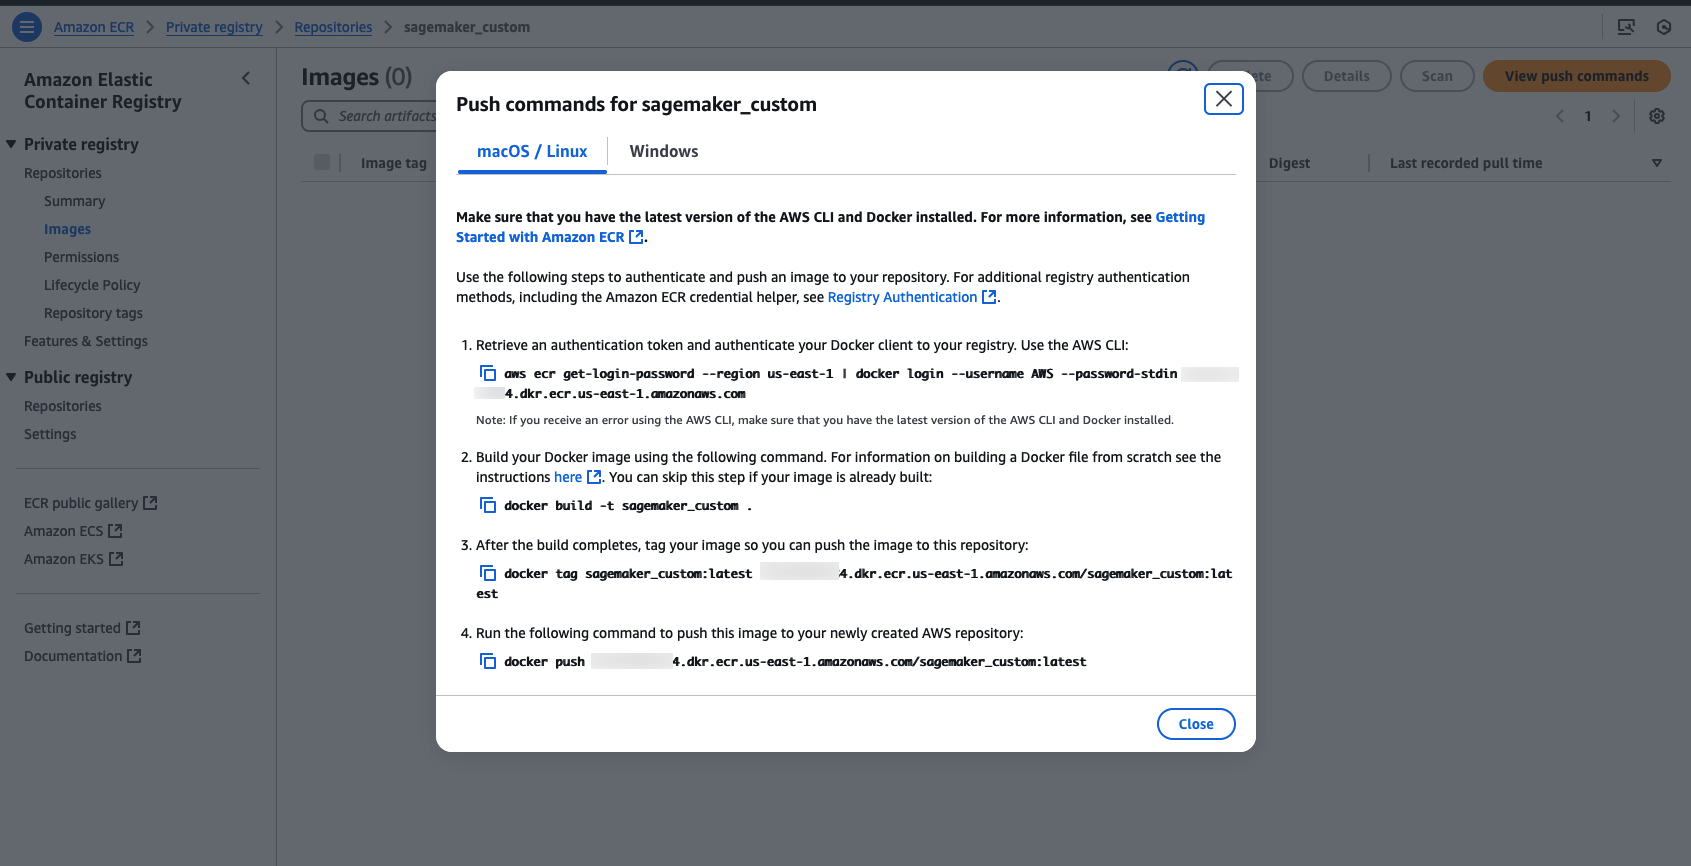
- Run these commands in the folder containing your docker file to build and push the image with the latest tag.
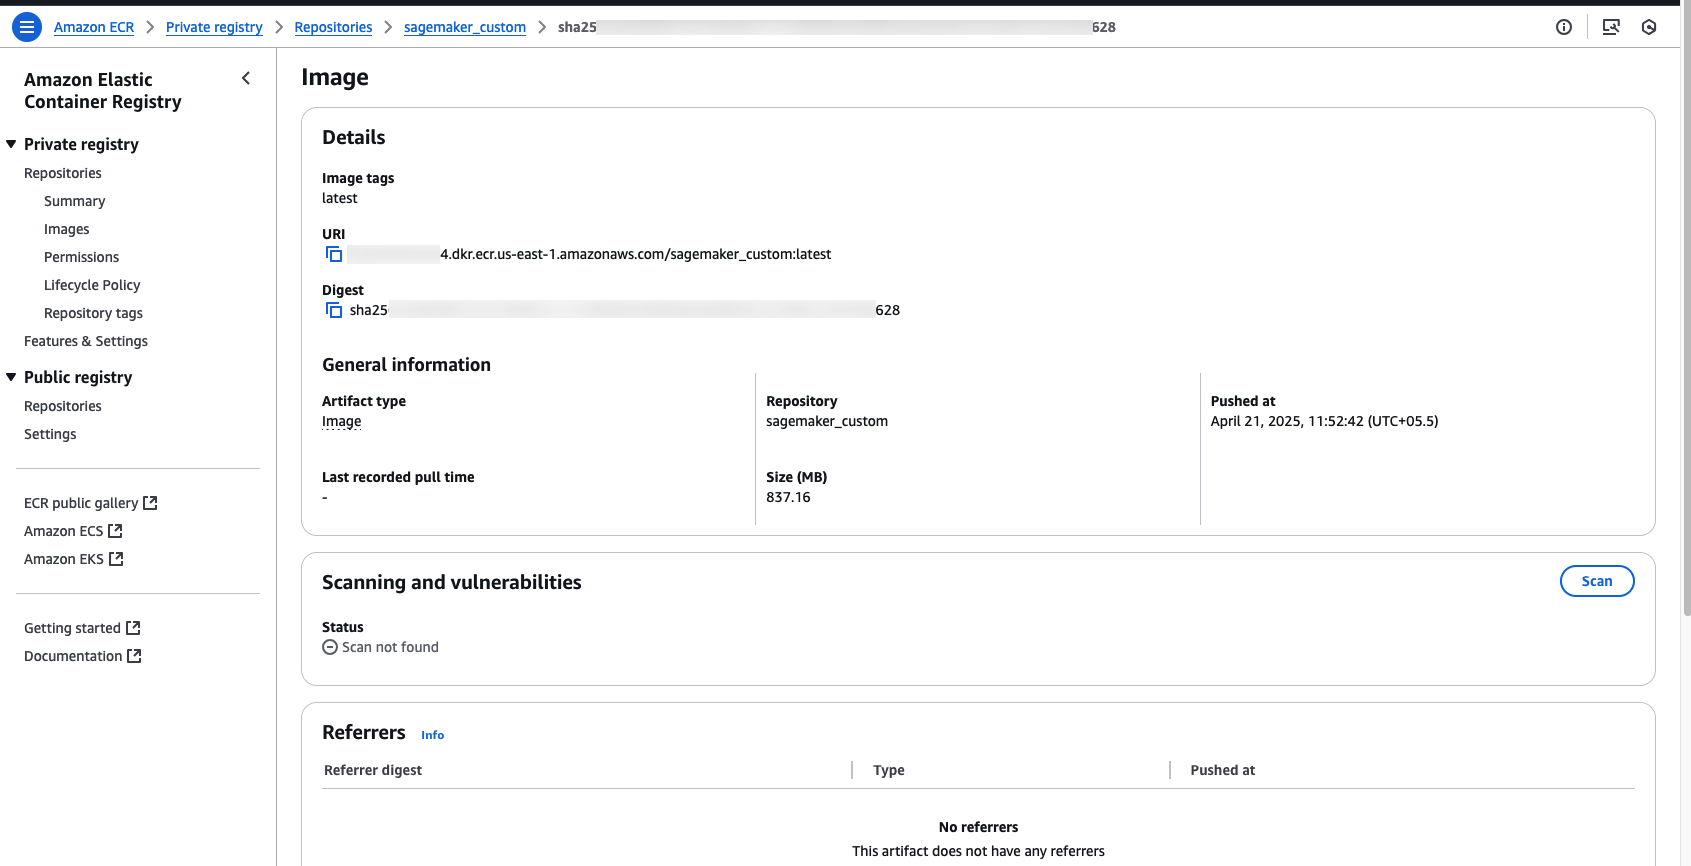
- Note down the image URI.
Attaching images using the Studio UI
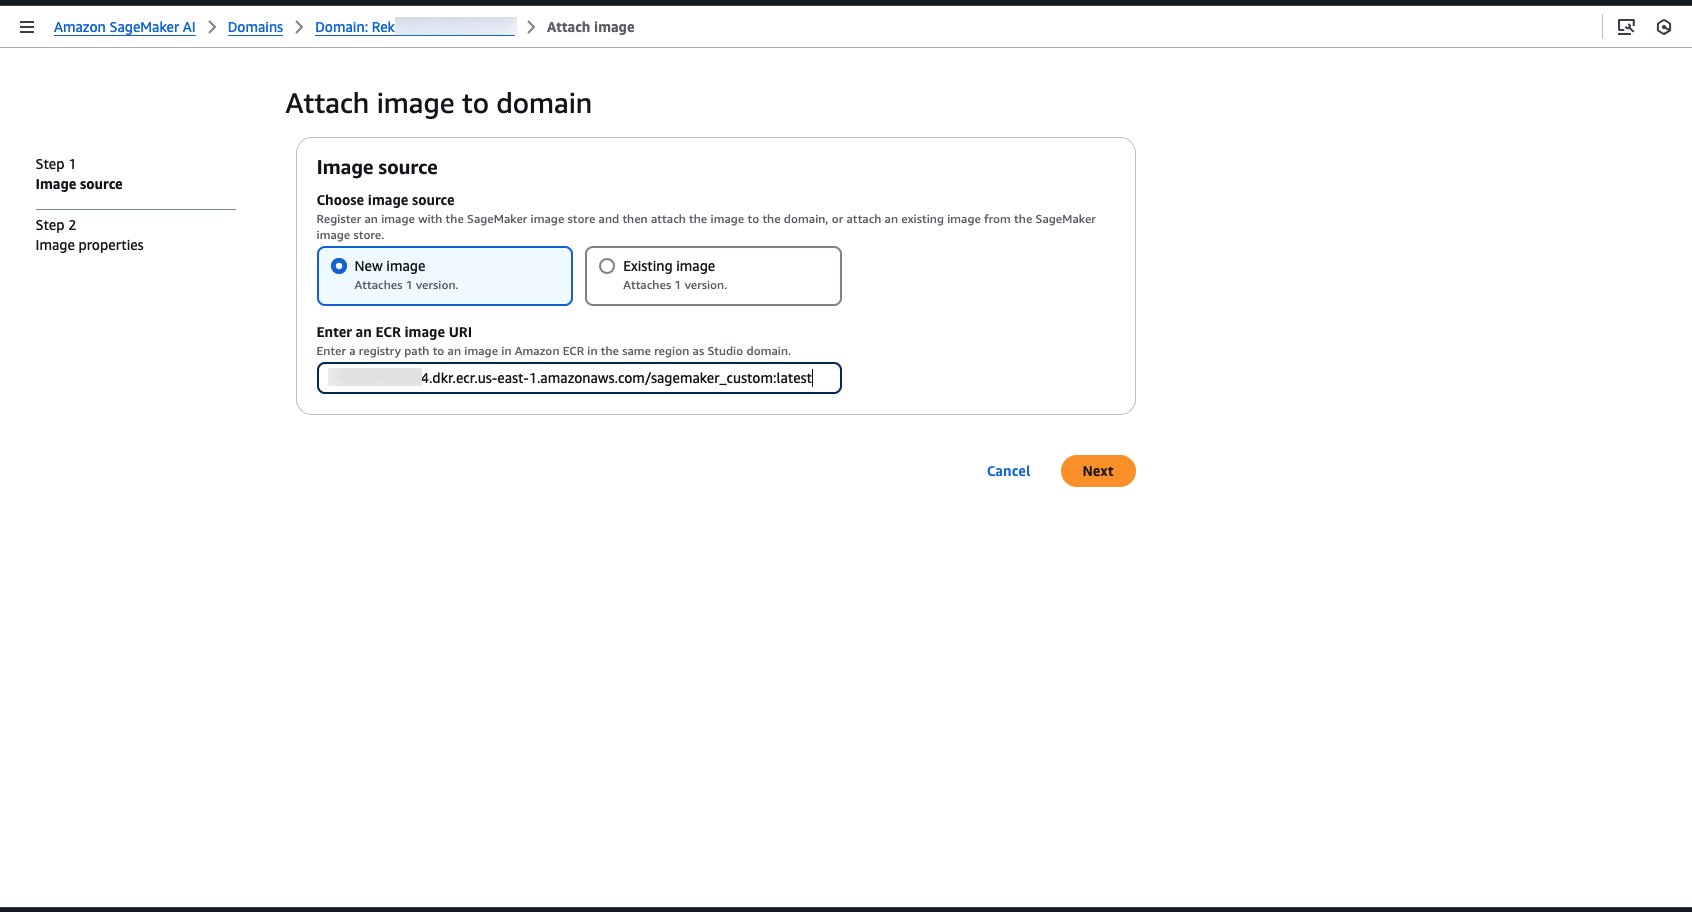
You can attach the custom image to the Studio domain from the console by following the steps below:
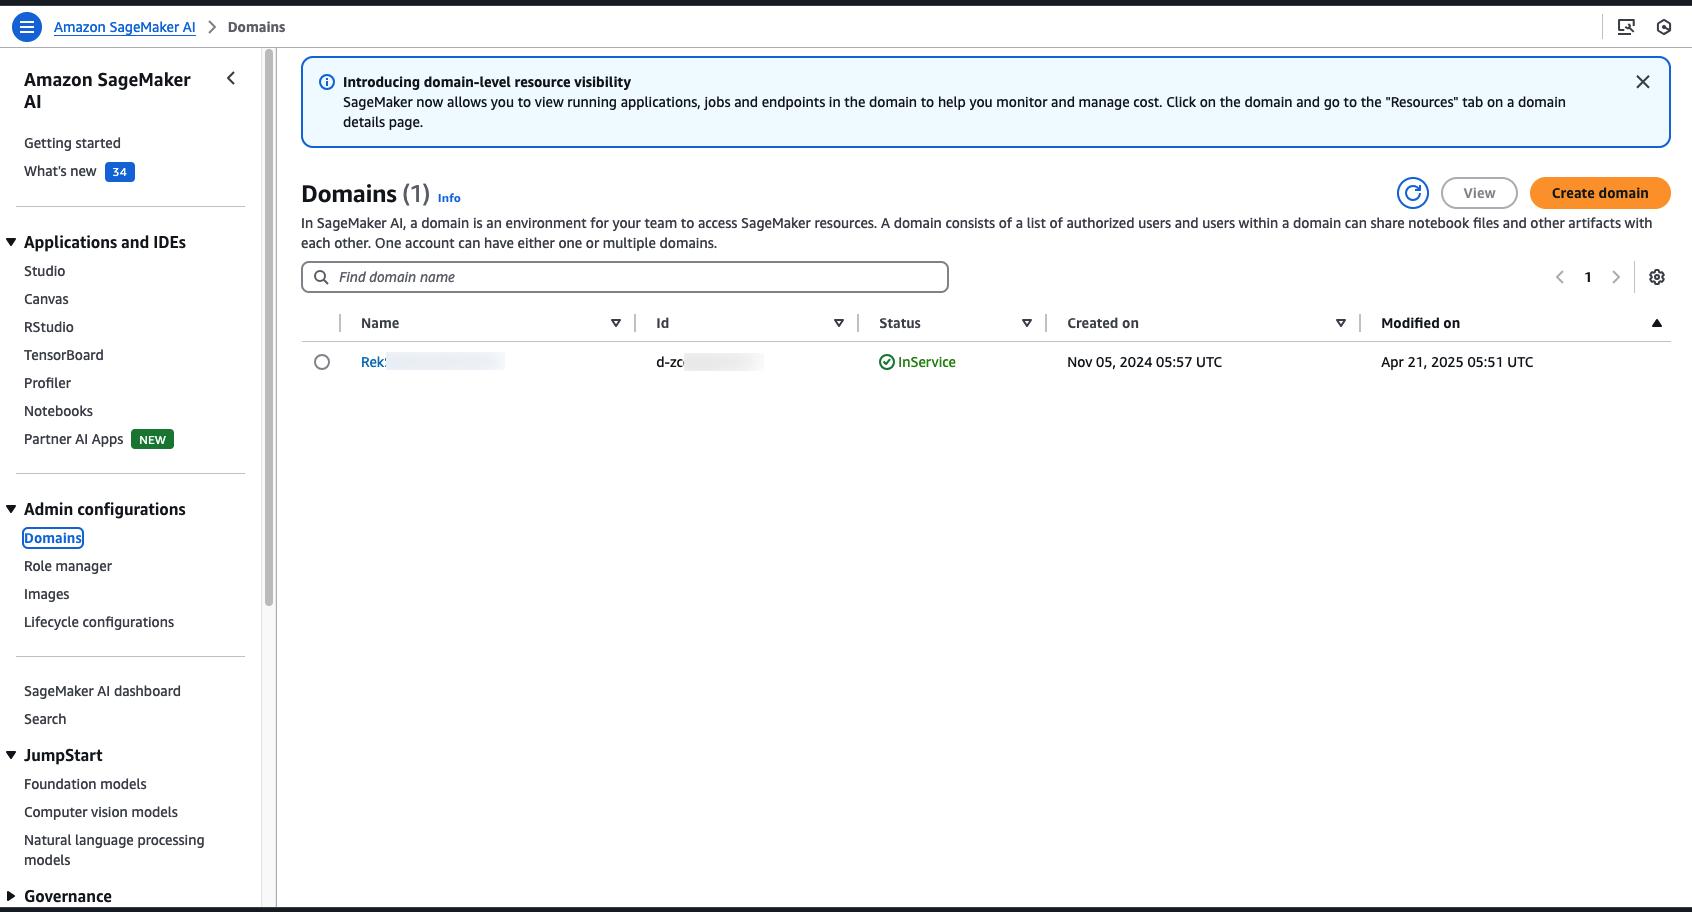
- On the Amazon SageMaker AI console, choose Domain and open the domain that you created.
- On the Domain page, go to Environment tab.
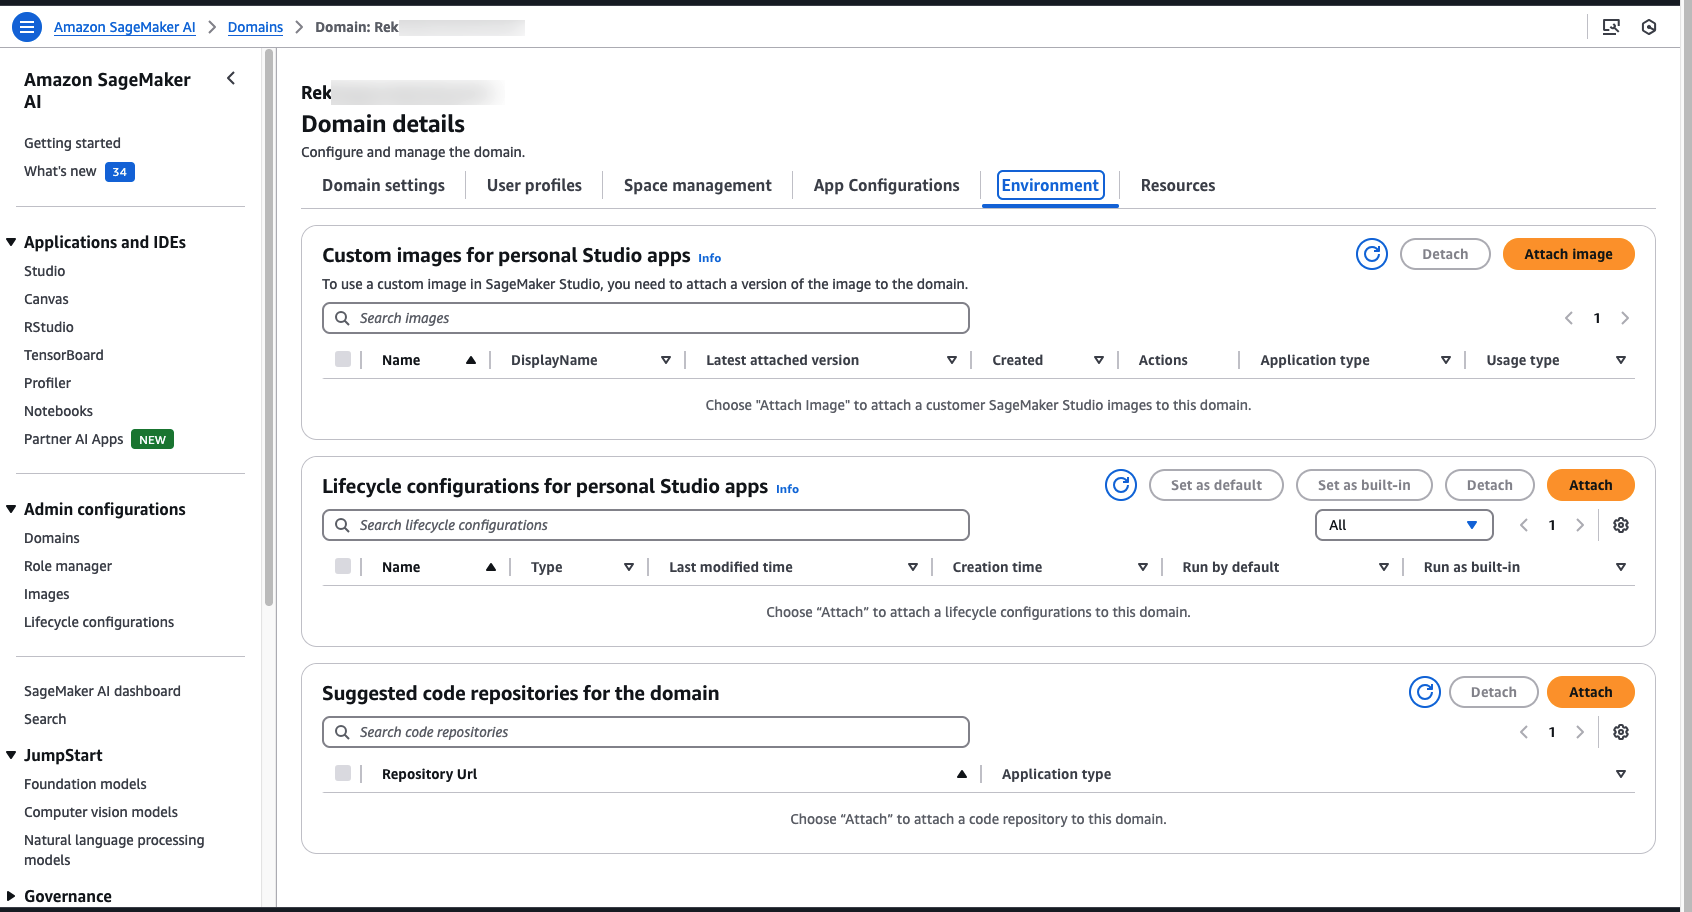
- Select Attach Image.
- Enter the ECR image URI and choose Next.
- Enter Image name, Image display name, and Description.
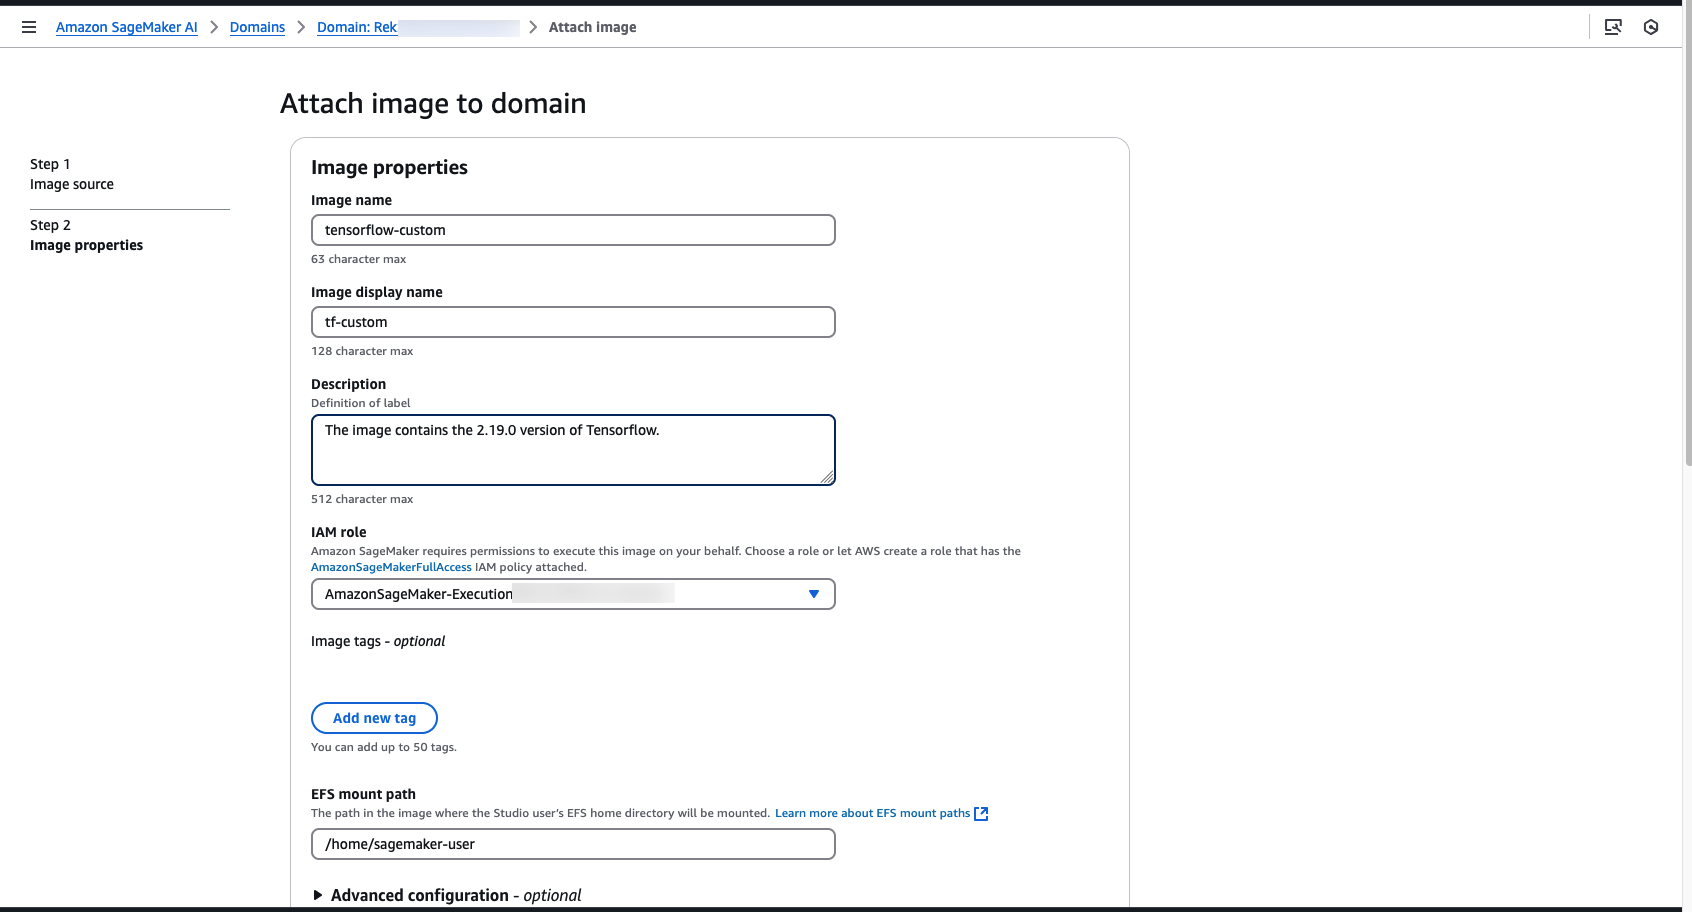
- Select Image type as JupyterLab image.
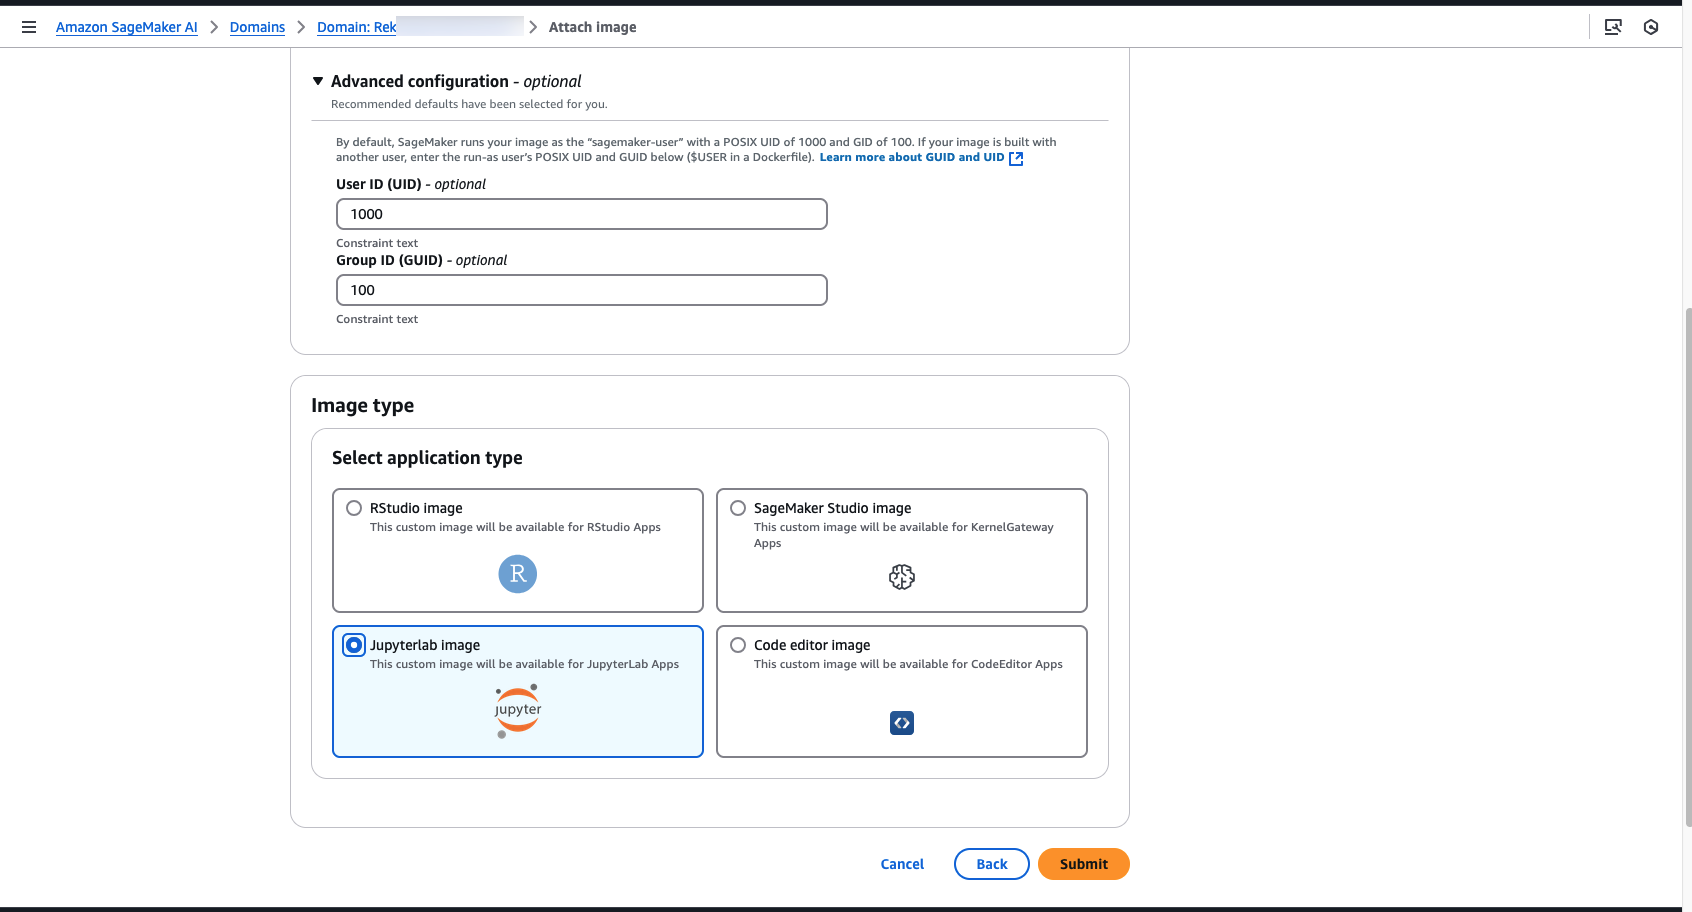
- Keep other options as default and choose Submit
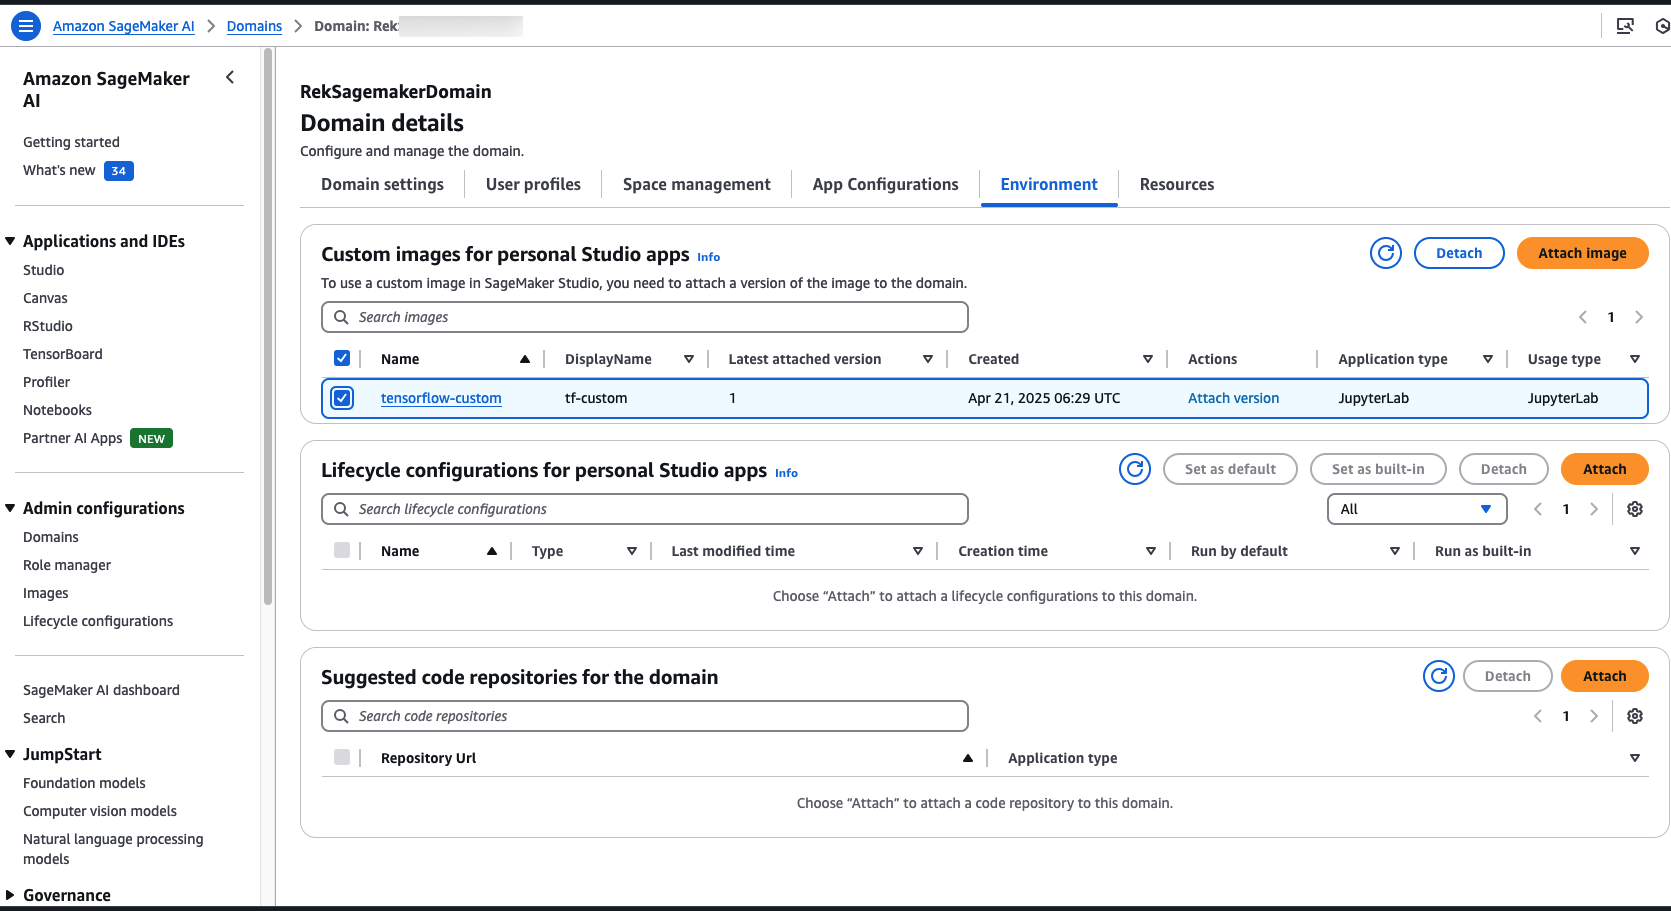
The green check box indicates that the image has been successfully attached to the domain.
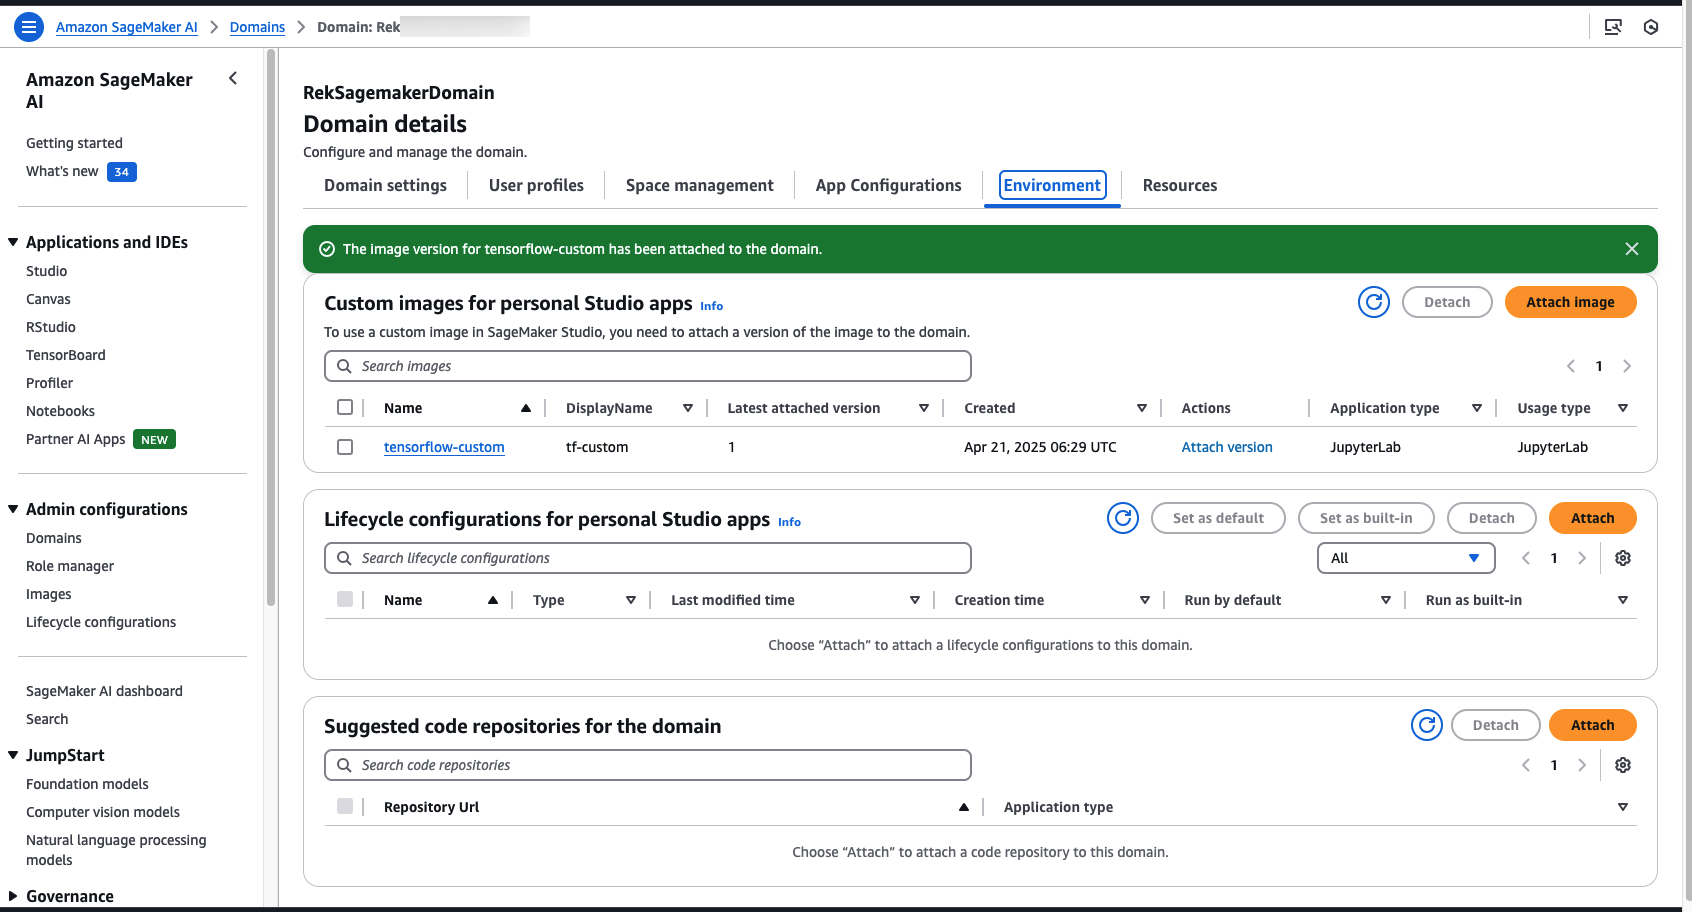
The Amazon SageMaker AI image store automatically versions your images. You can select a pre-attached image and choose Detach to detach the image and all versions, or choose Attach image to attach a new version. For more information, visit Attach a custom SageMaker image.
User experience with a custom image
Let’s now jump into the user experience for a Studio user.
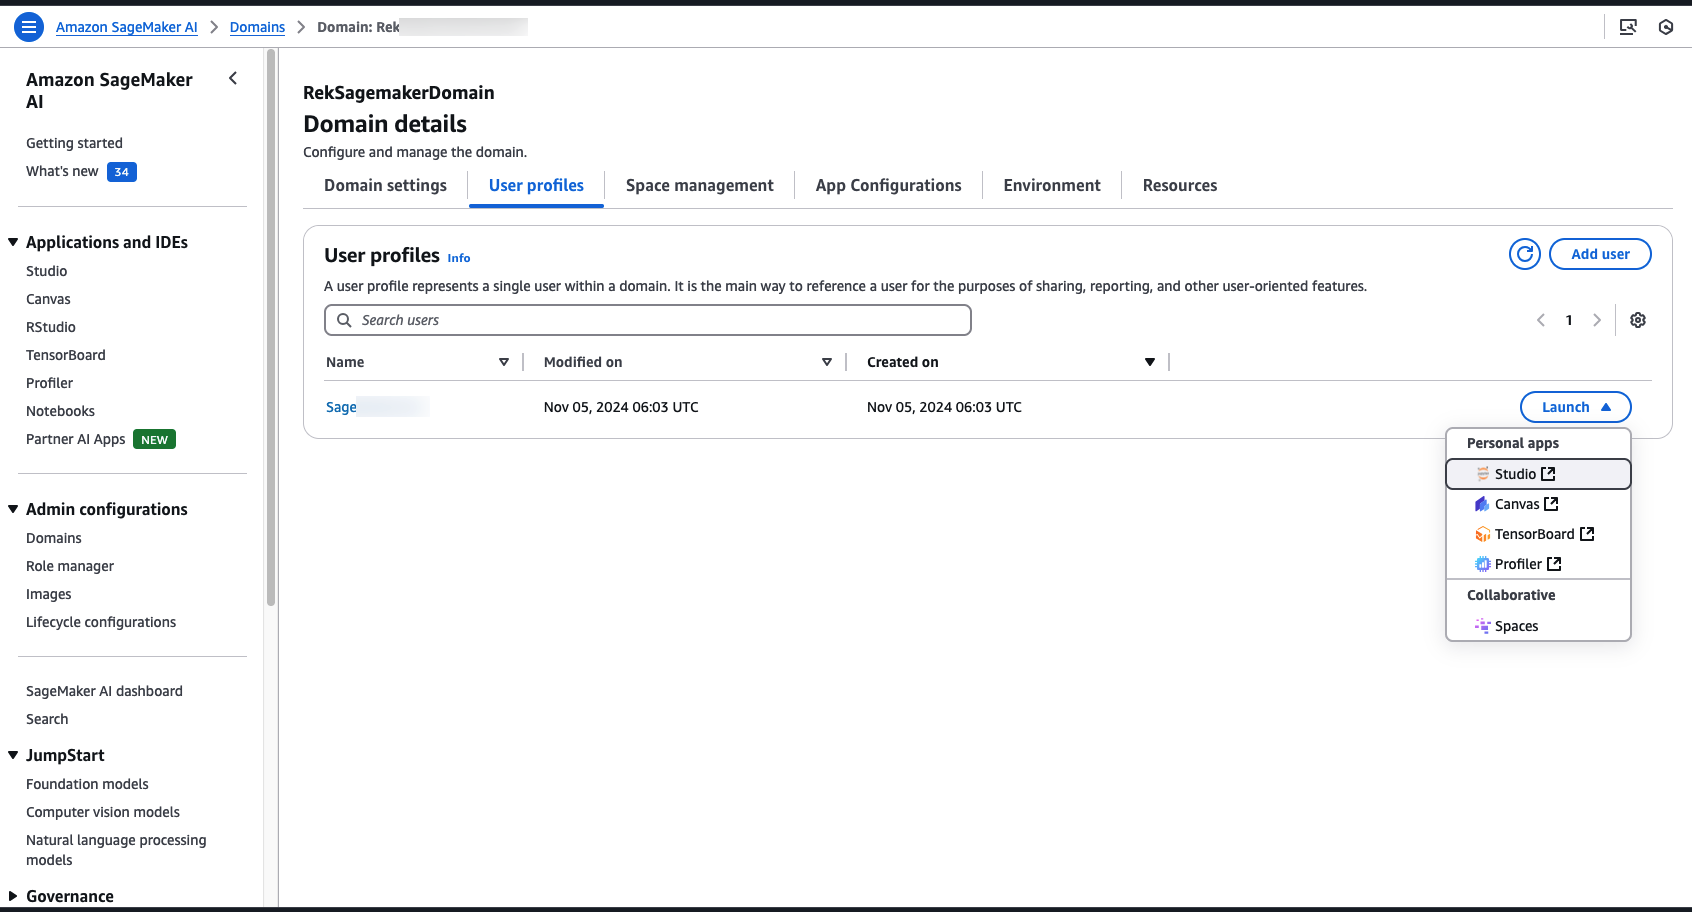
- On the Amazon SageMaker AI console, choose Domain and open the domain that you created.
- On the Domain page, go to User Profiles tab.
- Choose Launch and open Studio.
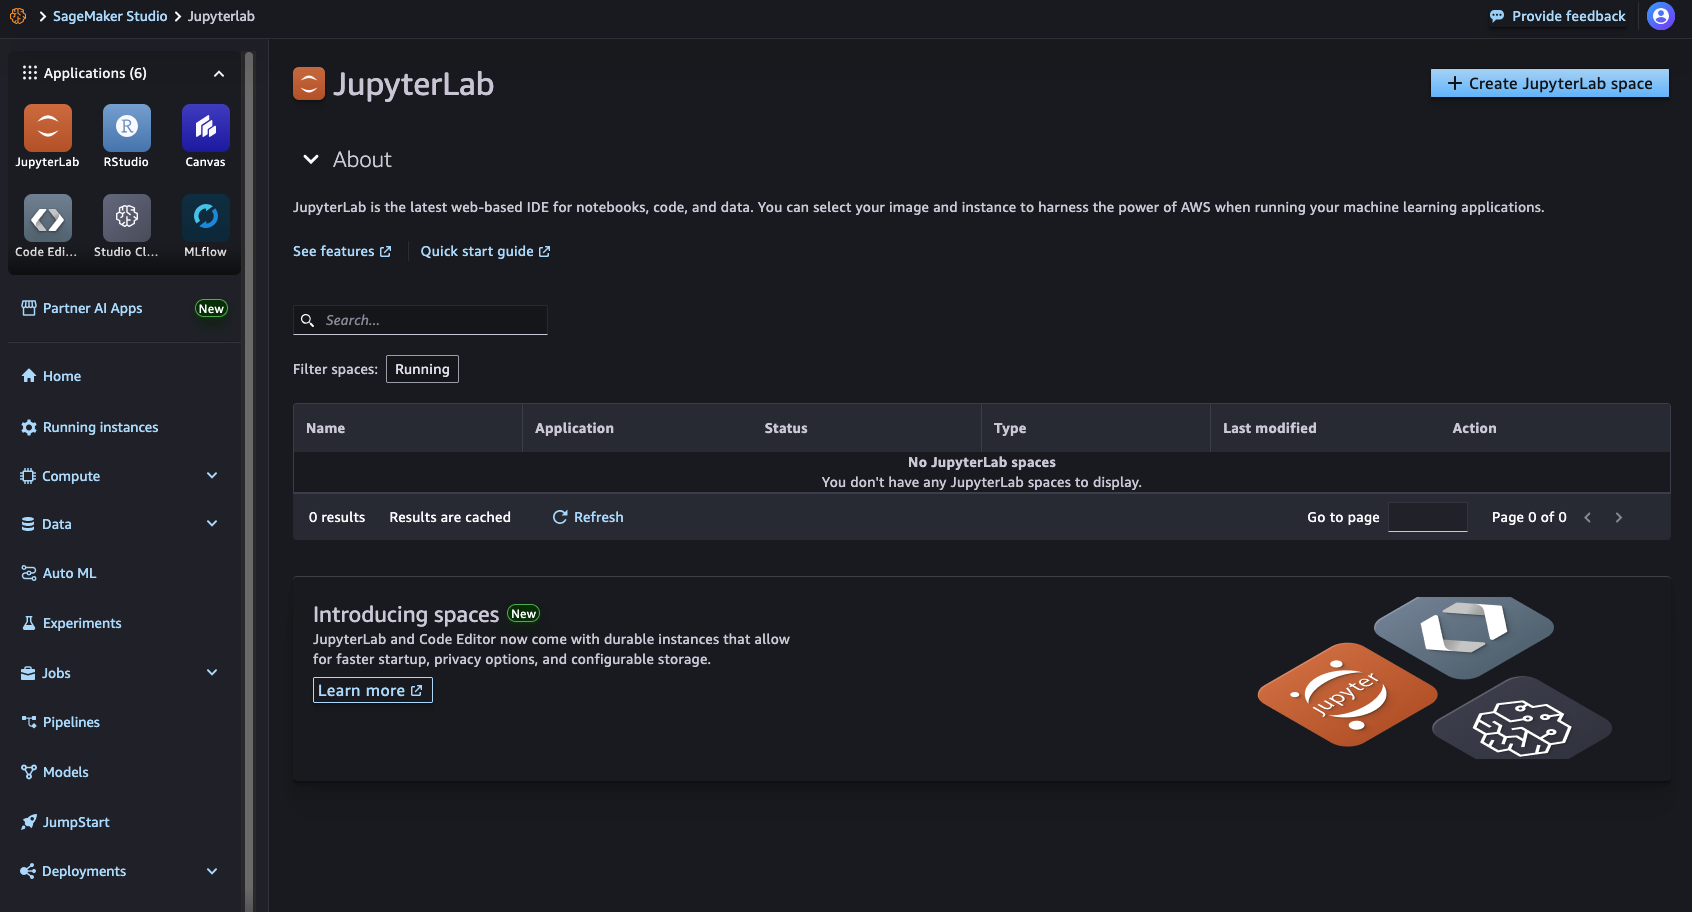
- Select JupyterLab, and click on Create JupyterLab space.
- Enter the Name, and choose Create Space.
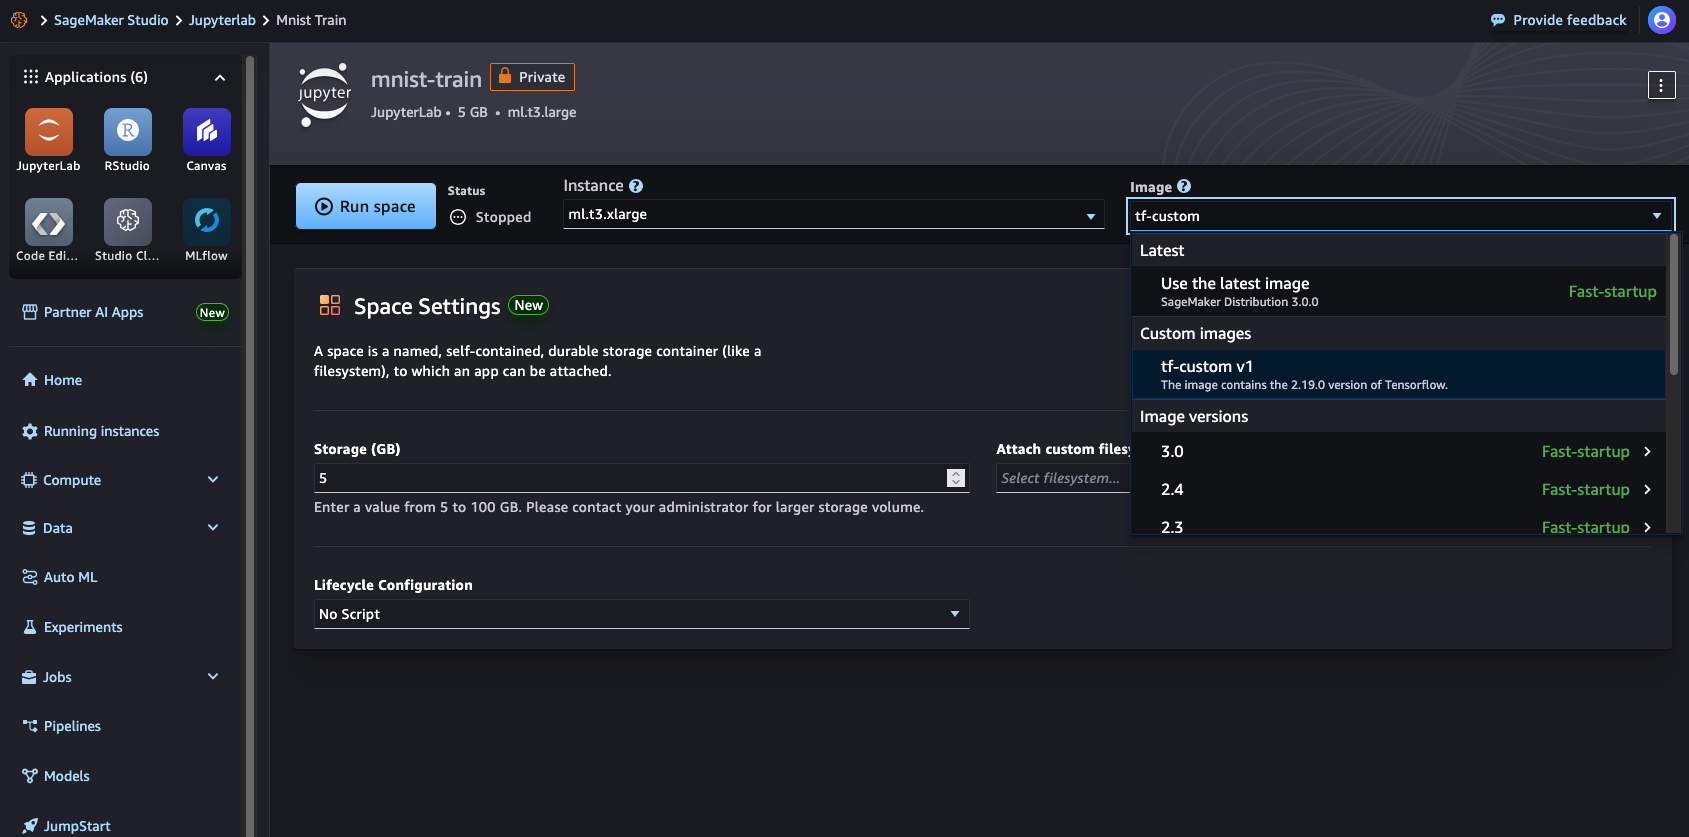
- For Instance, select
ml.t3.xlarge. - For Image, select your image from Custom images that you have added to the domain.
- For Instance, select
- Choose Run space.
The JupyterLab Space takes a couple minutes to spin up and you’re ready to go! If you get any error with building the image, please see some of the common issues here.
Testing your custom container in the notebook
When the JupyterLab Space is up and running, you can create and run the code in a notebook. First, let’s test that the correct version of TensorFlow that was specified in the Dockerfile is available for use.

Amazon SageMaker AI notebooks also display the local CPU and memory usage.
Next, let’s try out the custom training script directly in the notebook. Copy the training script into a notebook cell and run it. The script downloads the mnist dataset from the tf.keras.datasets utility, splits the data into training and test sets, defines a custom deep neural network algorithm, trains the algorithm on the training data, and tests the algorithm on the test dataset.
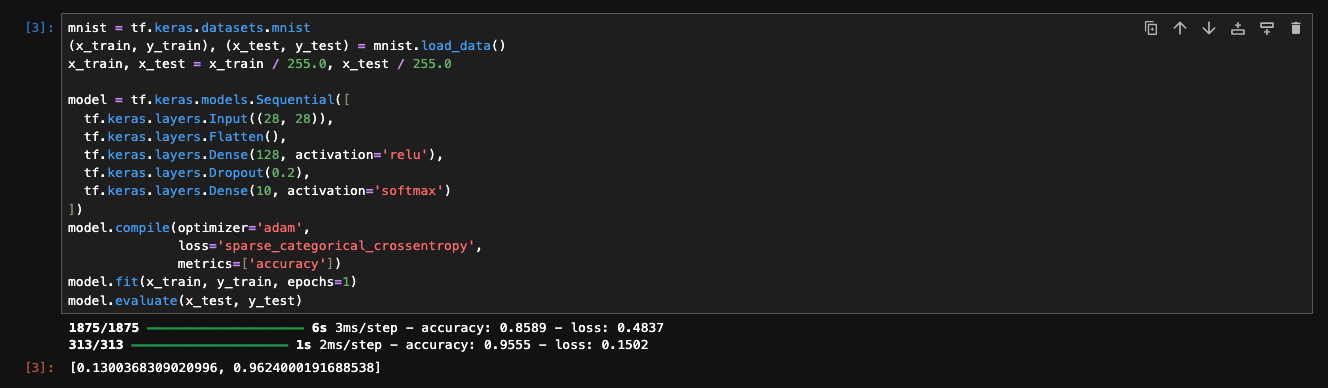
Amazon SageMaker AI also dynamically modifies the CPU and memory usage as the code runs. By bringing your custom container and training scripts, this feature allows you to experiment with custom training scripts and algorithms directly in the Amazon SageMaker AI notebook. When you’re satisfied with the experimentation in the Studio JupyterLab Space notebook, you can start a training job.
What about the Python files or custom files you included with the Dockerfile using the COPY command? SageMaker AI Studio mounts the elastic file system in the file path which we earlier provided while attaching the image which is /home/sagemaker-user. To avoid Studio from overwriting any custom files you want to include, the COPY command loads the train.py file in the path /home. To access this file, open a terminal or notebook and run the code:
You should see an output as shown in the screenshot below.
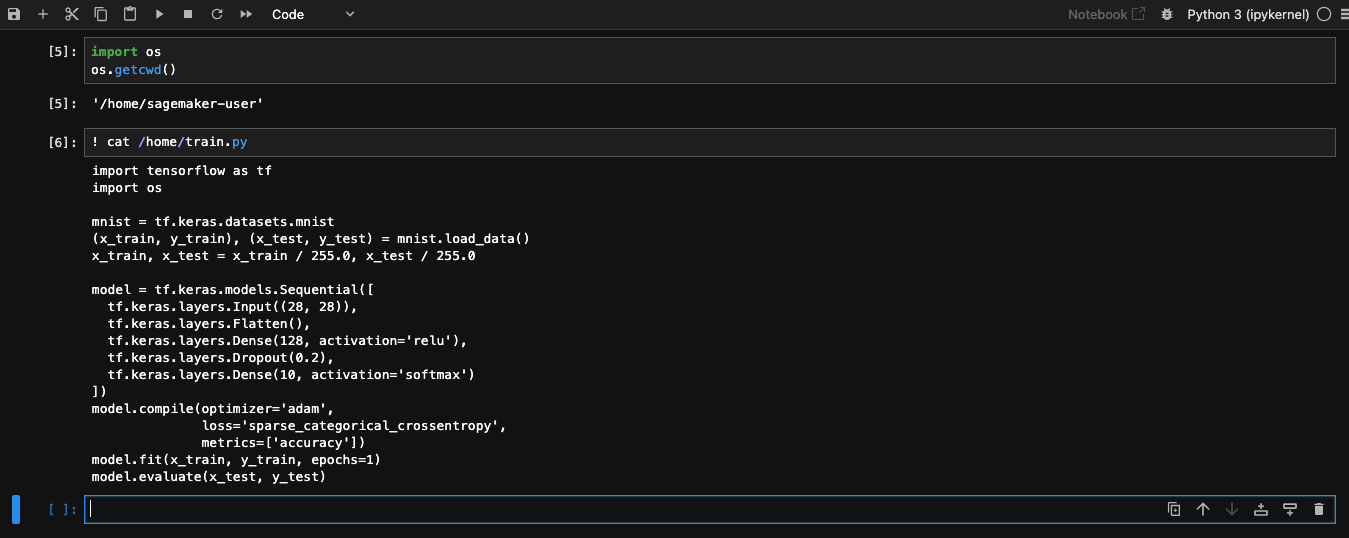
The train.py file is in the specified location.
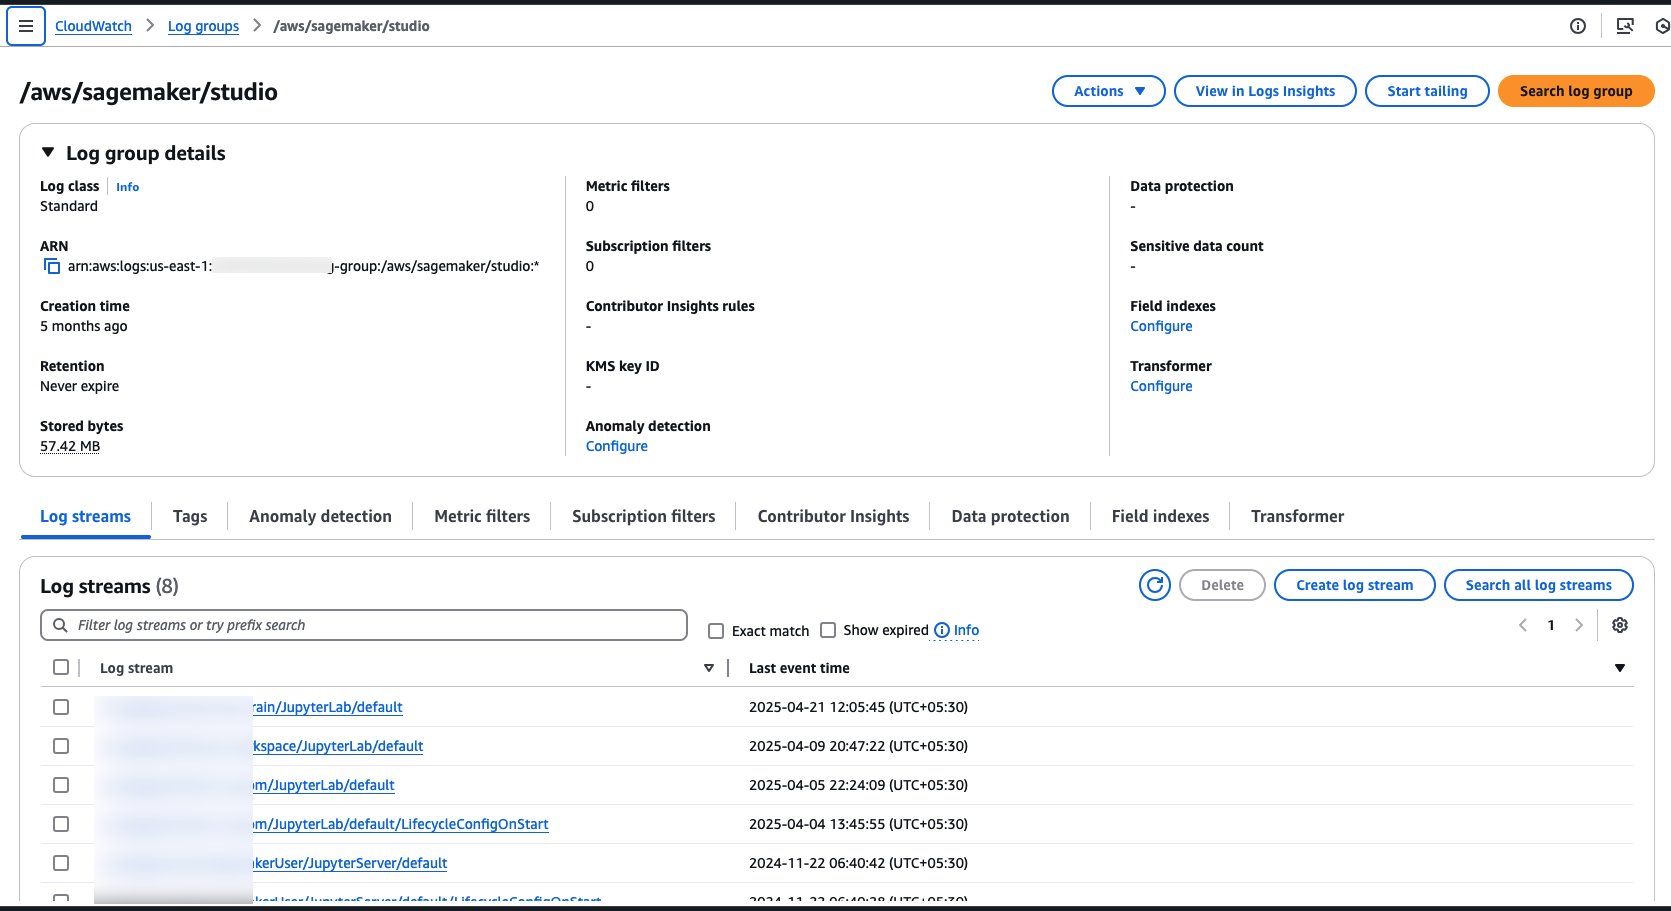
Logging in to CloudWatch
SageMaker AI Studio also publishes kernel metrics to Amazon CloudWatch, which you can use for troubleshooting. The metrics are captured under the /aws/sagemaker/studio namespace.
To access the logs, on the CloudWatch console, choose CloudWatch Logs. On the Log groups page, enter the namespace to see logs associated with the JupyterLab server and the kernel gateway.
Detaching an image or version
You can detach an image or an image version from the domain if it’s no longer supported.
To detach an image and all versions, select the image from the Custom images attached to domain table and choose Detach.
You have the option to also delete the image and all versions, which doesn’t affect the image in Amazon ECR.
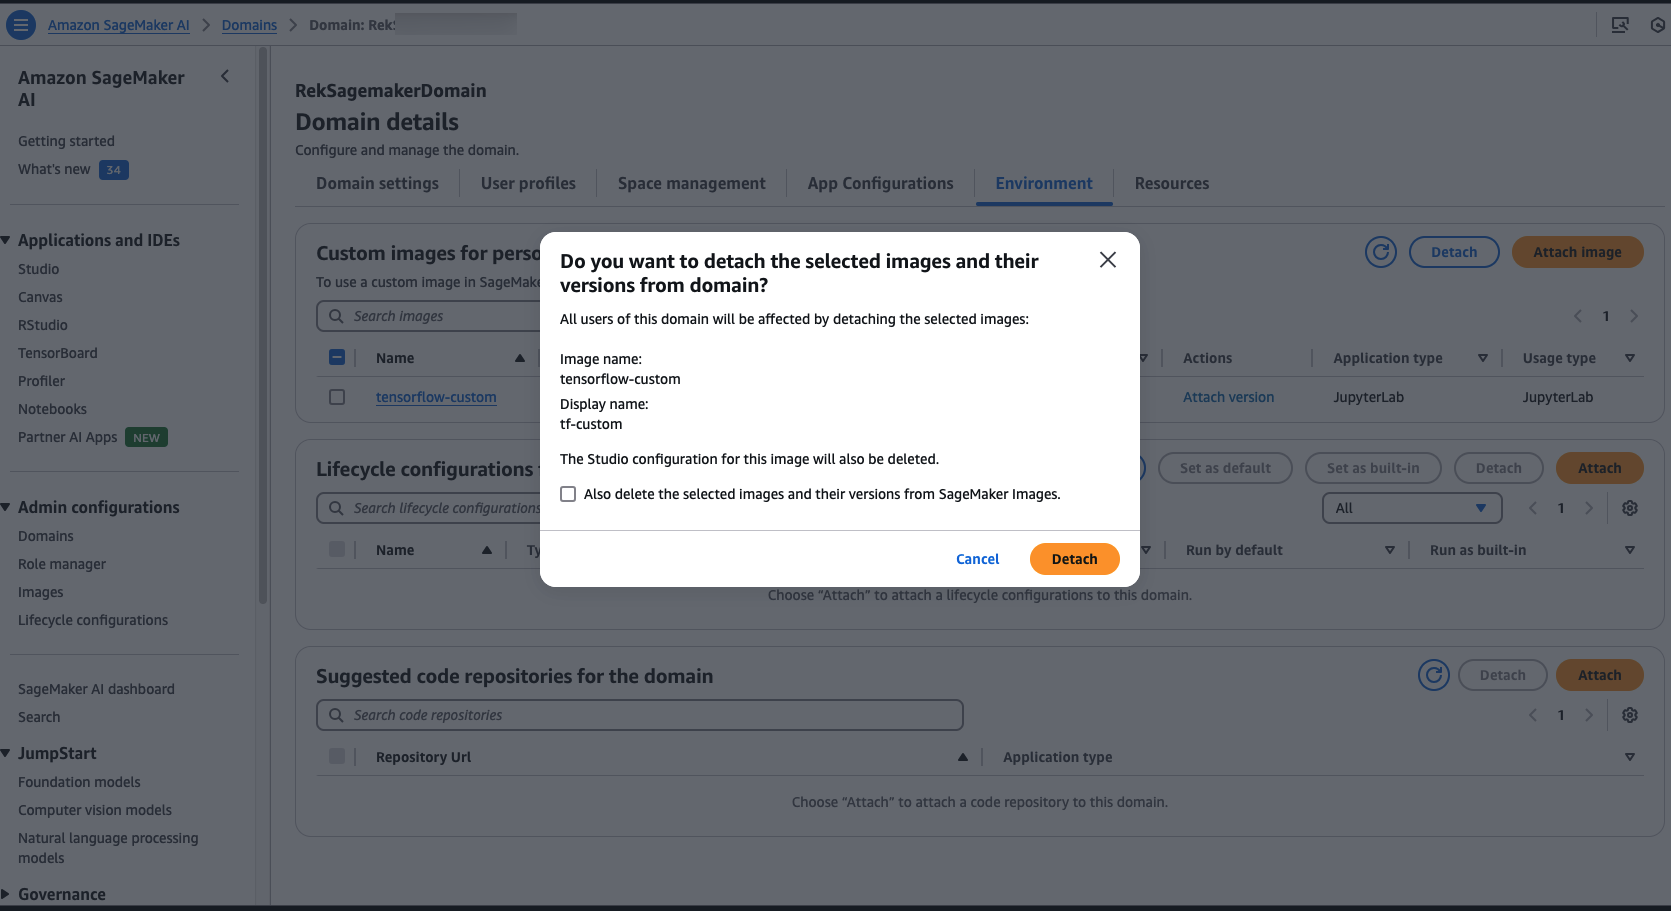
To detach an image version, choose the image. On the Image details page, select the image version (or multiple versions) from the Image versions attached to domain table and choose Detach. You see a similar warning and options as in the preceding flow.
Conclusion
SageMaker AI Studio enables you to collaborate, experiment, train, and deploy ML models in a streamlined manner. To do so, data scientists often require access to the newest ML frameworks, custom scripts, and packages from public and private code repositories and package management tools. You can now create custom images containing all the relevant code, and launch these using Studio notebooks. These images will be available to all users in the Studio domain. You can also use this feature to experiment with other popular languages and runtimes besides Python, such as R, Julia, and Scala. The sample files are available on the GitHub repo. For more information about this feature, see Bring your own SageMaker AI image.
About the Authors
 Stefan Natu is a Sr. Machine Learning Specialist at AWS. He is focused on helping financial services customers build end-to-end machine learning solutions on AWS. In his spare time, he enjoys reading machine learning blogs, playing the guitar, and exploring the food scene in New York City.
 Jaipreet Singh is a Senior Software Engineer on the Amazon SageMaker Studio team. He has been working on Amazon SageMaker since its inception in 2017 and has contributed to various Project Jupyter open-source projects. In his spare time, he enjoys hiking and skiing in the Pacific Northwest.
 Huong Nguyen is a Sr. Product Manager at AWS. She is leading the user experience for SageMaker Studio. She has 13 years’ experience creating customer-obsessed and data-driven products for both enterprise and consumer spaces. In her spare time, she enjoys reading, being in nature, and spending time with her family.
 Eitan Sela is a Solutions Architect with Amazon Web Services. He works with AWS customers to provide guidance and technical assistance, helping them improve the value of their solutions when using AWS. Eitan also helps customers build and operate machine learning solutions on AWS. In his spare time, Eitan enjoys jogging and reading the latest machine learning articles.
 Vishal Bhardwaj is a Solutions Architect at Amazon Web Services, supporting Scale customers in India. He works with customers to help improve their machine learning workloads.In his spare time, he enjoys trying out new food, playing video games, and travel.
 Rohit Raj is a Solution Architect at AWS, specializing in Serverless and a member of the Serverless Technical Field Community. He continually explores new trends and technologies. He is passionate about guiding customers build highly available, resilient, and scalable solutions on cloud. Outside of work, he enjoys travelling, music, and outdoor sports.