.NET on AWS Blog
AWS Transform for .NET now supports connection to Azure Repos and Azure Artifacts
In May 2025, we launched AWS Transform for .NET with the capability to connect and download .NET code bases from GitHub, GitLab, or Bitbucket for transformation (described in the AWS Transform User Guide). AWS Transform now also supports code bases in Azure Repos and Azure Artifacts. With this new capability, you can transform .NET applications with source control in Azure DevOps, including applications that have private NuGet references. In this post, I will walk you through how the feature works.
Creating a job
To get started with the web experience of AWS Transform, I onboard using the steps outlined in the documentation, sign in using my credentials, and create a job for .NET modernization by selecting the corresponding option in the chat window.
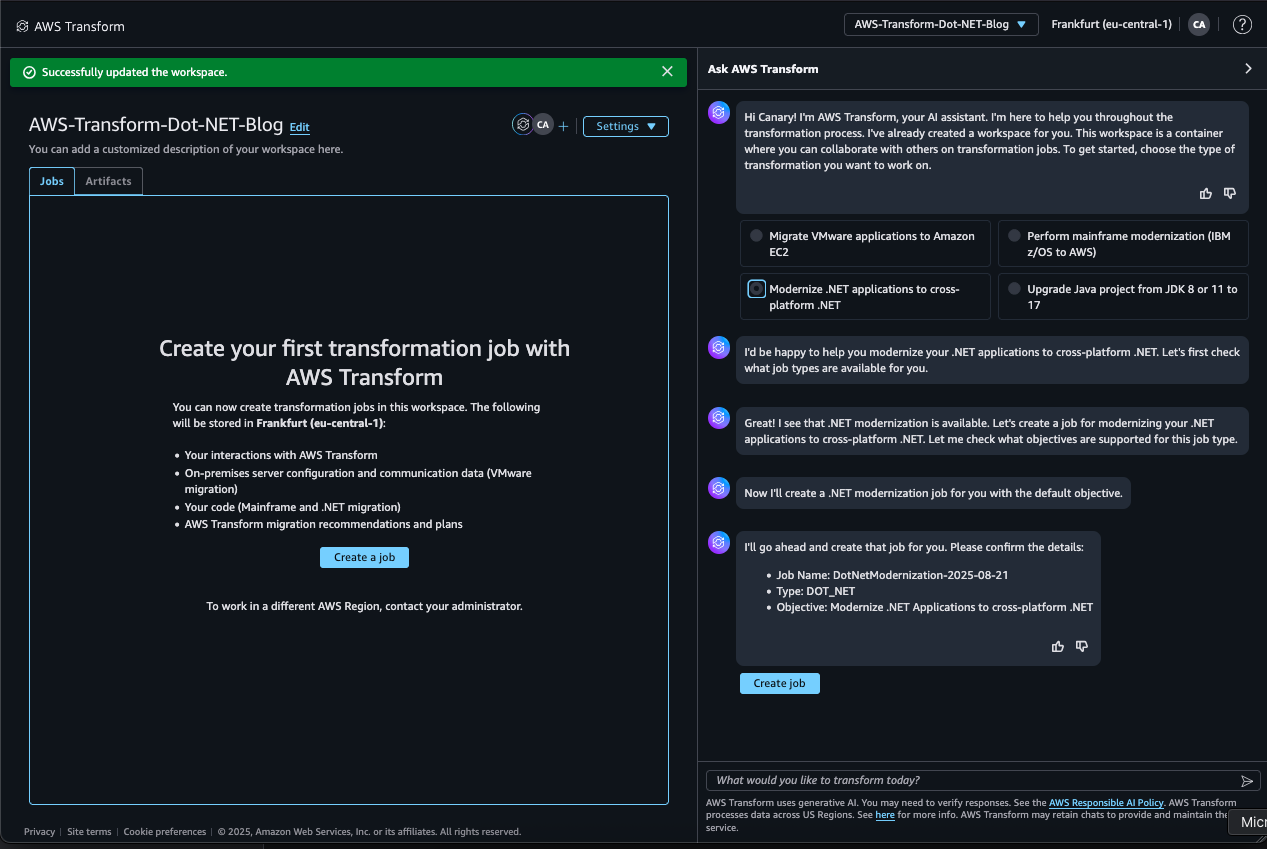
Figure 1: Creating a .NET modernization job in AWS Transform
Creating an Azure DevOps connector
AWS Transform for .NET creates a job plan, which is a sequence of steps that the agent will execute to assess, discover, analyze, and transform applications at scale. AWS Transform requires a connector setup for it to access source code repositories. As my .NET application source code is hosted in Azure repos and my private NuGets are in Azure Artifacts, I followed instructions to create a connection to Azure DevOps, which enables access to both Azure Repos and Artifacts. Once the connection is created, I will specify the connection ARN to move the job forward.
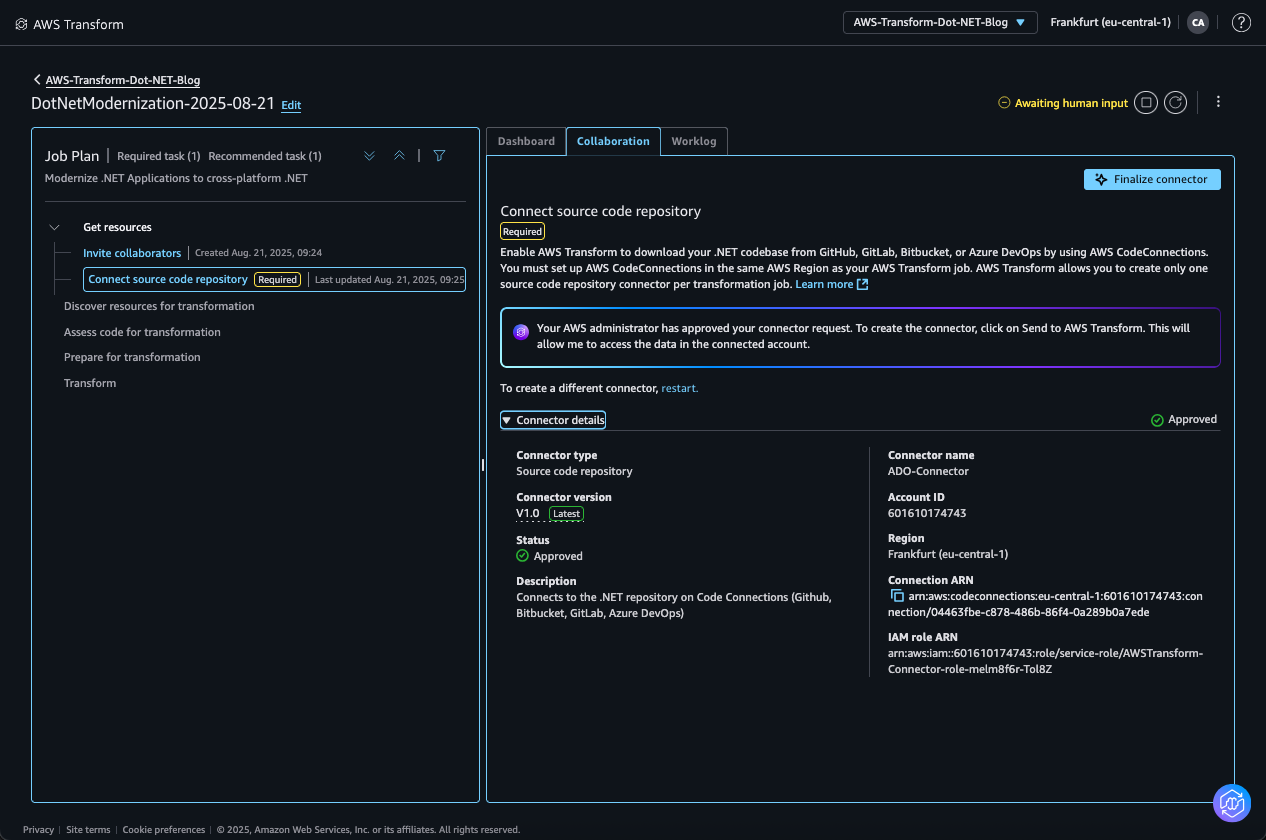
Figure 2: Connect Source Code Repository dialog
Discovering repos for assessment
Once the connection to Azure DevOps is ready to use, the agent will start discovering Azure Repos. Here, I’ve reviewed and submitted all the repositories for assessment.
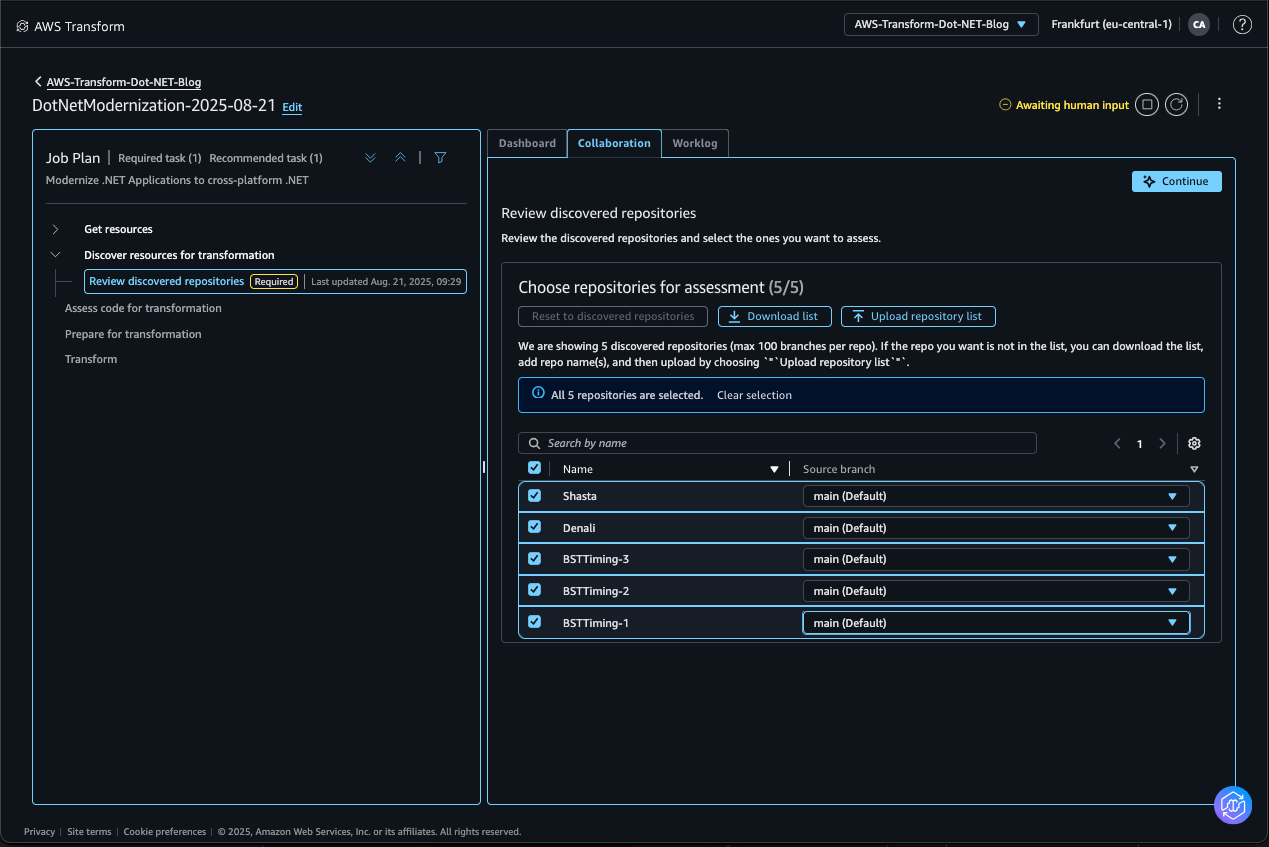
Figure 3: Review Azure DevOps repos for assessment
Next, the .NET agent runs assessment across all repositories and provides more information for the discovered repositories. I have again selected all repositories and confirmed for transformation.
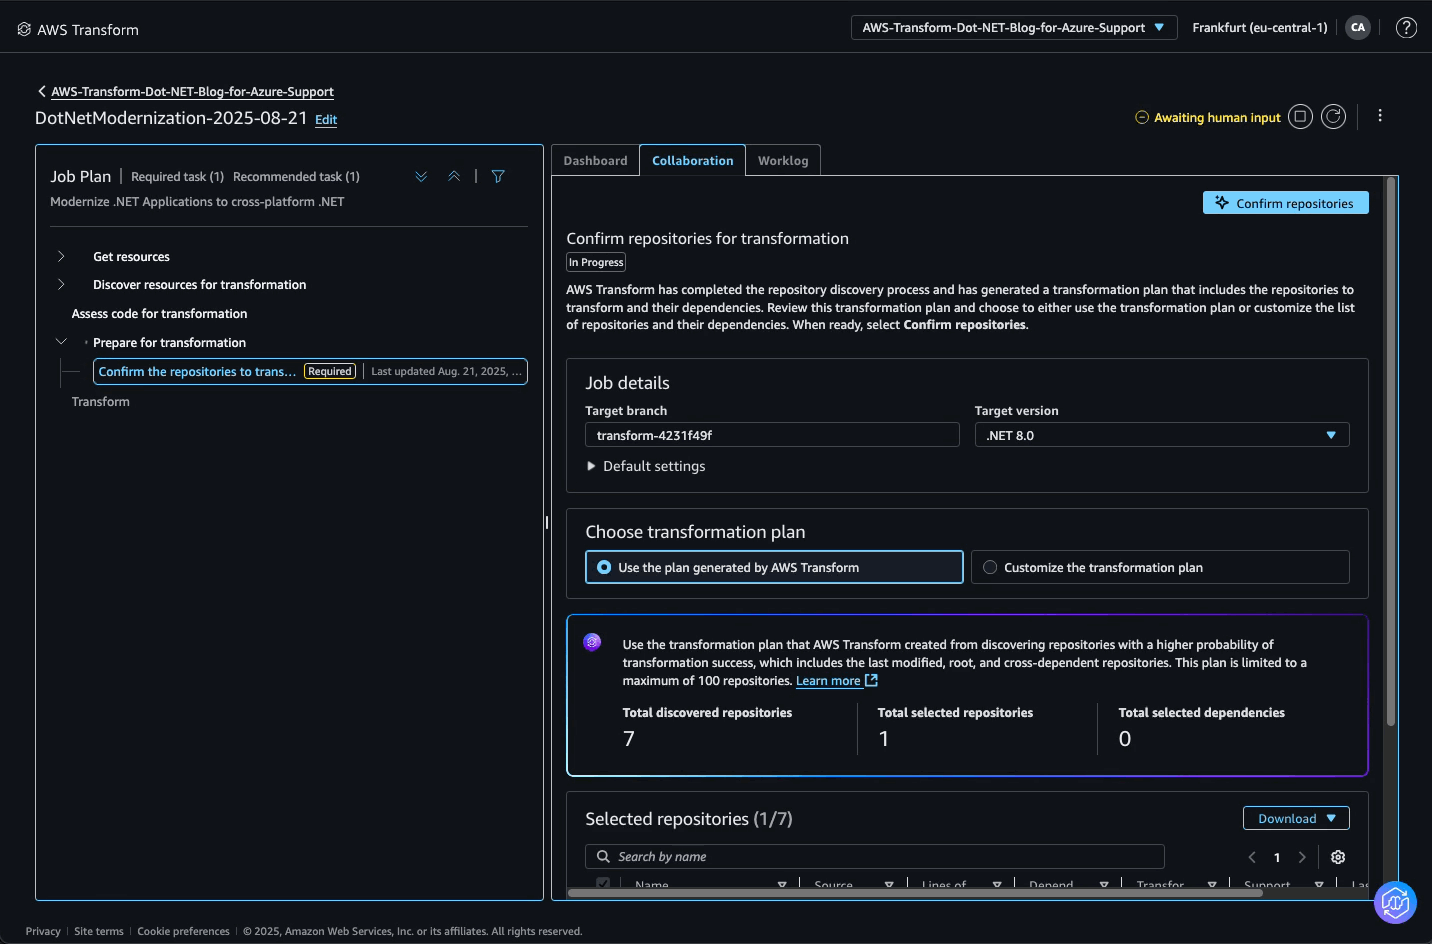
Figure 4: Confirm repositories for assessment
Connect to Azure Artifacts repository for private NuGet packages
Before submitting repositories for transformation, .NET agent discovered the presence of private NuGet dependencies in the selected repositories above, and provides an option to connect to Artifact Repository that contains the required NuGets referenced in my projects. Please note that this step is optional.
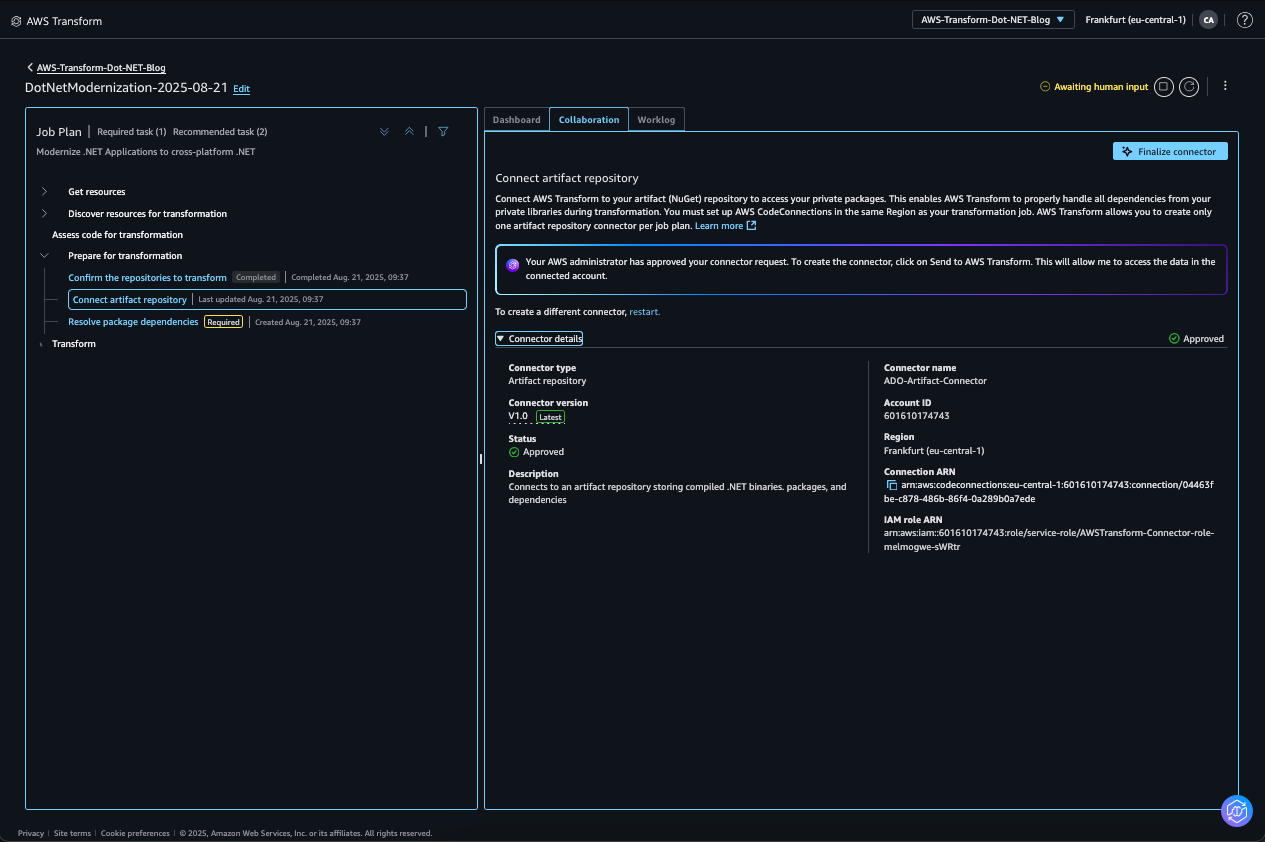
Figure 5: Connect artifact repository
Handling dependencies
Next, the .NET agent surfaces any dependencies it could not find and provides an opportunity to upload them manually.
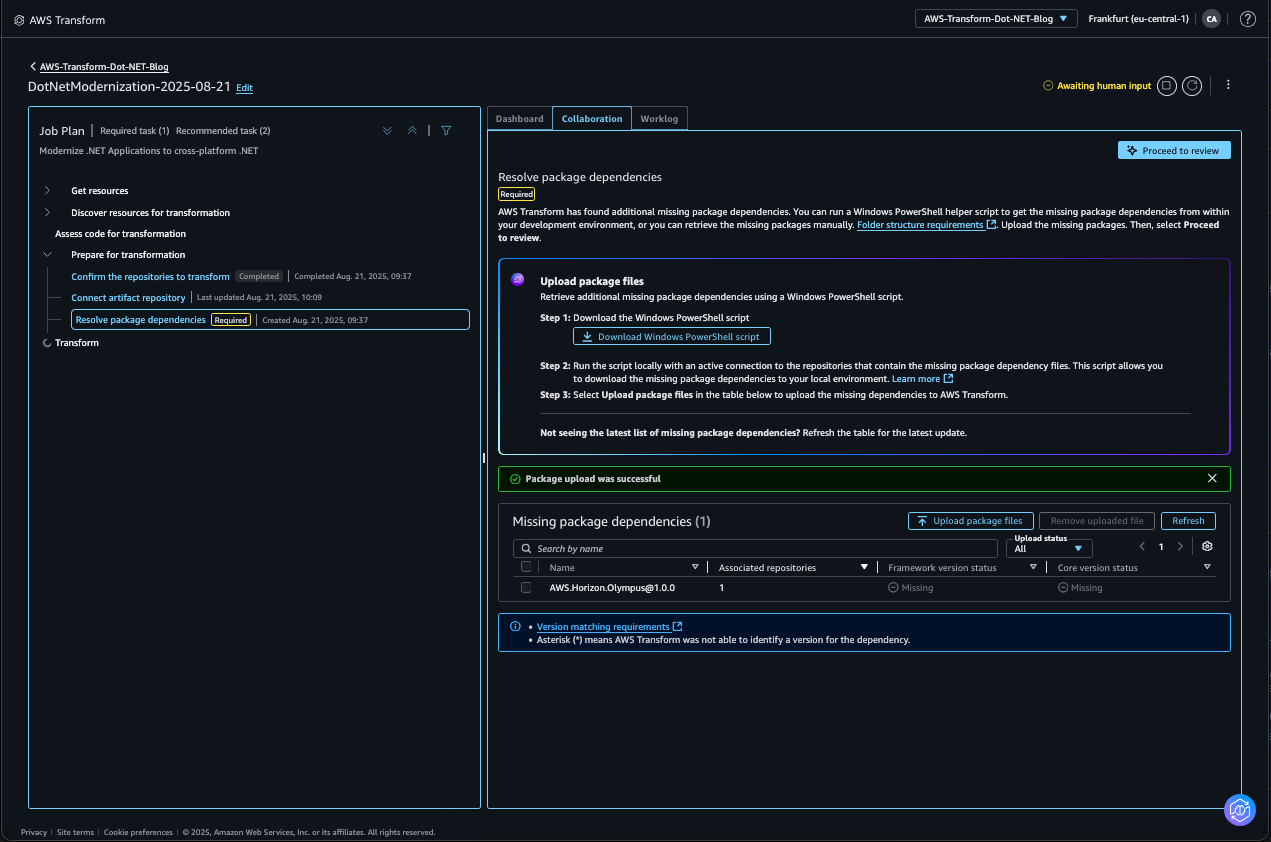
Figure 6: Upload package files
For this example, I skipped the step to upload missing dependencies and proceeded to review transformation.
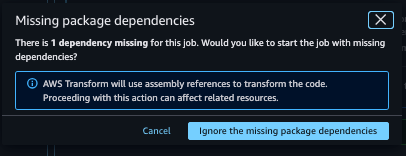
Figure 7: Missing package dependencies dialog
Next, I reviewed repositories selected, dependent repositories, dependent packages and started transformation.
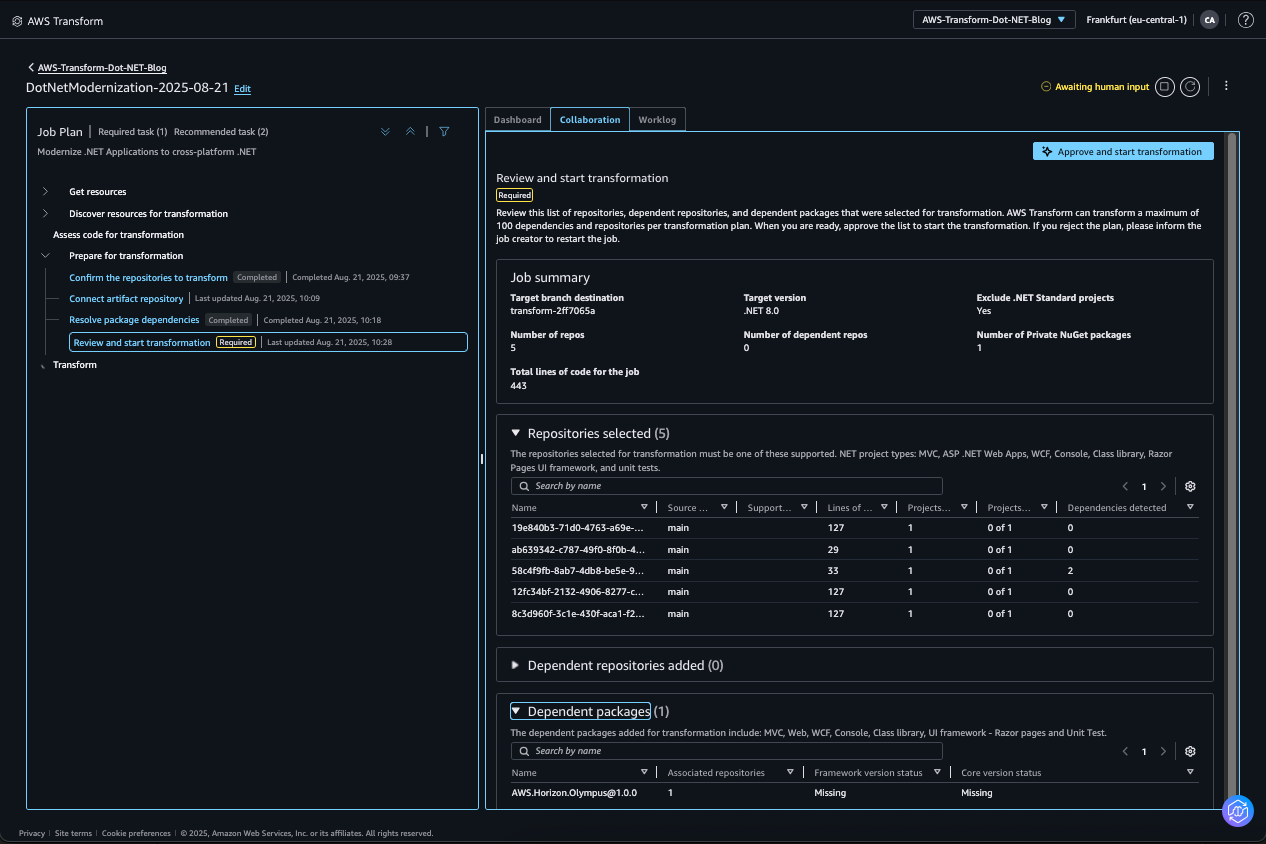
Figure 8: Review repositories and dependencies and start transformation
I can follow the progress for each repository separately or get an overall summary from the dashboard, as shown in Figure 9.
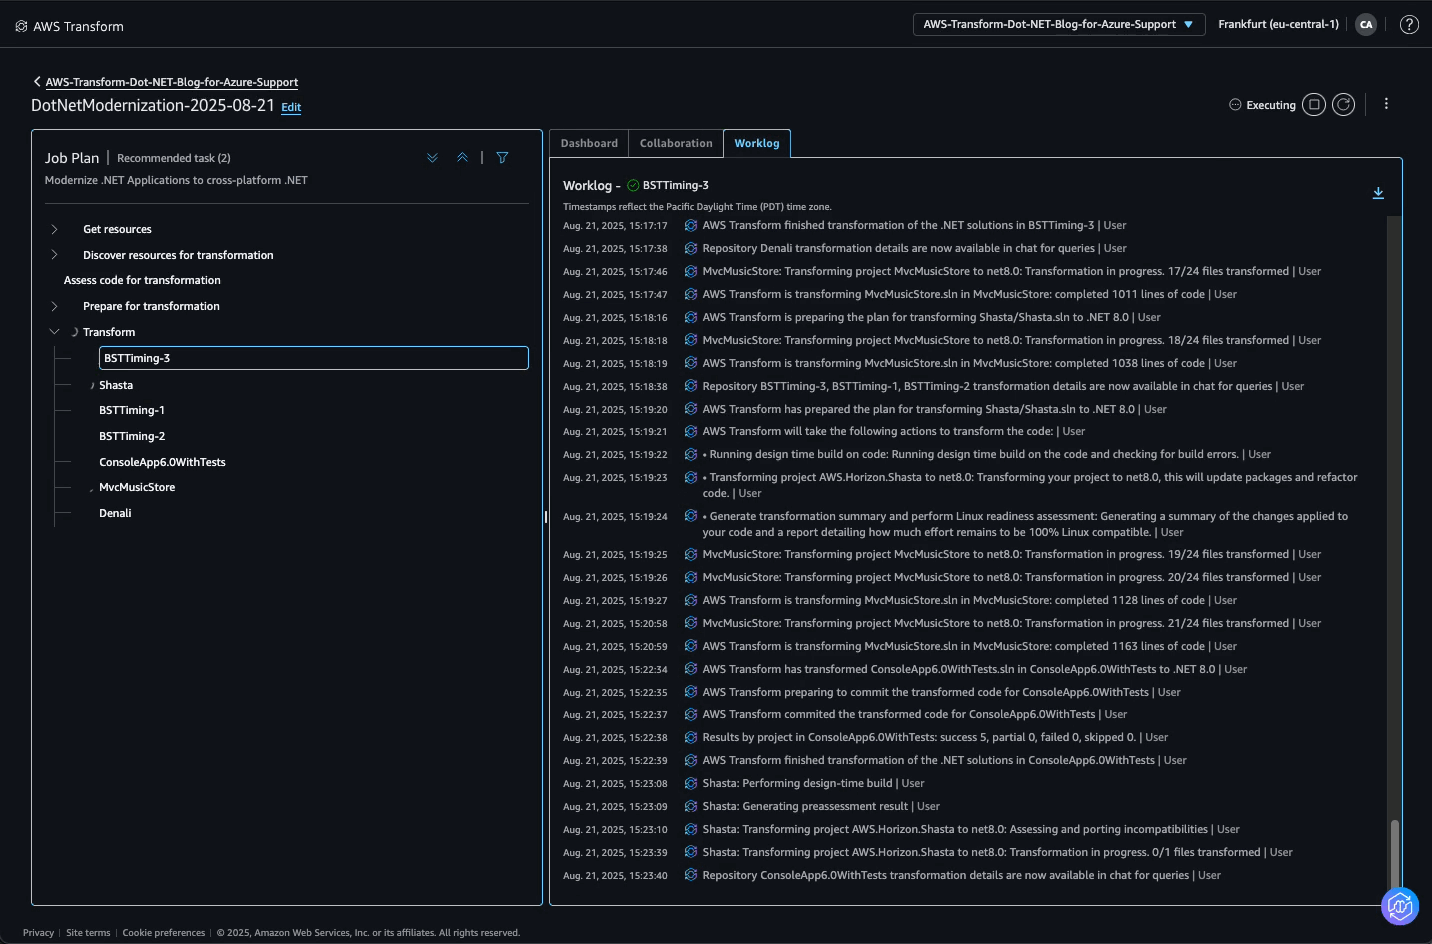
Figure 9: Monitor progress in worklog and dashboard
Transformation summary and unit test results
Once the agent completes transformation of all the repositories, I can view or download a transformation summary from the dashboard. The agent also supports execution of unit tests after transformation is complete. I view the result of unit test execution with the View details link in the dashboard Unit test status section.
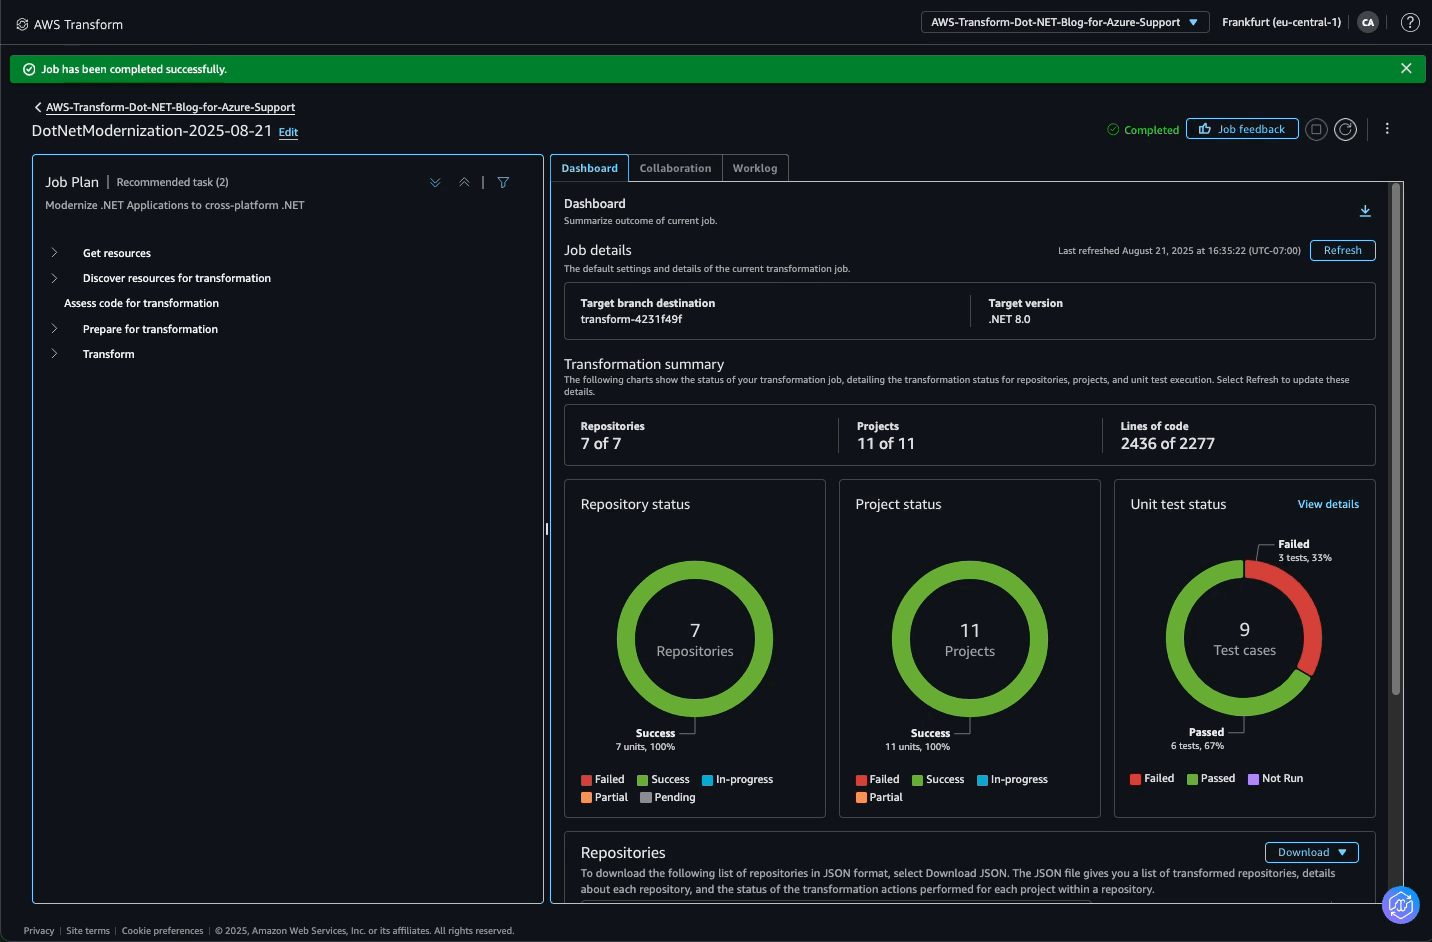
Figure 10: Transformation complete
At this point, I can use the Download button in the Repositories table to download the transformation summary which provides details about each repository, and the status of the transformation actions performed for each project within the repository. Finally, also checkout the new branch created by the agent in Azure Repos.
Conclusion
In this post, I walked through the new Azure DevOps connector support in AWS Transform for .NET. I showed how to connect to Azure Repos and Azure Artifacts, and how to work with them in an end-to-end transformation job. The new Azure DevOps connector support opens up large-scale .NET modernization to more customers. Learn more about AWS Transform and Azure DevOps support at the AWS Transform User Guide.