AWS Database Blog
Accelerate database migration using virtual target mode in AWS DMS Schema Conversion
Database migrations require careful planning and assessment before implementation. AWS recently announced virtual target mode in AWS Database Migration Service (AWS DMS) Schema Conversion. This feature helps you start migration planning without provisioning target databases. It is especially valuable during the discovery and design phases, where early visibility into migration-level effort and readiness can help you plan more effectively. By starting early migration tasks before the target is provisioned, you can reduce the need for these resources in the initial stages, helping you use your environment more efficiently and manage cost more effectively.
In this post, we show you how to get started using virtual target mode in AWS DMS Schema Conversion.
Solution overview
As of this writing, virtual target mode supports Amazon Aurora and Amazon Relational Database Service (Amazon RDS), including Amazon RDS for DB2, Amazon RDS for MySQL, Amazon RDS for PostgreSQL, Amazon Aurora MySQL-Compatible Edition, Amazon Aurora PostgreSQL-Compatible Edition, and Amazon Redshift. It is available in AWS Regions where AWS DMS Schema Conversion is supported.
In the next sections, we show you how to configure the virtual target mode to provide an early start by assessing and converting your database objects, helping you accelerate your migration even before the target database is provisioned. We demonstrate how to use AWS DMS Schema Conversion to assess and convert an RDS for SQL Server database to a virtual target of Aurora PostgreSQL-Compatible, and then switch from the virtual target to the actual target database when your database is available.The high-level steps are as follows:
- Create the target data provider with virtual mode.
- Create and launch a migration project.
- Assess and convert database objects with the virtual mode data provider.
- Transition the virtual target to the actual target database:
- Close the migration project.
- Reconfigure the target data provider with the actual target database.
- Reconfigure the migration project with the actual target database.
- Launch the migration project.
- Apply converted code to the actual target database.
Prerequisites
To set up AWS DMS Schema Conversion, you must complete multiple configuration steps. For detailed instructions to plan, configure, create and launch your database migration project using AWS DMS Schema Conversion, refer to prerequisites section of the AWS DMS Schema Conversion user guide.
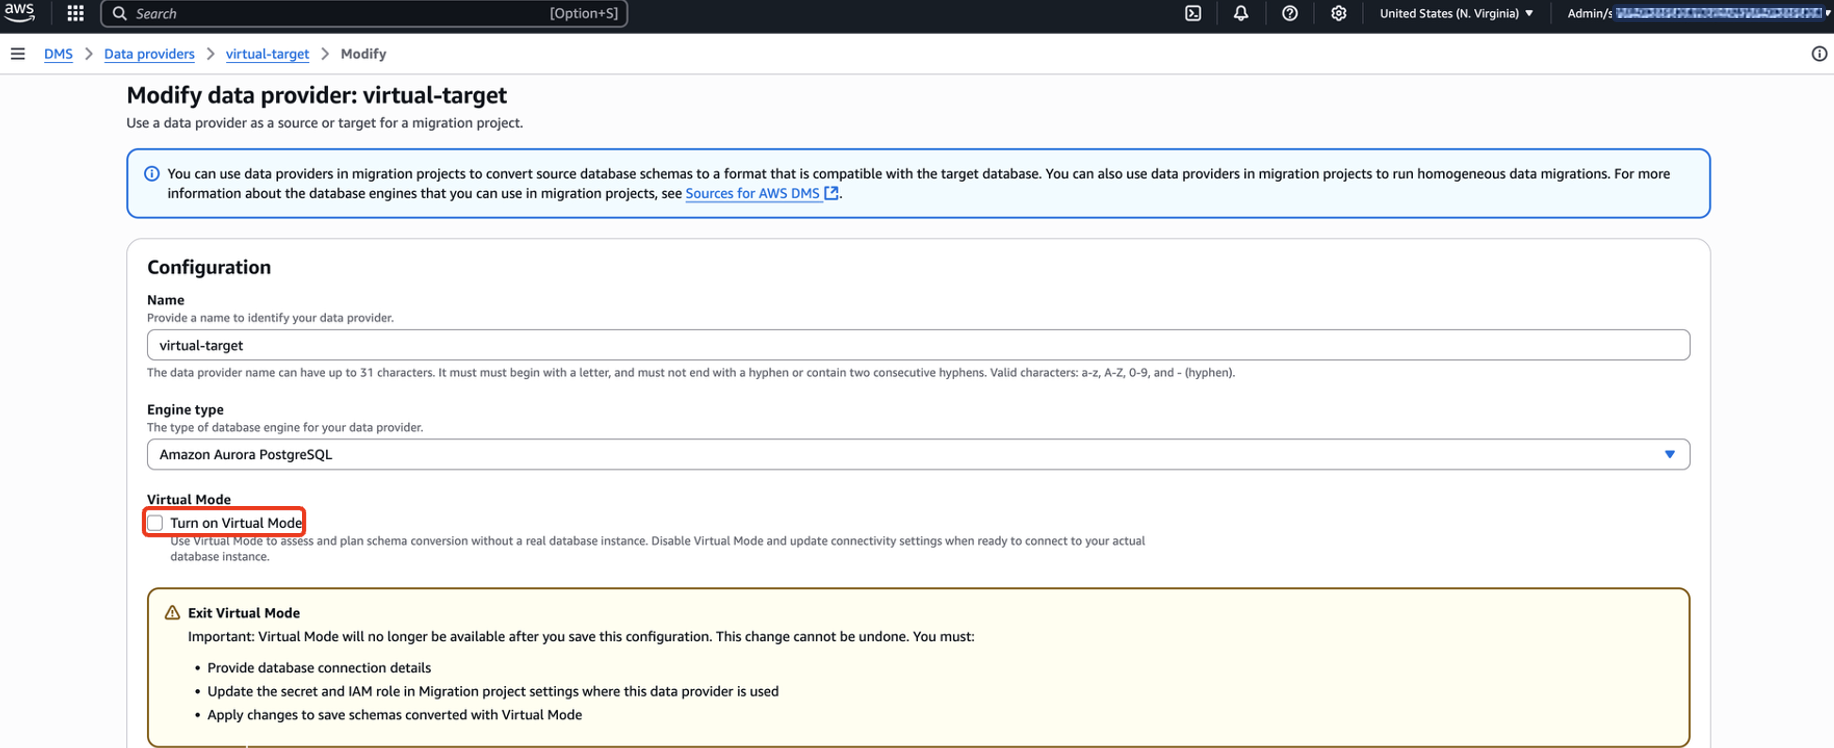
Create a target data provider with virtual mode
Virtual mode is currently available within the target data provider. It stores the target database type for AWS DMS Schema Conversion to perform migration activities. Configure your virtual target data provider with the following steps:
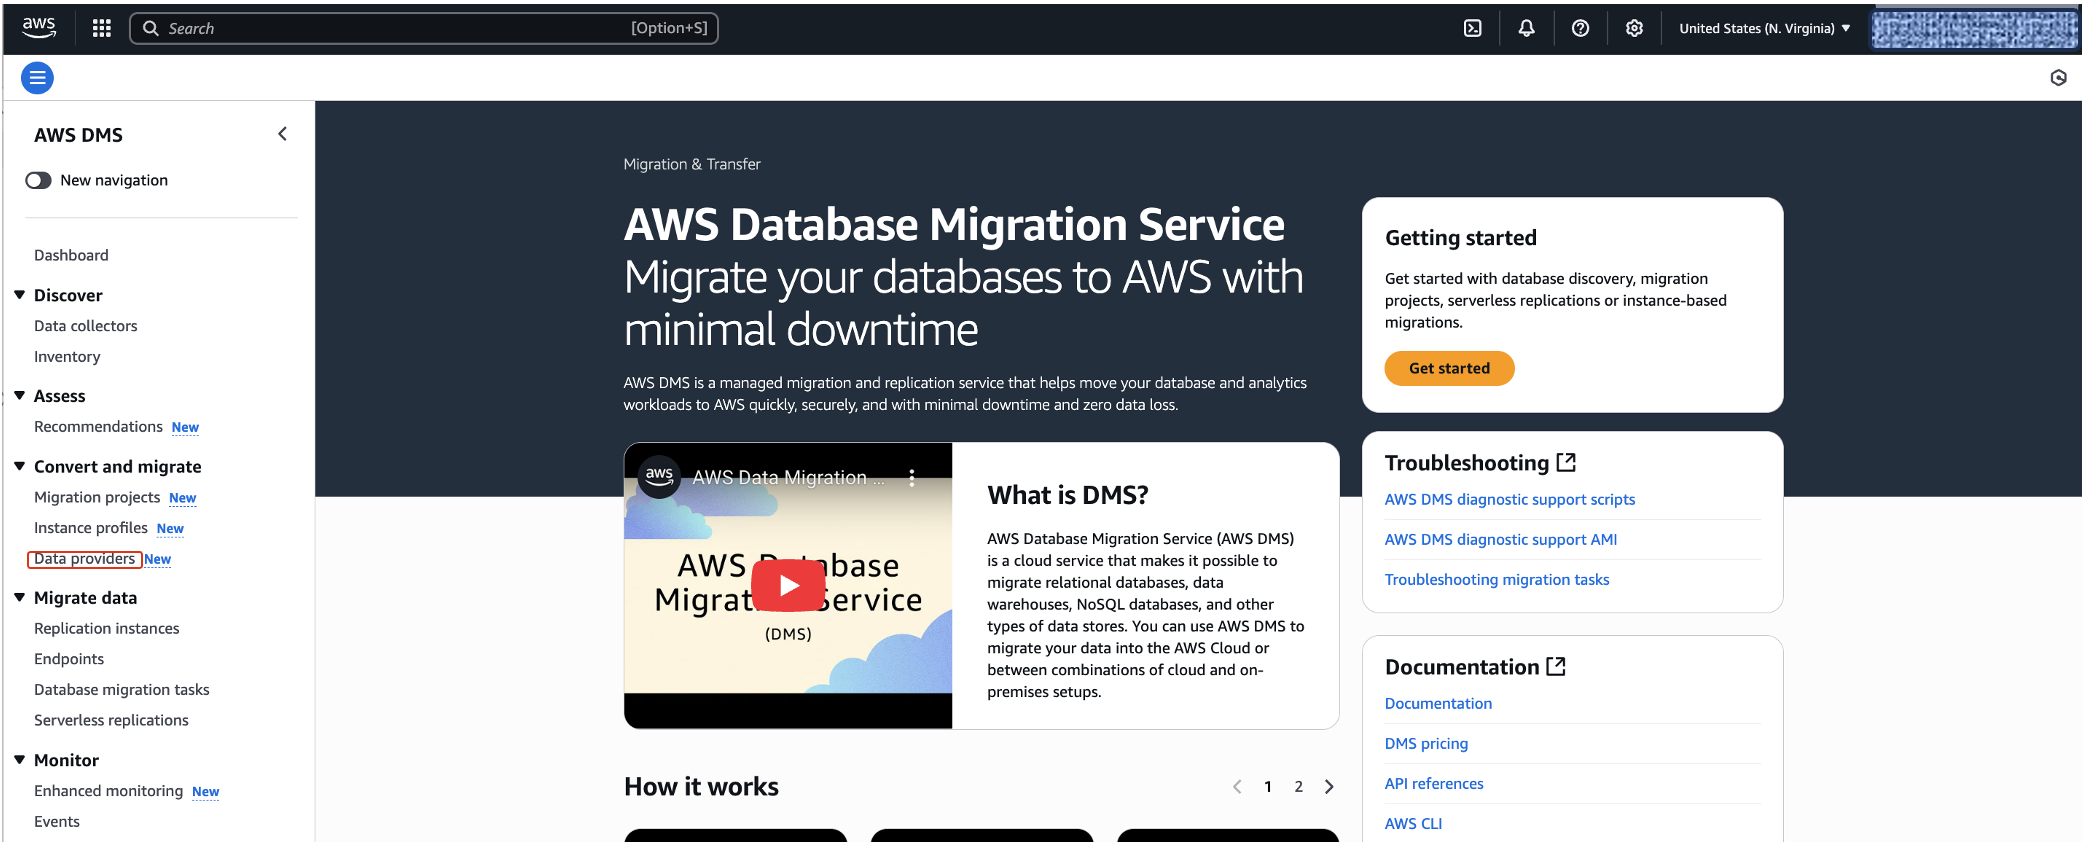
- On the AWS DMS console, choose Data providers in the navigation pane.
- Choose Create data provider.
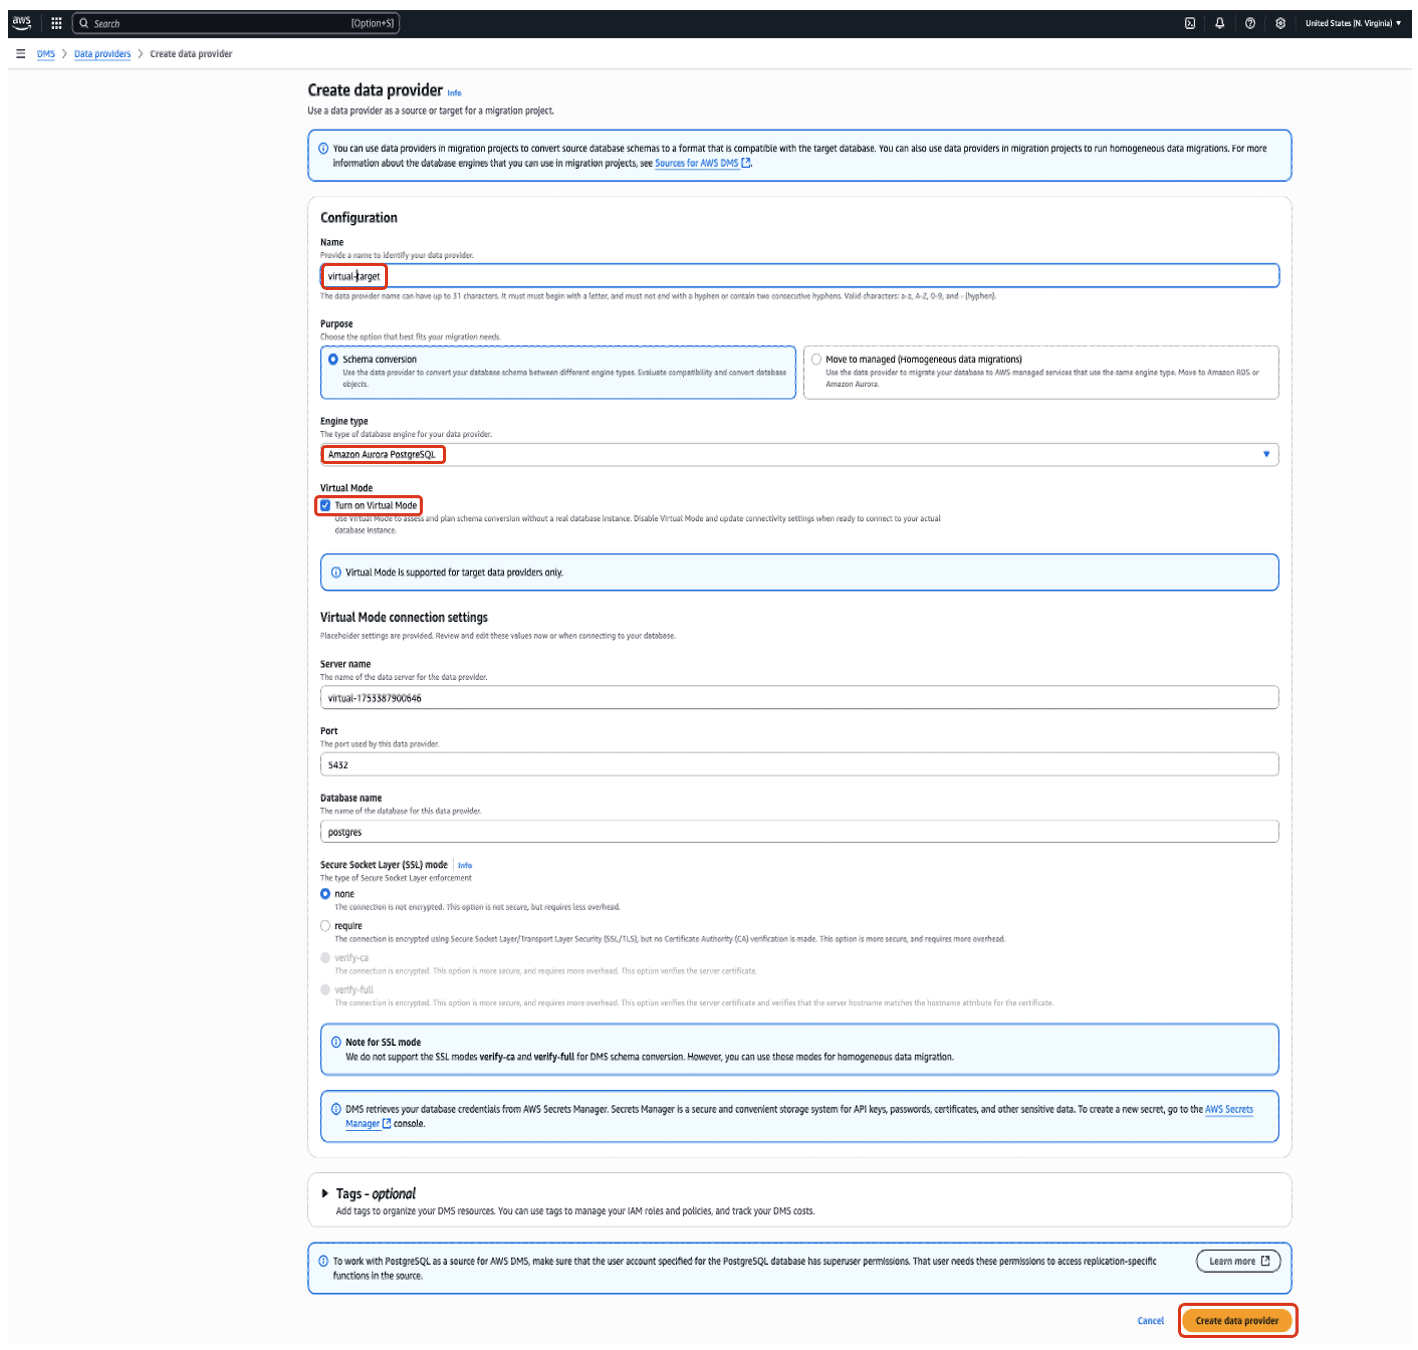
- For Name, enter a name (for example, virtual-target).
- For Purpose, select Schema conversion.
- For Engine type, choose Amazon Aurora PostgreSQL.
- For Virtual Mode, select Turn on Virtual Mode.
- For Virtual Mode connection settings, keep the default values.
- Choose Create data provider.
Create a migration project
You can use the virtual target data provider in your new migration project with the following steps:
- On the AWS DMS console, choose Migration projects in the navigation pane.
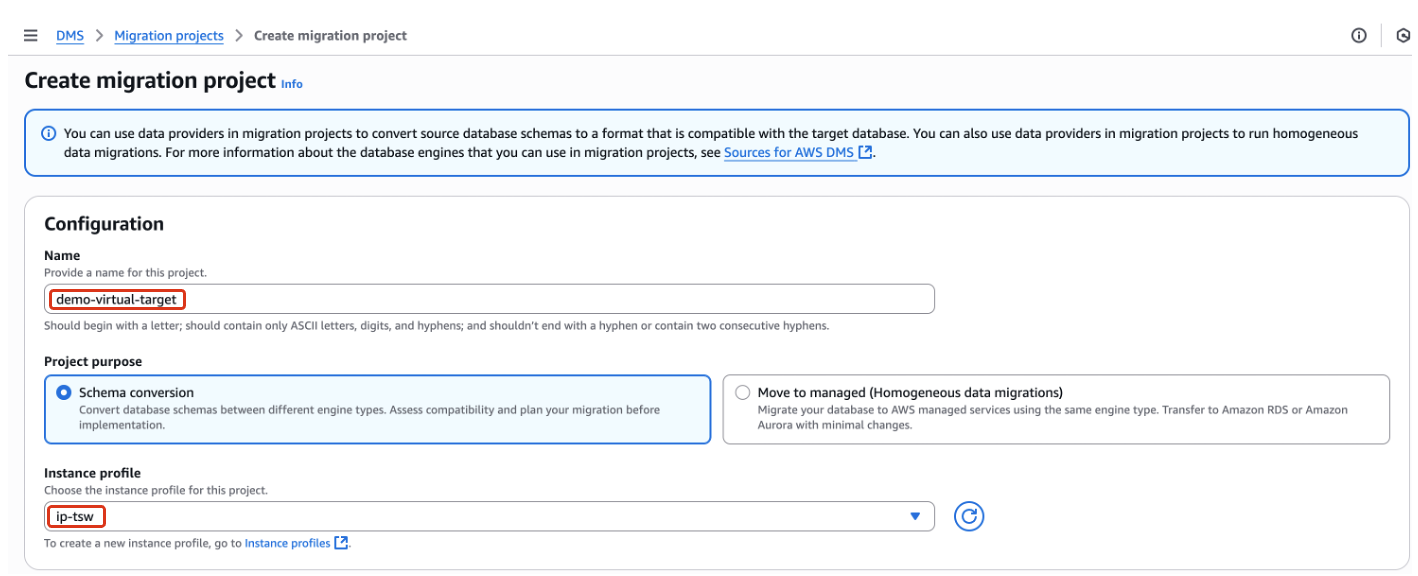
- Choose Create migration project.

- For Name, enter a name to identify your migration project (for example, demo-virtual-target).
- For Project purpose, select Schema conversion.
- For Instance profile, choose the instance profile you created in the prerequisite steps.
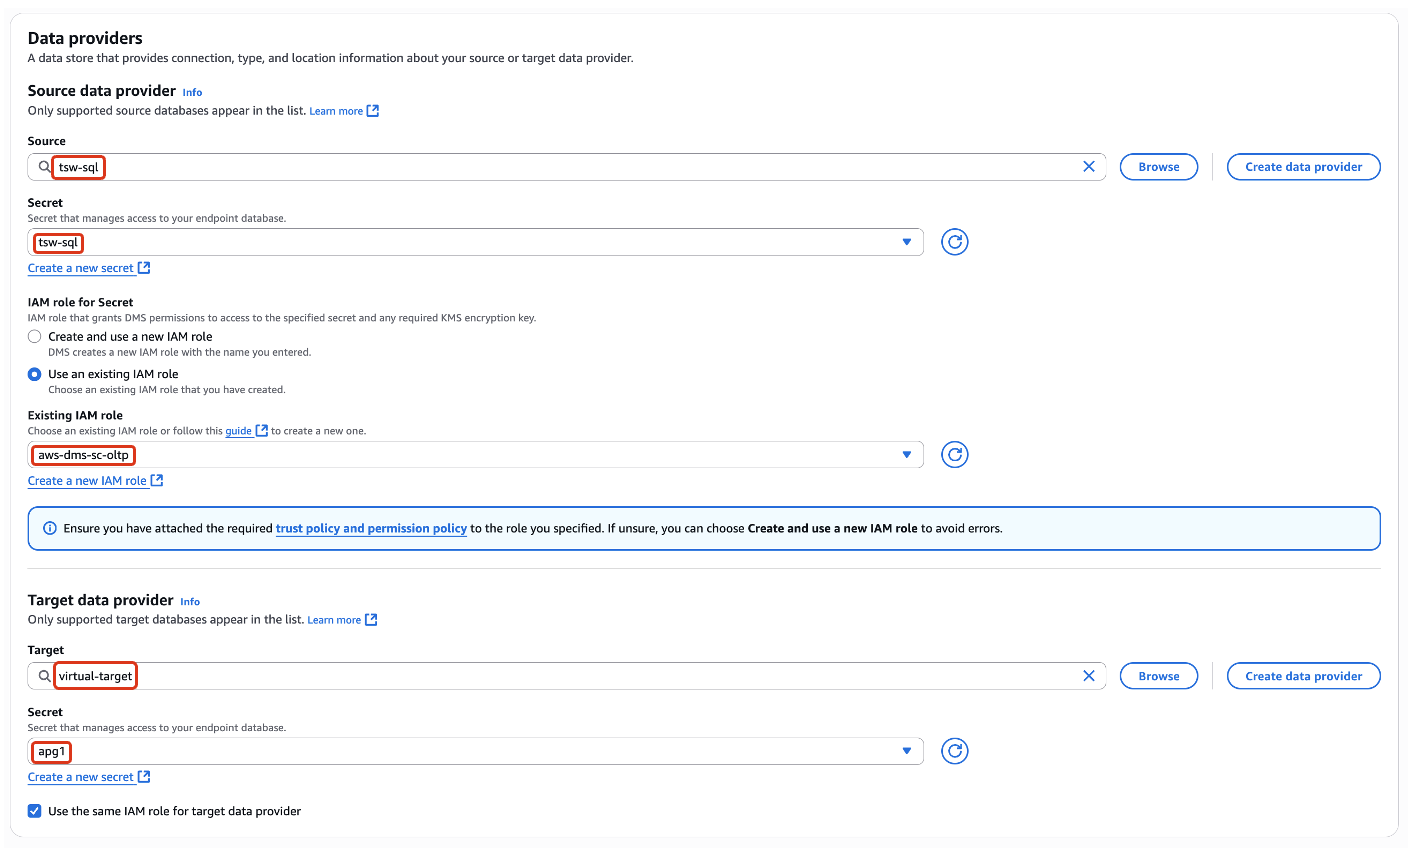
- In the Data providers section, enter the source provider and the target provider created earlier, AWS Secrets Manager secret, and AWS Identity and Access Management (IAM) roles.
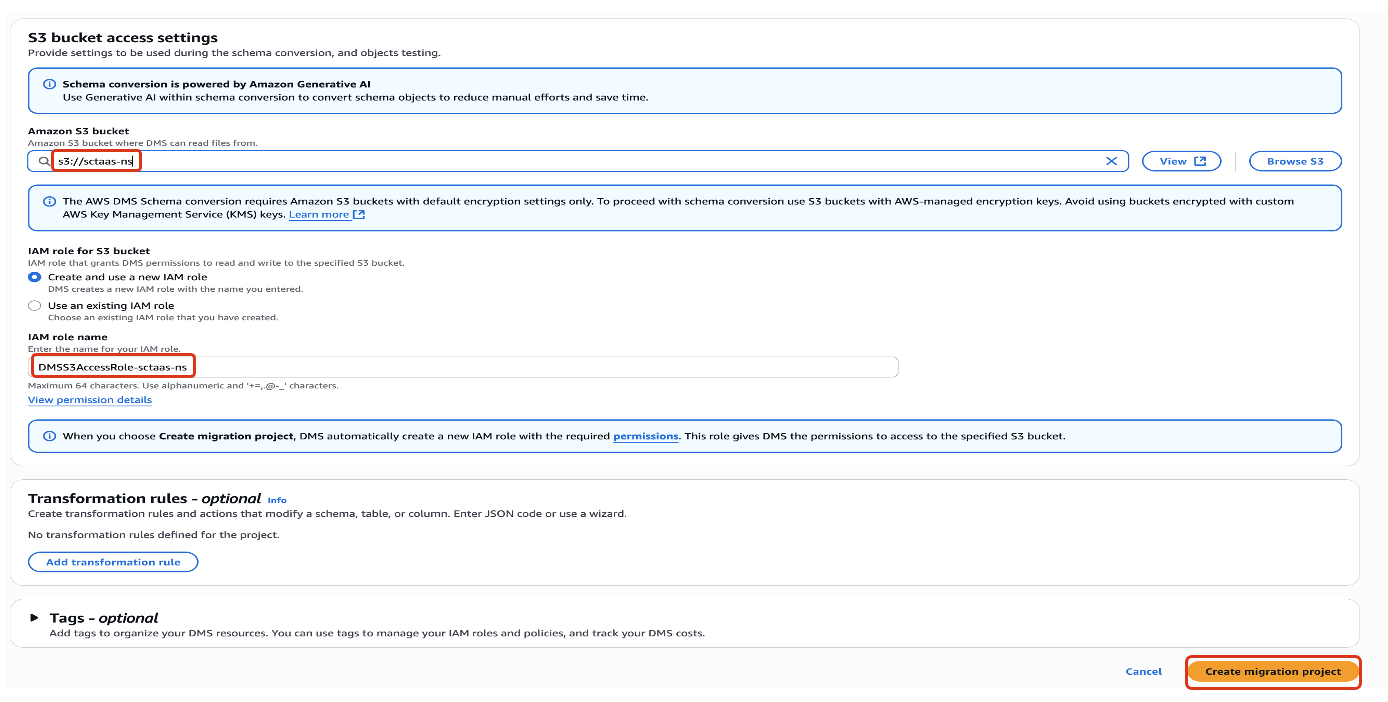
- In the S3 bucket access settings section, enter the Amazon Simple Storage Service (Amazon S3) URL and choose the applicable IAM role.
- Choose Create migration project.
Launch a schema conversion project
Complete the following steps to launch your schema conversion project:
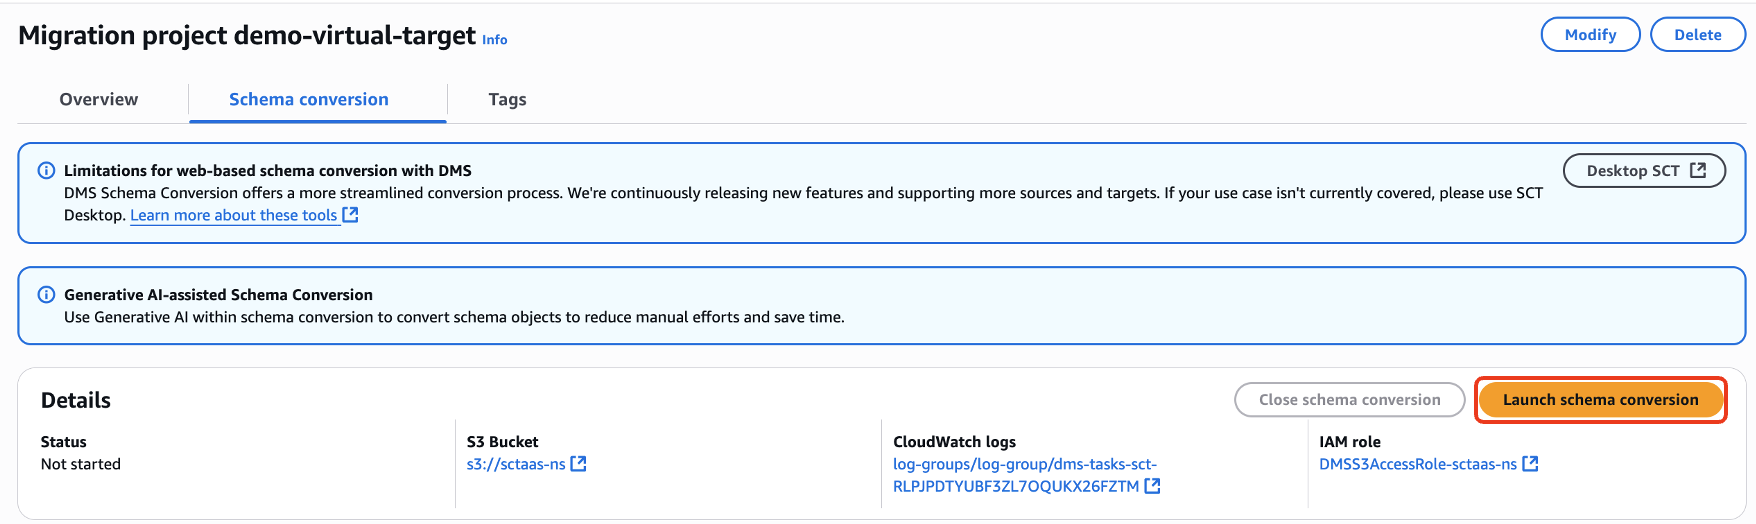
- On the AWS DMS console, open the migration project you created.
- Choose Launch schema conversion.
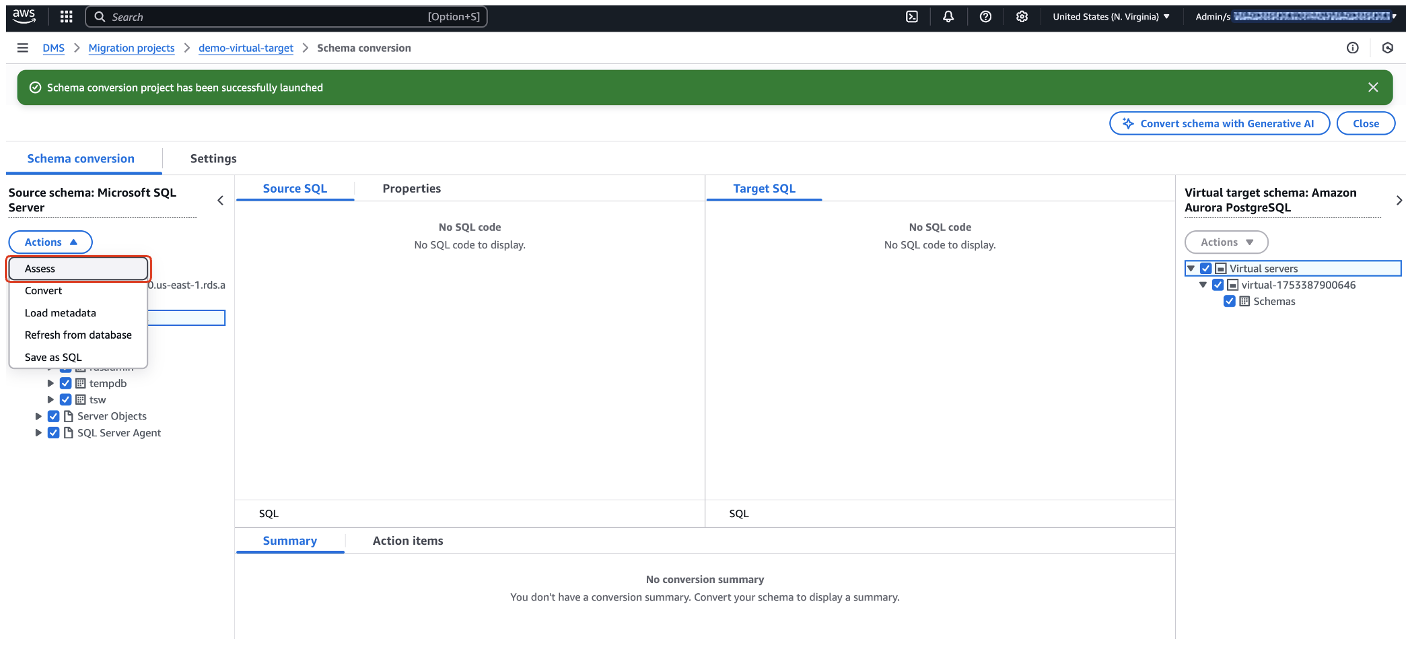
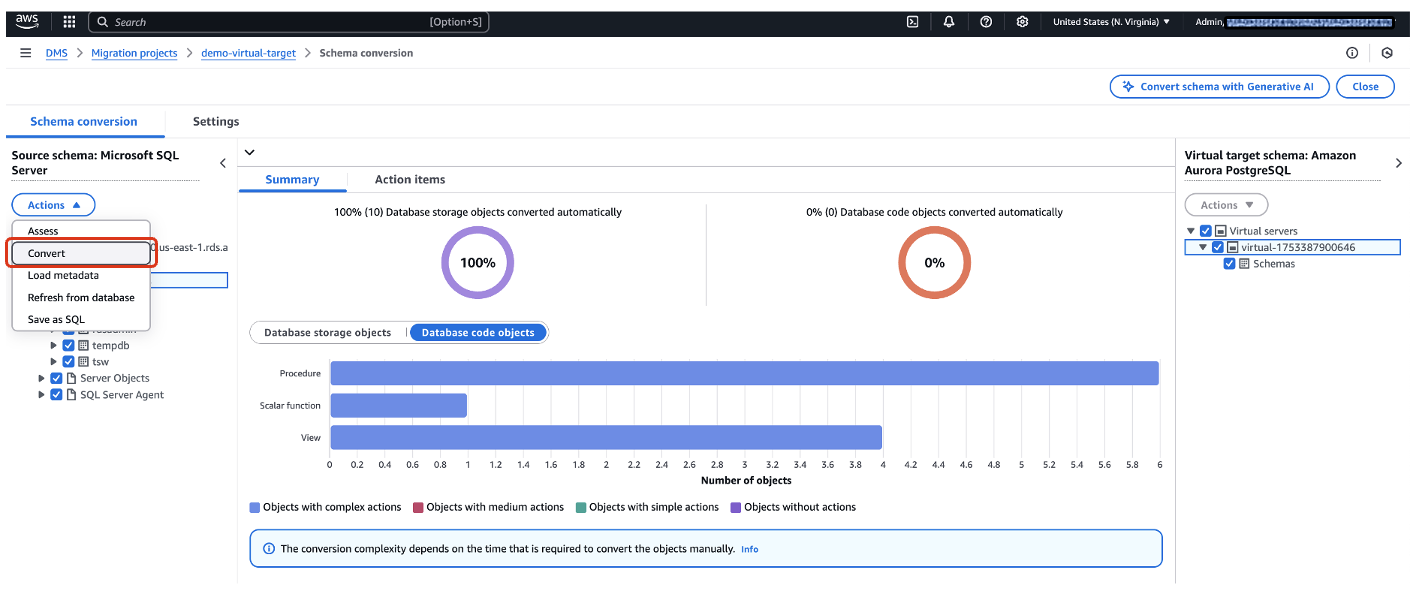
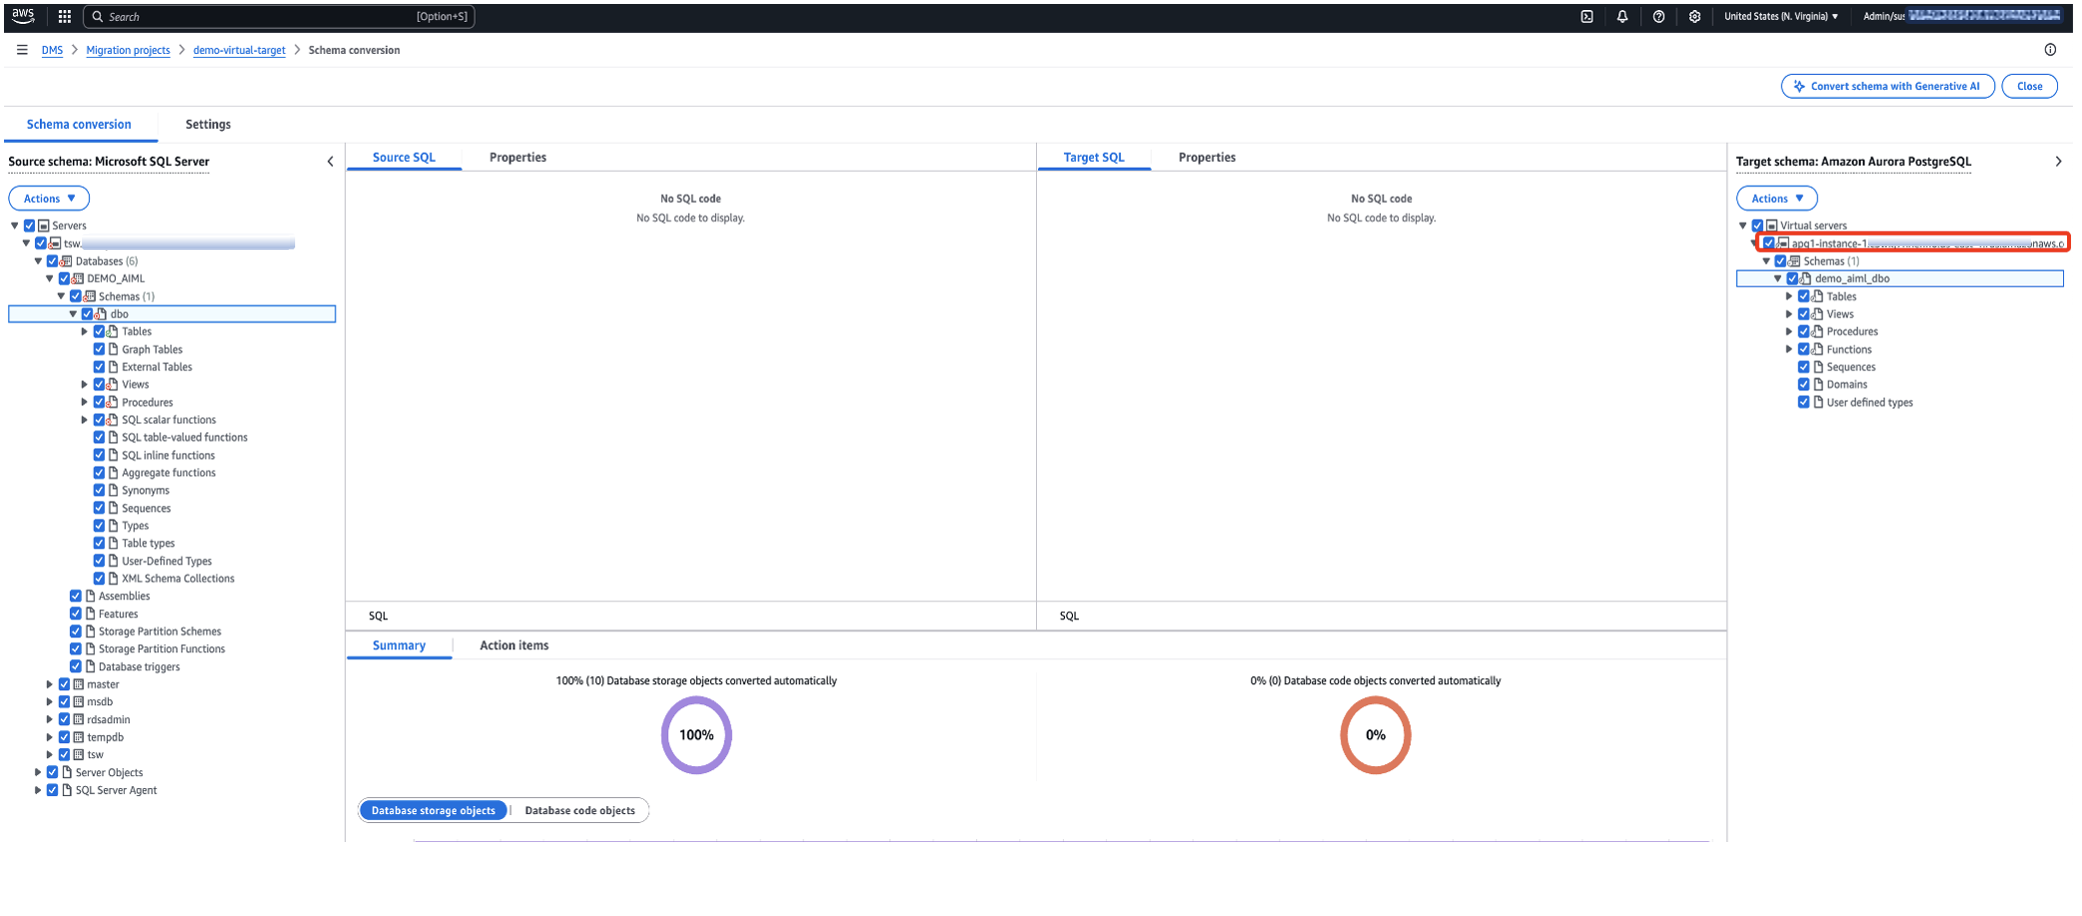
When your schema conversion project is ready, you will see the virtual server appear in the tree view on the right side of the console. You have two main options for your selected database objects: you can either generate a migration assessment report or begin the conversion process.
- To create an assessment report, choose Actions and choose Assess from the dropdown menu.
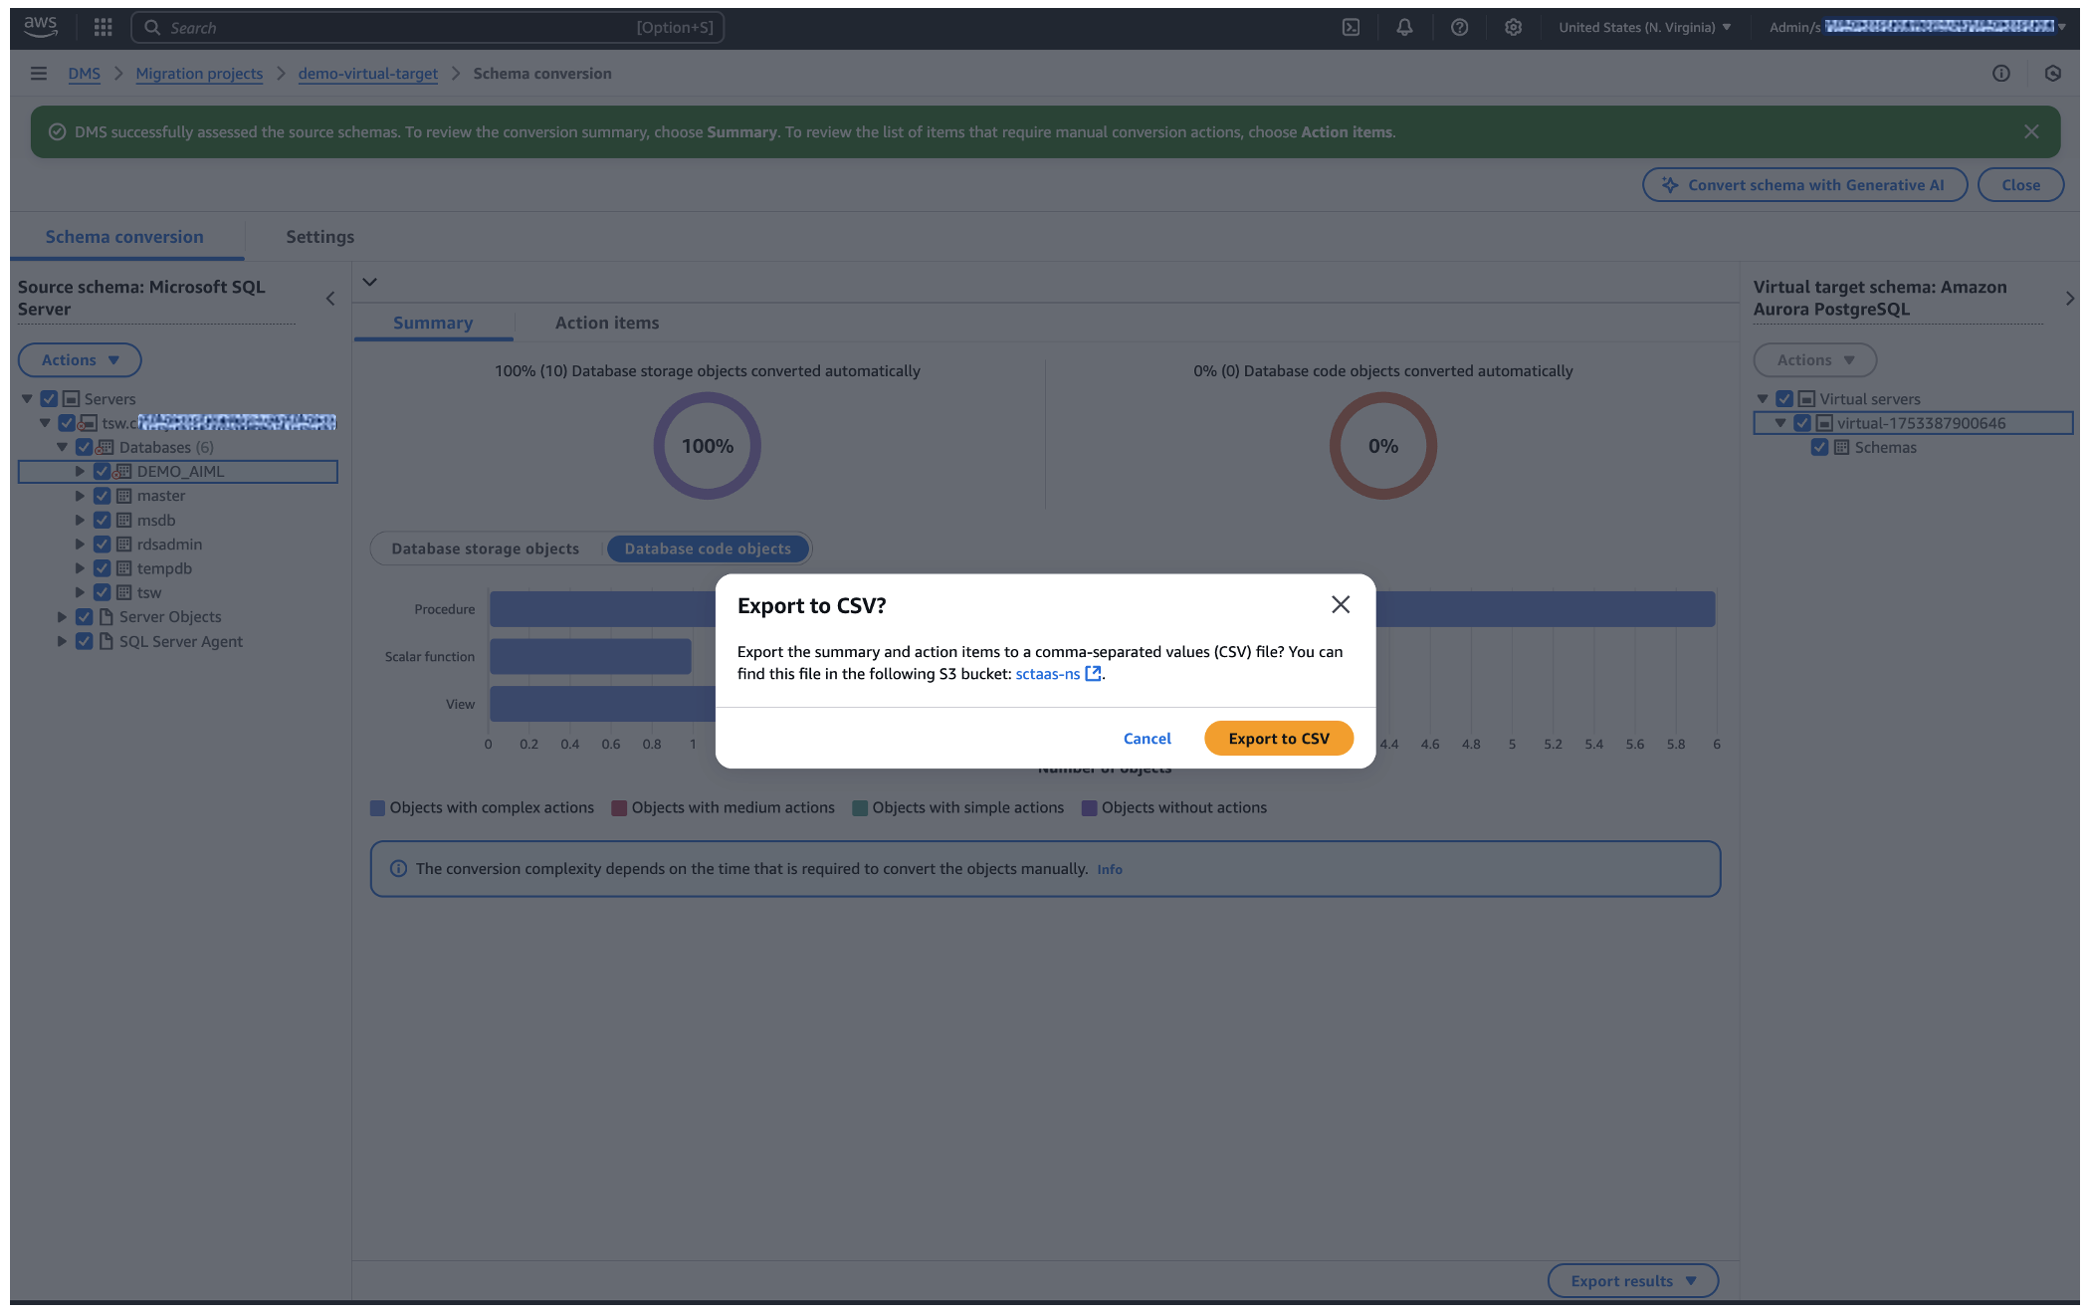
- After the assessment report is created and available on the AWS DMS console, you can export it to an S3 bucket.
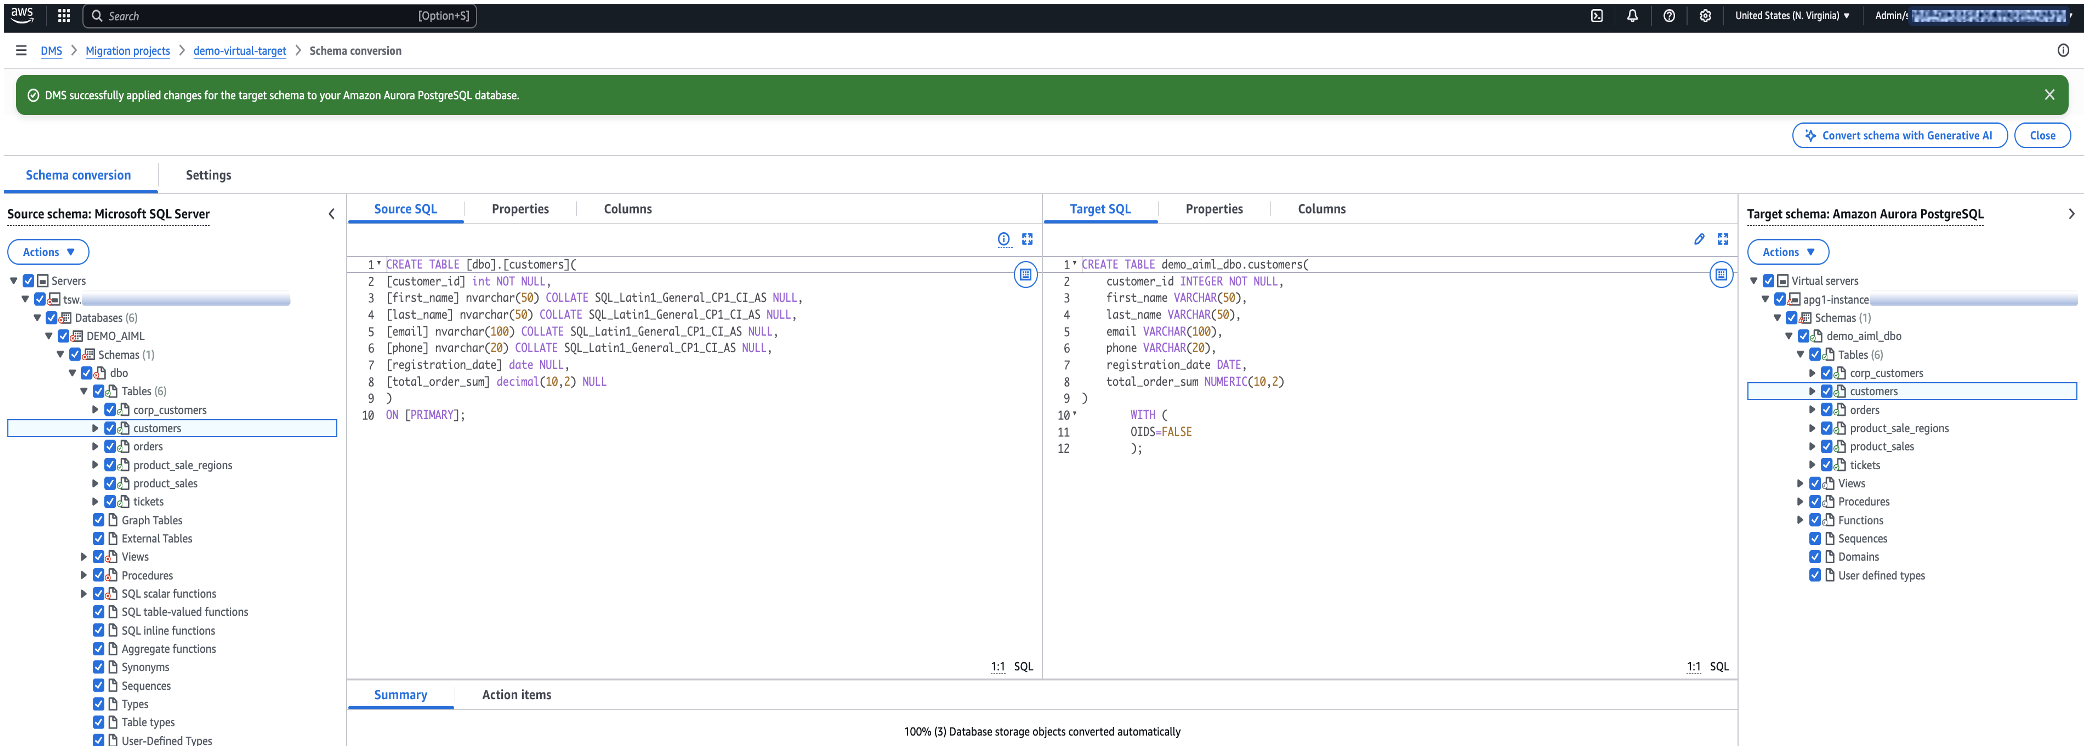
- When you’re ready to begin conversion, locate and select your desired object in the source tree. Then choose Actions and choose Convert from the dropdown menu.
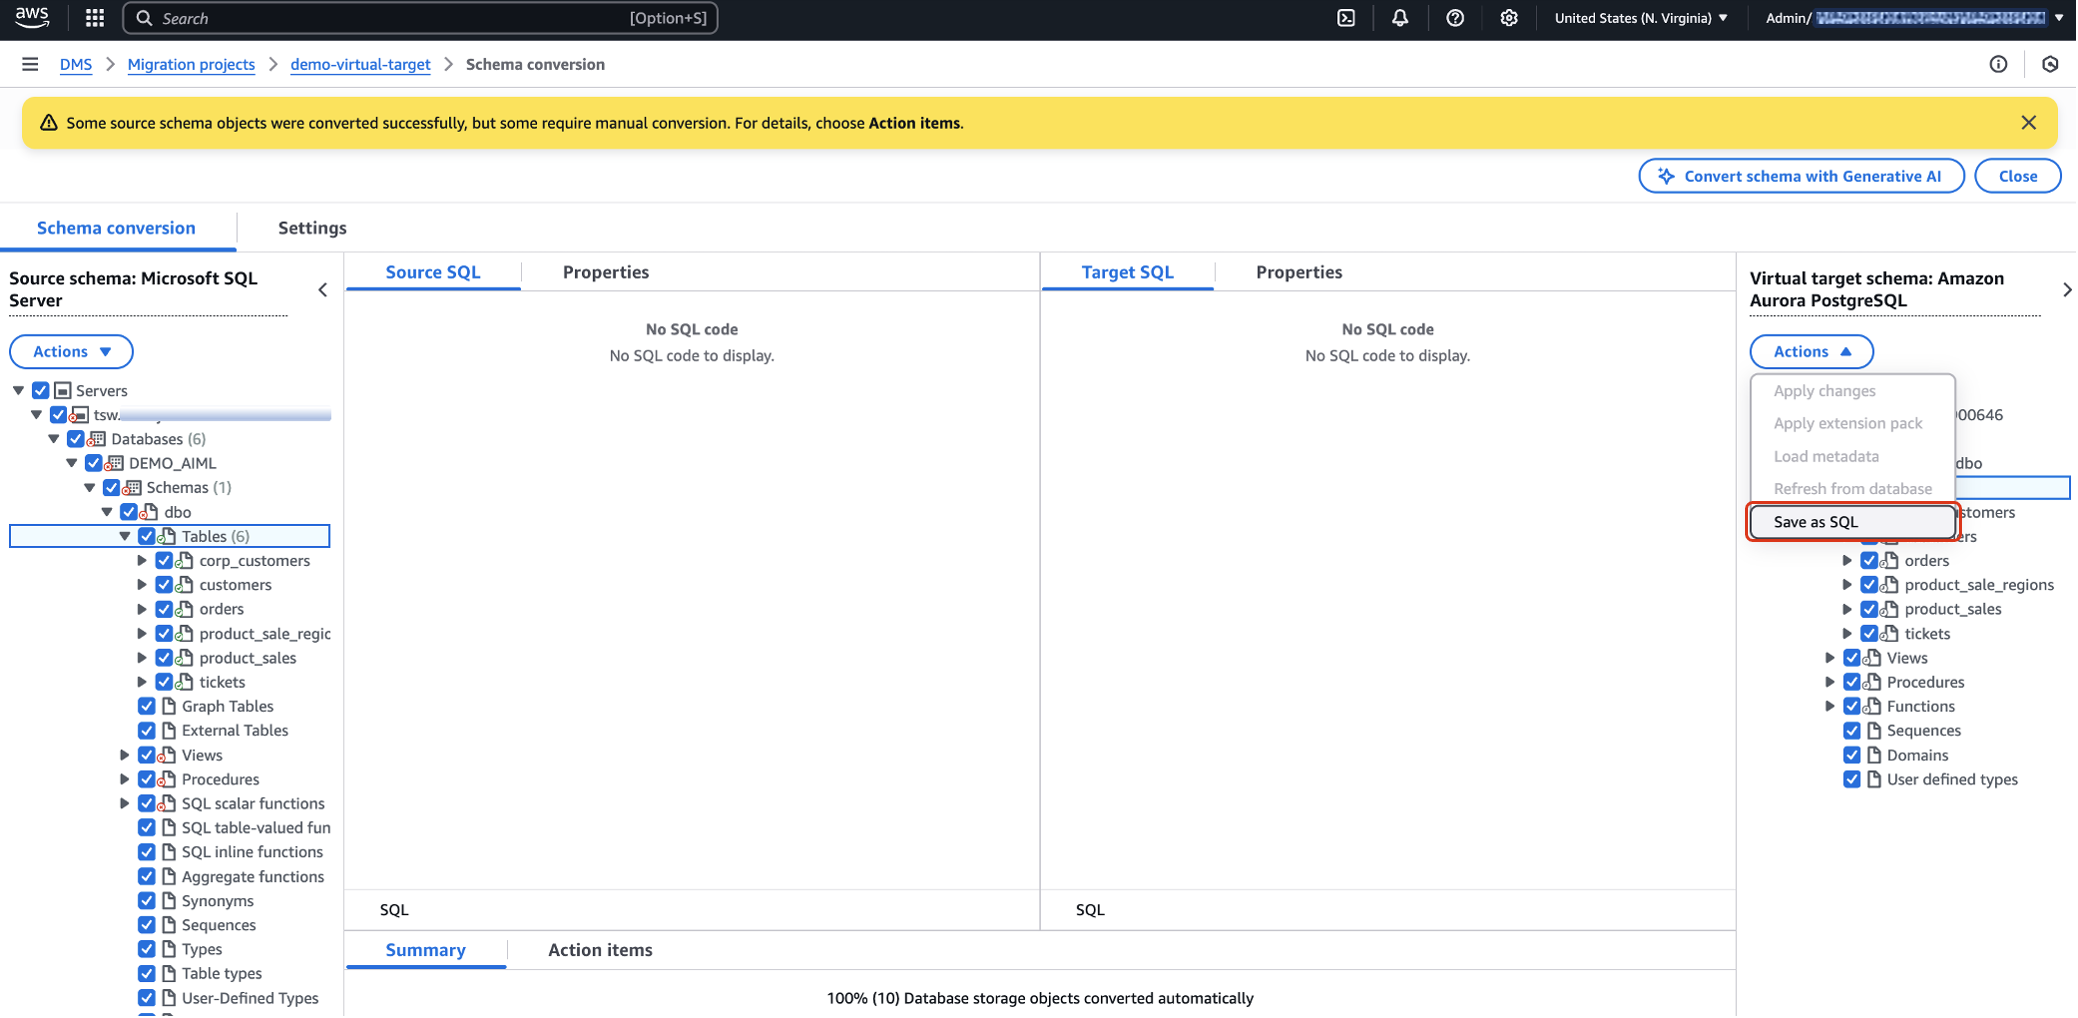
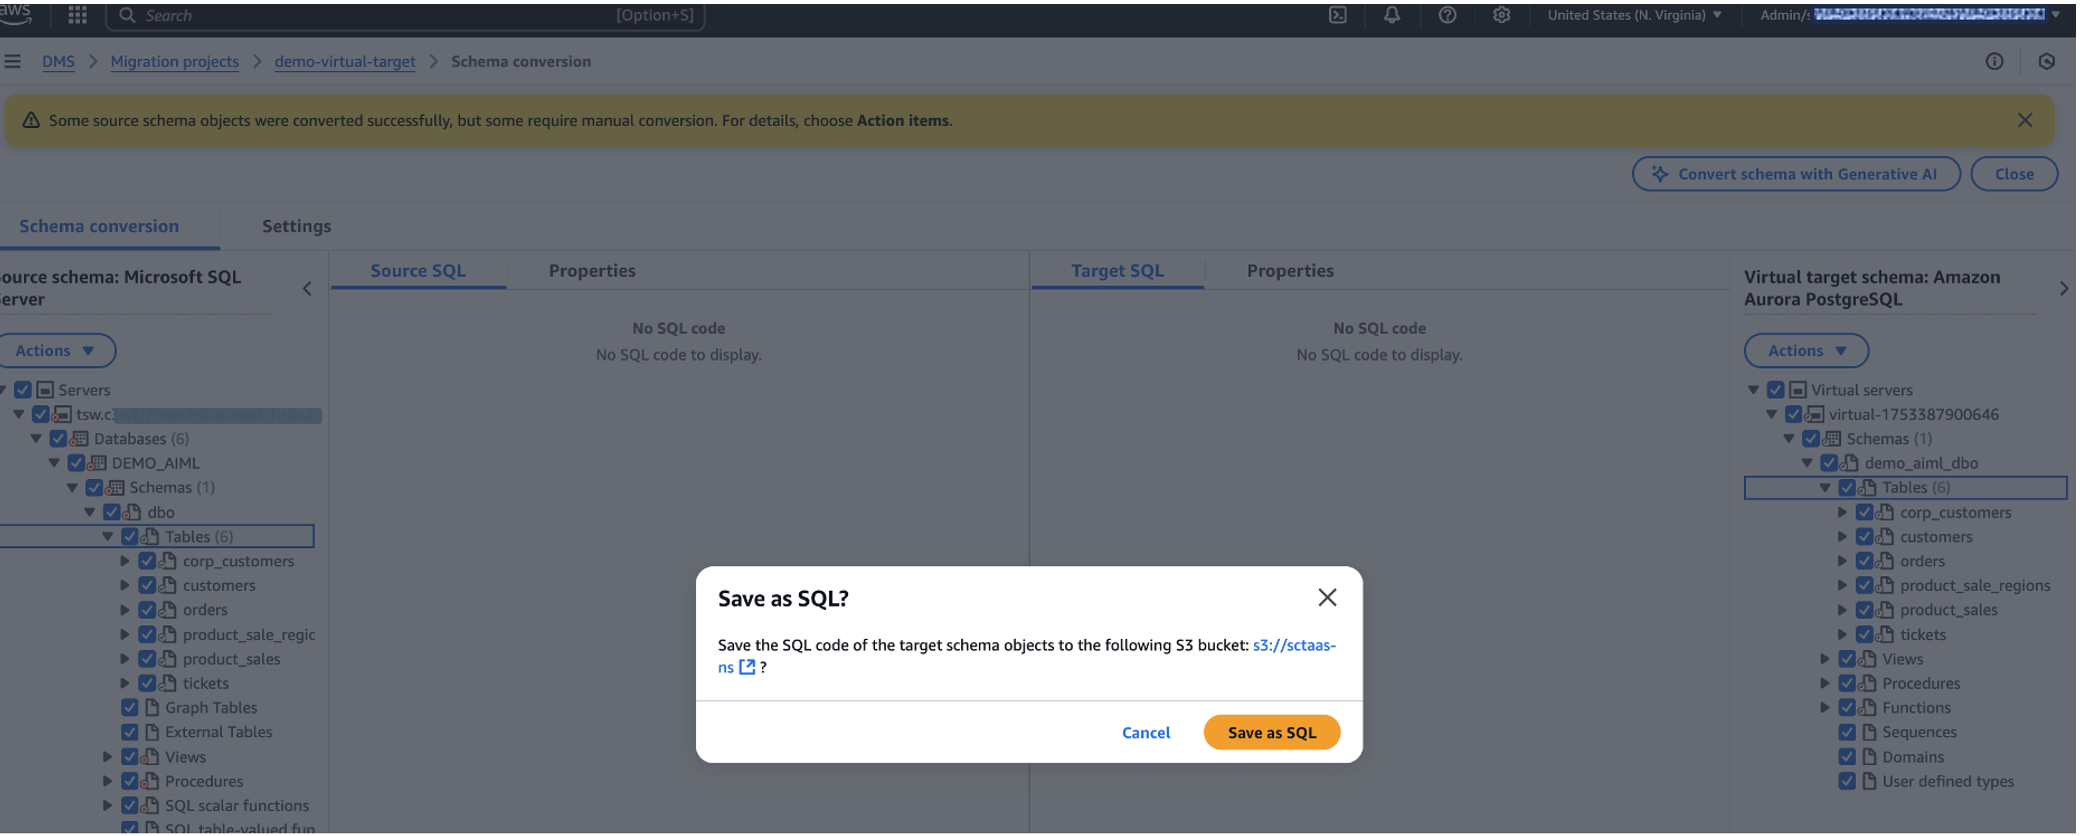
- You can export the converted code to the S3 bucket. Navigate to the virtual target tree, choose Action, and choose Save as SQL from the dropdown menu.
- Choose Save as SQL to confirm.
Transition to the actual target database
When your target database is ready, you have two options for applying the converted code: you can either apply it yourself or let AWS DMS Schema Conversion apply it for you. To have AWS DMS Schema Conversion apply the converted code, you must update your target data provider settings from the virtual target to the actual target database and update the associated migration project accordingly. Complete the following steps:
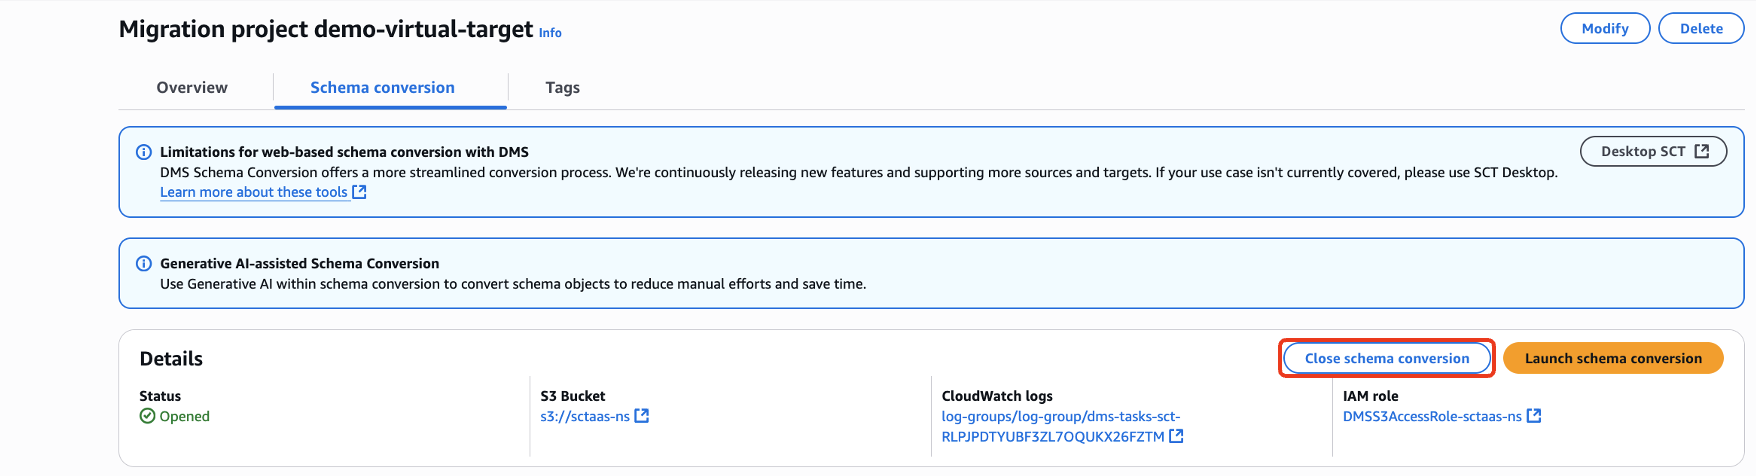
- Close the associated schema conversion project:
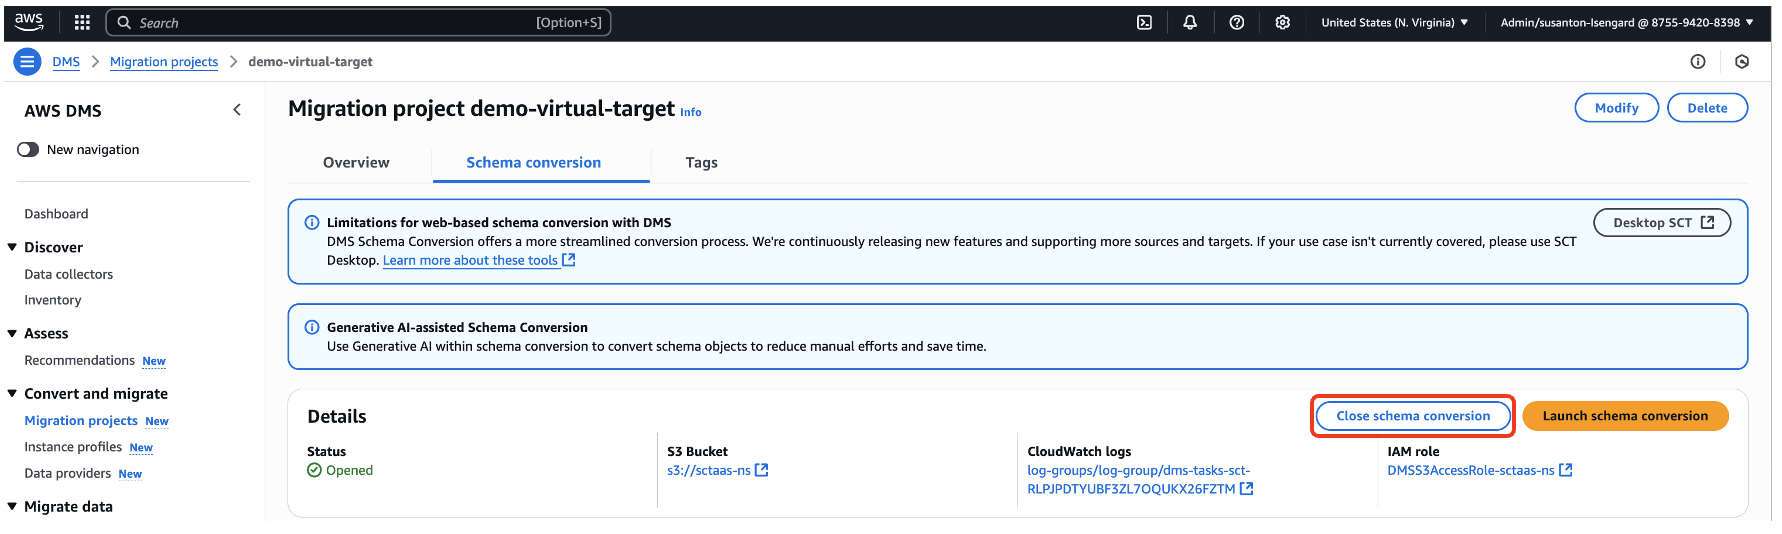
- On the AWS DMS console, open your migration project.
- On the Schema conversion tab, choose Close schema conversion.
- Update the target data provider settings:
- Choose Data providers in the navigation pane.
- Locate your virtual data provider and choose Modify.
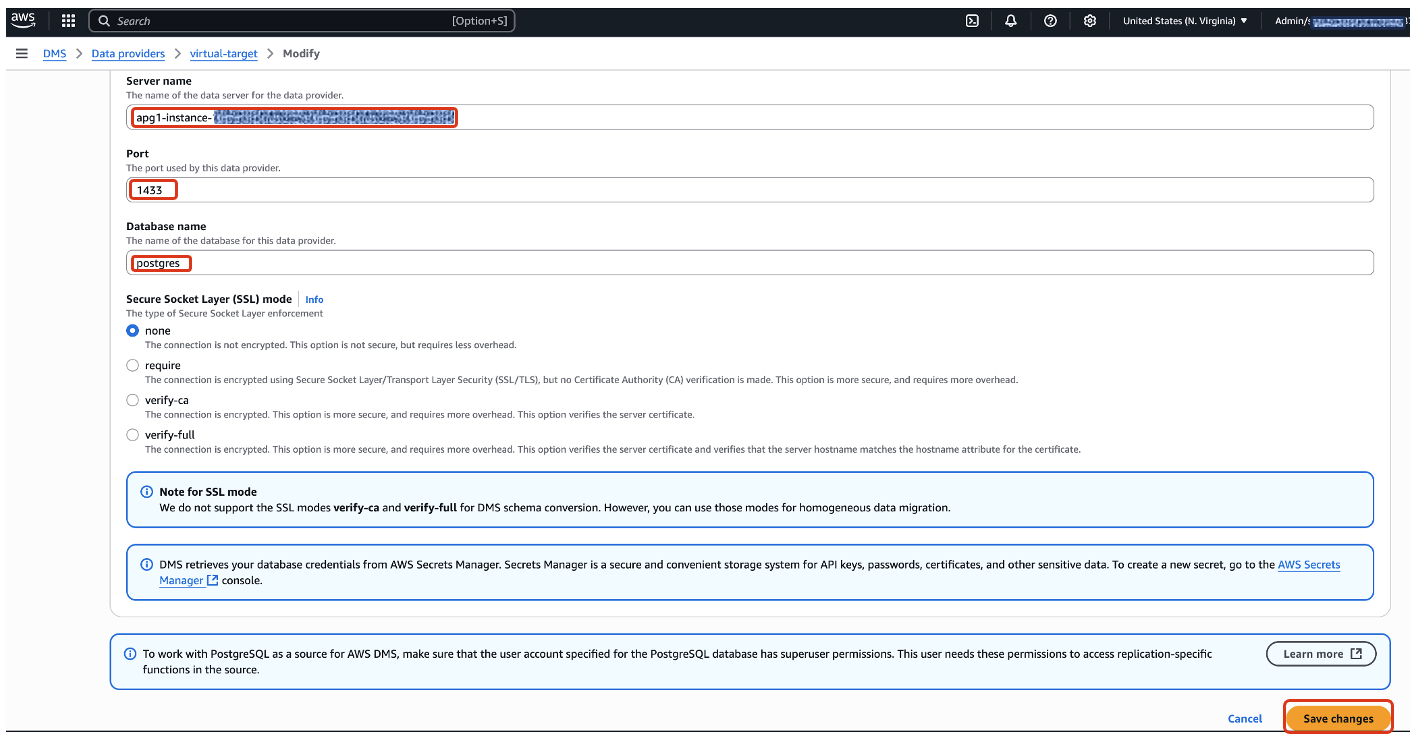
- Deselect Turn on Virtual Mode.
- For Server name, enter the server name from your RDS instance.
- For Port, enter the port from your RDS instance.
- For Database name, enter a name from your RDS instance.
- Choose Save changes.
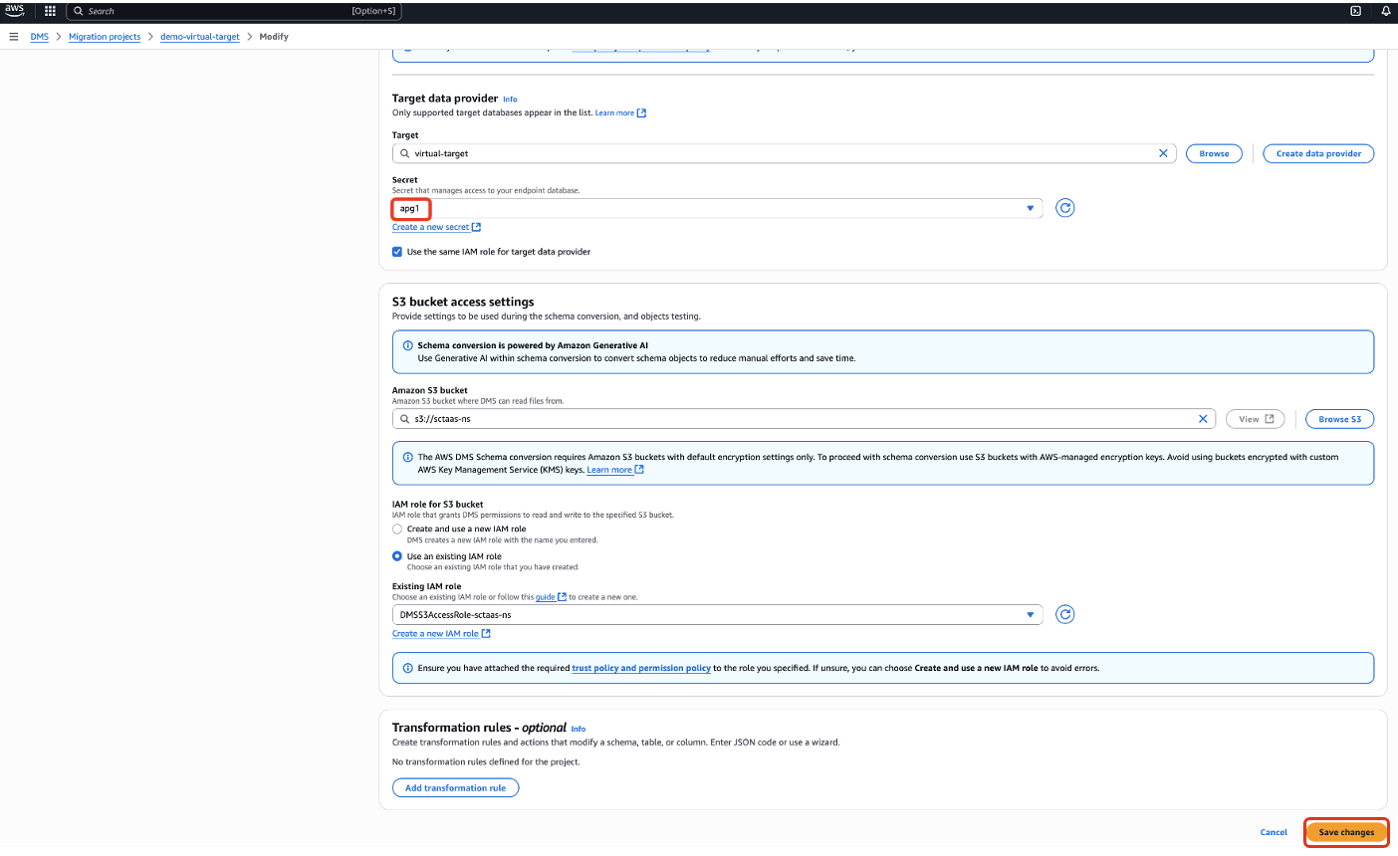
- Update the migration project settings:
- Locate your migration project and choose Modify.
- For Secret, choose the secret associated to your actual target database.
- Choose Save changes.
- Relaunch the migration project.
The target tree switches to regular (non-virtual) mode, and AWS DMS Schema Conversion resumes its standard operations. All following actions will function normally as they would in a regular, non-virtual environment.
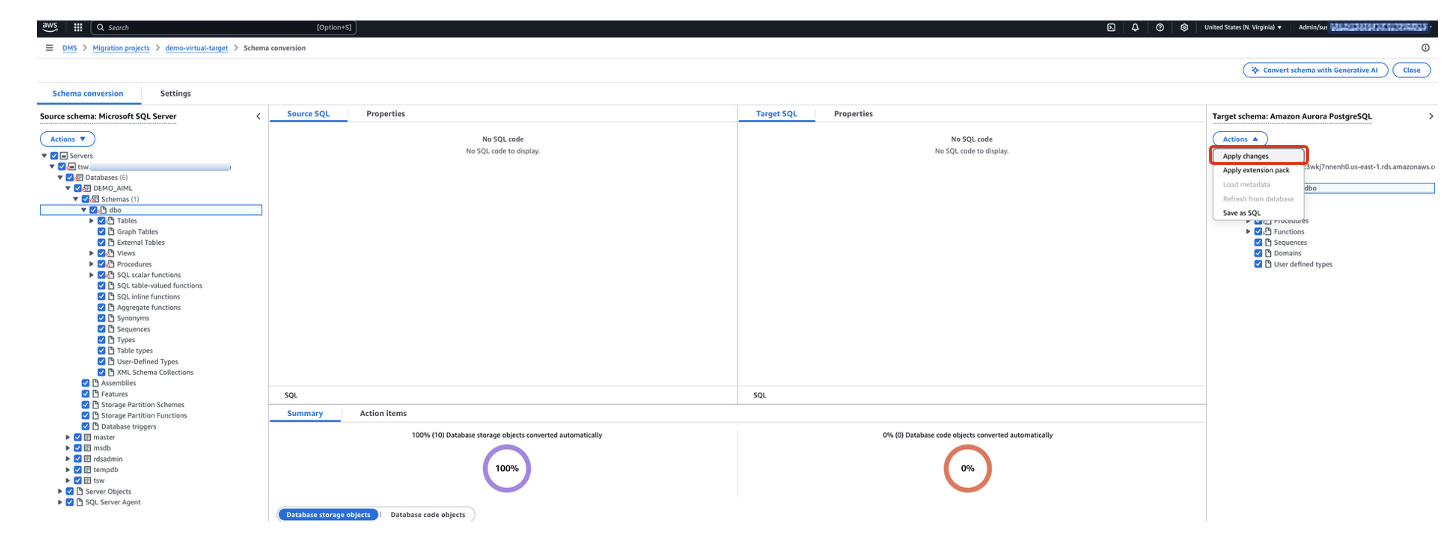
- Apply the converted code:
- Locate and open the desired object in the target tree.
- Choose Action and choose Apply changes from the dropdown menu.
Clean up
When the migration is complete, you can clean up the AWS DMS Schema Conversion resources:
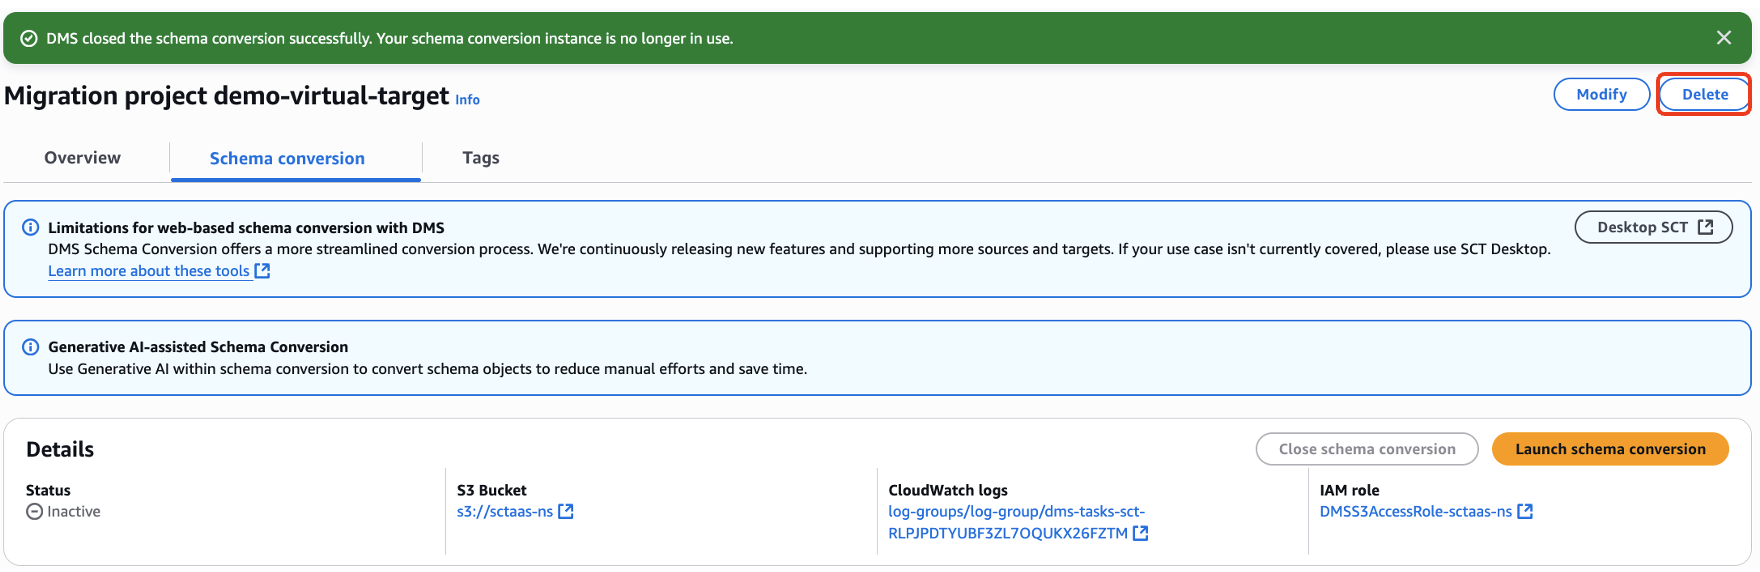
- Delete the AWS DMS Schema Conversion migration project:
- On the AWS DMS console, open your migration project.
- Choose Close schema conversion.
- Choose Delete.
- In the Data providers section, select the source and target data providers that you want to clean up, then choose Delete.

Conclusion
In this post, we demonstrated how to enable virtual mode in AWS DMS Schema Conversion to assess and convert your database objects before the target database is available. We also covered the steps to transition from virtual mode to the actual target database when it becomes available, including how to apply the converted code to the actual database using AWS DMS Schema Conversion.
To learn more, refer to Converting database schemas using DMS Schema Conversion.