AWS Big Data Blog
Embed interactive dashboards in your application with Amazon QuickSight
August 2025: This post was reviewed and updated to include the latest APIs for embedding.
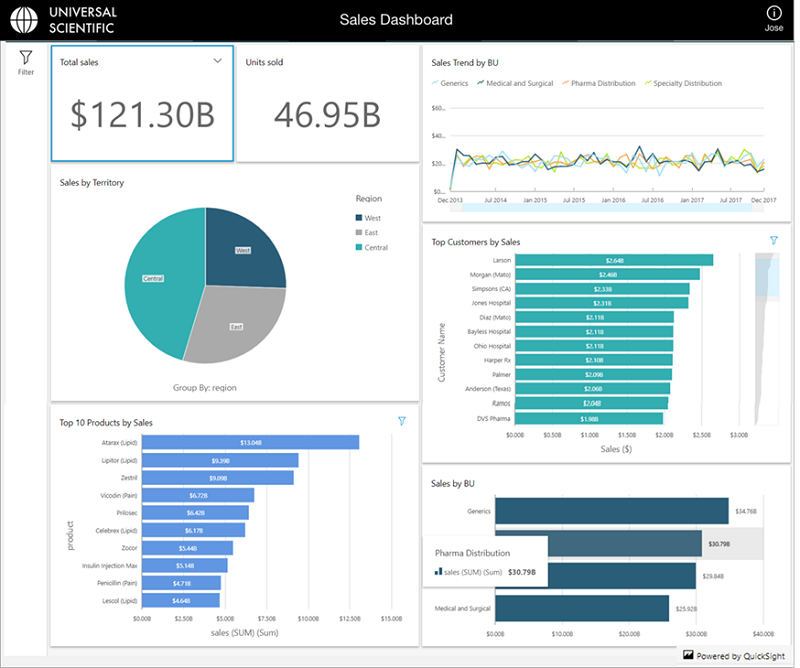
Amazon QuickSight allows you to quickly and efficiently enhance your application by embedding Amazon QuickSight dashboards within your Application. This means rich interactive data visualizations and analytics capabilities can be added to your application without any custom development. You won’t require specialized expertise on your team to develop, maintain, and evolve the analytics components for your applications, nor manage and scale your analytics servers, manage complex data engineering pipeline and infrastructure as your applications’ popularity grows. This saves you time and money and lets you focus on your core application functionality!
Embedded Amazon QuickSight dashboards allow you to utilize Amazon QuickSight’s serverless architecture and easily scale your insights with your growing user base, while ensuring you only pay for usage with Amazon QuickSight’s unique pay-per-session pricing model. Applications can authenticate the dashboard users with any identity provider of choice (example Active Directory, Cognito, or any SAML based federated SSO provider that your organization uses) and act on behalf of the user to get access to Amazon QuickSight dashboard. This means that every user receives a secure, personalized dashboard while requiring no user-facing QuickSight-specific authentication. Dashboard embedding is available in Amazon QuickSight Enterprise Edition in all supported regions.
To facilitate an easy embedding experience, AWS has also launched the Amazon QuickSight JavaScript SDK, and a rich set of Amazon QuickSight API operations. The Amazon QuickSight JavaScript SDK lets you efficiently integrate Amazon QuickSight dashboards in your application pages, set defaults, connect controls and handle errors. The new user and group API operations allow you to programmatically manage users and groups. This helps you rollout Amazon QuickSight to your users faster, and makes it easier to manage Amazon QuickSight resources using groups. User API operations are available for both Standard and Enterprise Editions, while group API operations are available in Enterprise Edition.
Let’s now take a quick look at how you can embed a dashboard in your application. We’ll go over the embedding steps for both registered users and anonymous users. We’ll start with registered users. The following four steps describe how to embed a dashboard.
Step 1: In Amazon QuickSight, create your dashboards and whitelist your domains
In this step, you create the dashboards in Amazon QuickSight and then share it with the readers who you would like to access this in the embedded form. Each unique viewer of the embedded dashboard must be a member of the Amazon QuickSight account and can be either provisioned in the account ahead of time or at the point of access using the user API operations. To provide each viewer with access to the dashboard, share the dashboard with a group. Then add users to the group once they are provisioned in the Amazon QuickSight account.
Before publishing the dashboard, let’s first create an Amazon QuickSight group for Finance users. Amazon QuickSight groups can be created through the ‘create-group’ api. The following AWS CLI command shows how to achieve this.
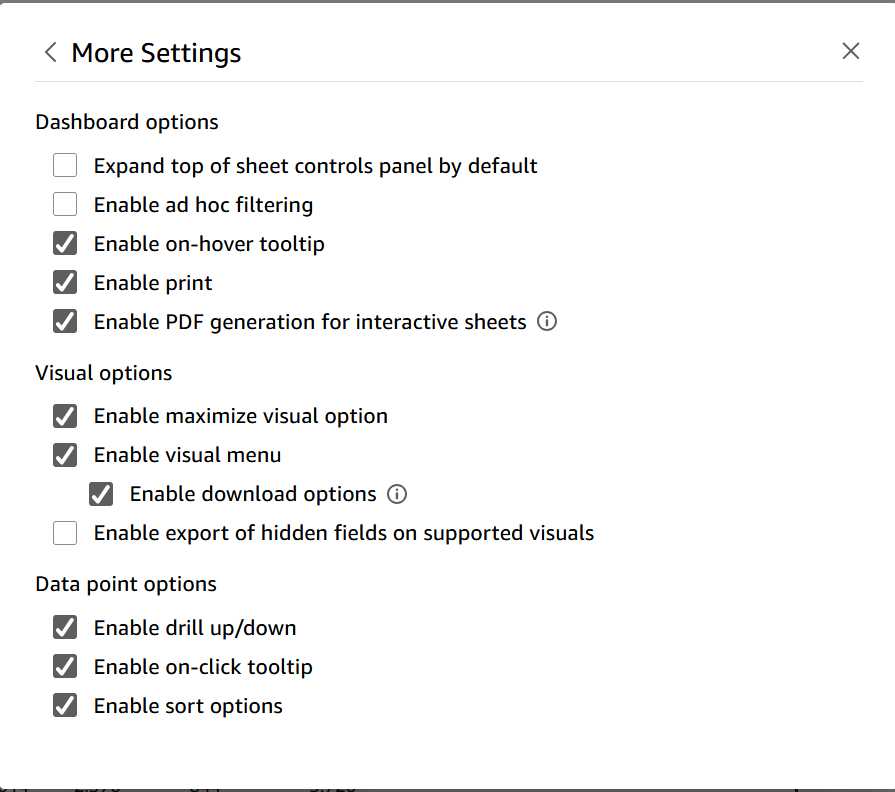
When you publish a dashboard, there is an option that allows you to enable or disable the advanced filtering and download to CSV options on the dashboard, to provide a simplified dashboard experience if desired.
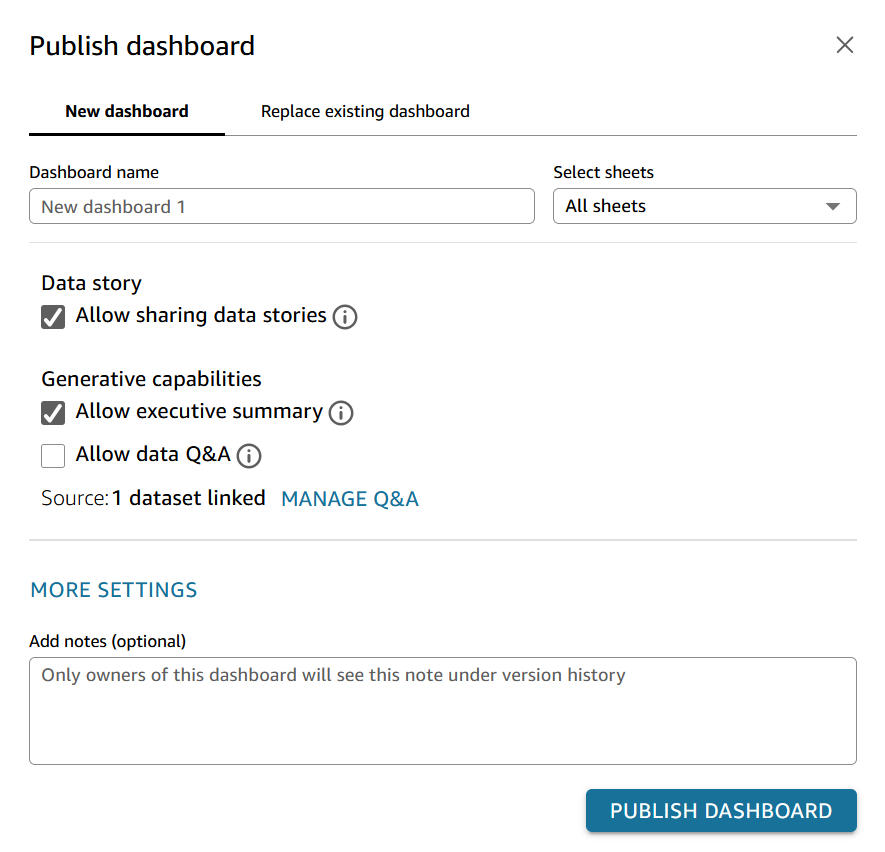
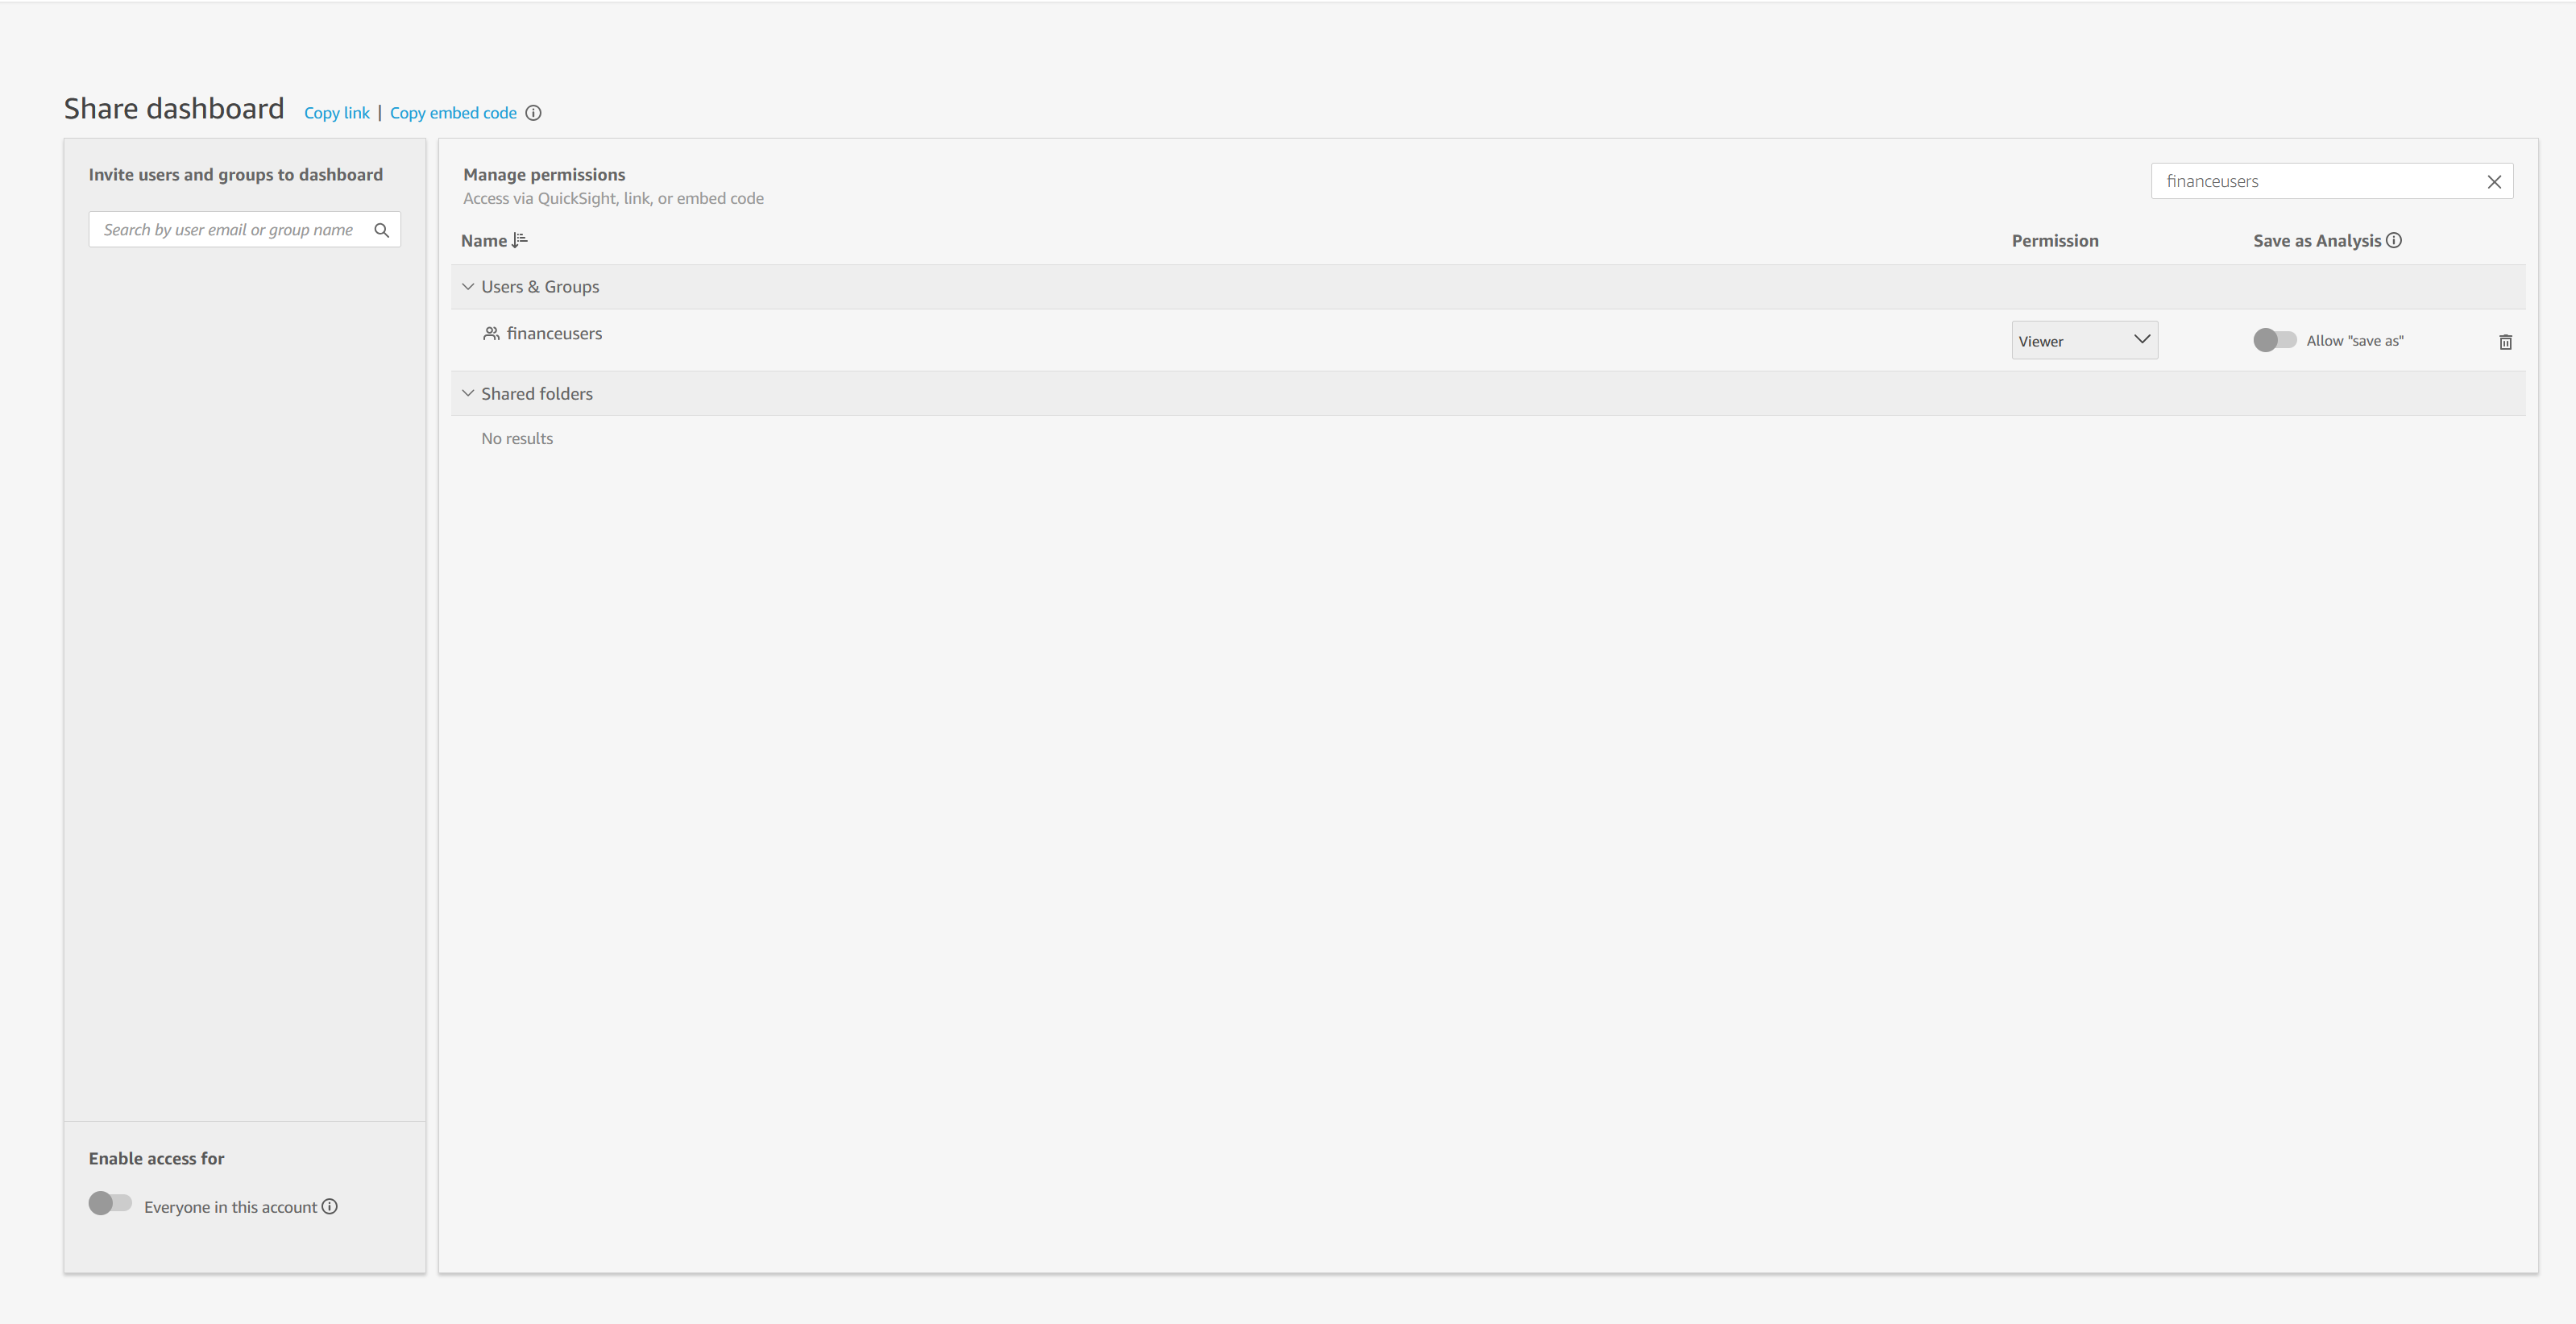
Share the dashboard with the financeuser group created above. You can find this group by searching in the ‘Select users in this account’ field. Grant ‘Viewer’ permissions to the group.
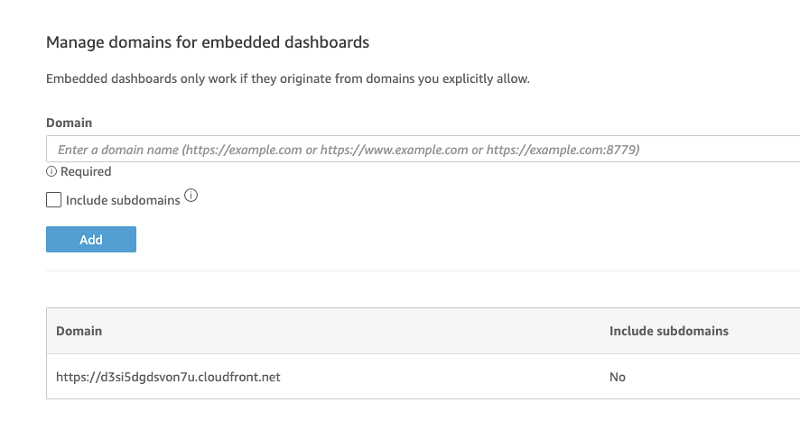
To avoid unauthorized embedding of dashboards from your account, an administrator in your account must explicitly enable domains where your Amazon QuickSight dashboards are embedded. You may also like to enable subdomains, which will allow embedded dashboards for all subdomains of this domain. For example if your domain is https://example.com, subdomains include https://blogs.example.com and https://salesinfo.corp.example.com. This is done by using the Manage QuickSight option that is available to all administrators. All domains in use (dev/staging/production) must be whitelisted and must use https.
Step 2: In your AWS account, set up permissions for embedded viewers
To provision users of your application as members of your Amazon QuickSight account, create an AWS Identity and Access Management (IAM) role that your application can assume on behalf of the user. This role should grant the visitor permissions to retrieve the specific embedded dashboard (quicksight: GenerateEmbedUrlForRegisteredUser)
The following is a sample policy with this permission:
In the above policy, you can limit the resources to certain dashboards and namespaces, for which you allow to generate the embedding url. Next, while calling the embed url API, you can use “experience-configuration” parameter to specify the allowed dashboard(s) for which you want to generate the embedding url.
Your application’s IAM identity must have permissions to use the role you just created. This means that as a user accesses your application, your application can assume the QuickSightEmbed role on the user’s behalf, and provision the user in the Amazon QuickSight account. The following example shows a statement that can be added to your application’s IAM identity to allow it to assume the QuickSightEmbed role.
Step 3: On your application server, authenticate the user and get the embedded dashboard URL
When a user lands in your application you can check to see if the user is already registered in Amazon QuickSight or provision the user if they are accessing for the very first time. The following AWS Command Line Interface (AWS CLI) command can be used to check if the user is already provisioned in the system.
In the above example, ‘tom.smith@example.com’ is the session name of the user visiting your application, and ‘QuickSightEmbed’ is the role that application assumes on user’s behalf. Combination of the IAM role name and role session name determines how the user is registered in Amazon QuickSight.
If no result is returned, you can perform a just-in-time provisioning of the user using the command below. You can also use this pattern to pre-provision users in Amazon QuickSight ahead of time. With Amazon QuickSight’s Pay-per-Session mode, you can provision thousands of users. You get charged only when they access Amazon QuickSight.
On the first access, you can also add this user to an Amazon QuickSight group with which the dashboard has been shared.
Next you can assume the IAM role created in Step 2 (QuickSightEmbed) on the user’s behalf by passing the session name of the user. Use the same session name (tom.smith@example.com) used while provisioning the in the previous step. The following shows an AWS CLI command that can achieve this:
The assume role API returns 3 parameters: access key, secret key and session token. You need to set these three parameters into your CLI:
If you are using a windows PC, you can do the same using the commands below:
Running this command sets the role session ID of the user visiting your website to “QuickSightEmbed/tom.smith@example.com.” This is also the user name in Amazon QuickSight.
You now have a user of your application who is also an Amazon QuickSight user and has access to the dashboard. For the last part of Step 3, call generate-embed-url-for-registered-user to get a signed URL for the dashboard that can be embedded.
Step 4: On your application page, use the Amazon QuickSight JavaScript SDK to embed the dashboard
You can download the Amazon QuickSight JavaScript SDK here. Use it to place the signed URL obtained in Step 3 in your application page. The SDK lets you place the dashboard on an HTML page, pass parameters into the dashboard and also handle error states with messages that are customized to your application.
The CLI commands referenced above are part of the AWS SDK. You can achieve the same result with all AWS SDK supported languages. For more information, see Tools for Amazon Web Services.
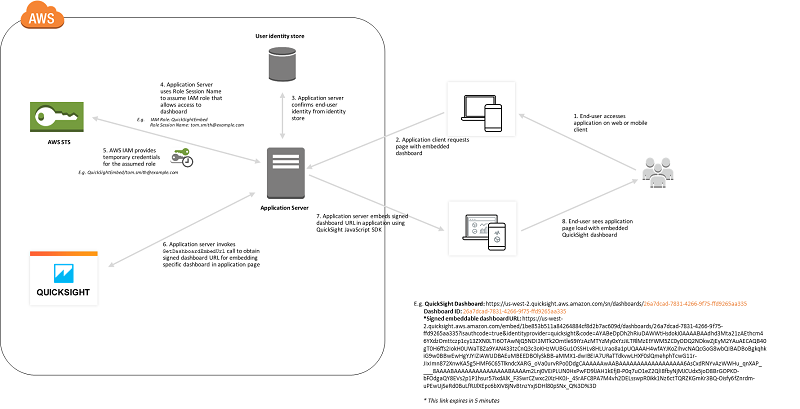
These four steps walk through the steps involved in embedding Amazon QuickSight dashboards in your application pages. When you integrate Amazon QuickSight dashboards in your application, you will repeat this sequence of steps for every user coming into the system, so that each user has a unique identity that has the right permissions to the dashboard, and can be shown the right data.
The flow of steps when a user requests an application page with an embedded dashboard is captured below.
Amazon QuickSight also allows embedding dashboards for unauthenticated users. This option requires session packs with capacity pricing.
Let’s now take a quick look at how you can embed a dashboard for unauthenticated users in your application. The following four steps describe how to embed a dashboard.
Step 1: In Amazon QuickSight, create your dashboards and whitelist your domains
This step is same as Step 1 for embedding dashboards for registered users.
Step 2: In your AWS account, set up permissions for embedded viewers
Each user who accesses a dashboard assumes a role that gives them Amazon QuickSight access and permissions to the dashboard. To make this possible, create an IAM role in your AWS account. Associate an IAM policy with the role to provide permissions to any user who assumes it. Following is the sample policy:
The application’s IAM identity must have a trust policy associated with it to allow access to the role that you just created. This means that when a user accesses your application, your application can assume the role on the user’s behalf to open the dashboard. The following example shows a sample trust policy.
Step 3: On your application server, get the embedded dashboard URL
You can assume the IAM role created in Step 2 (QuickSightEmbed) on the user’s behalf by passing the role ARN.
The following shows an AWS CLI command that can achieve this:
The assume role API returns 3 parameters: access key, secret key and session token. You need to set these three parameters into your CLI:
If you are using a windows PC, you can do the same using the commands below:
Running this command sets the role session ID of the user visiting your website to “embedding_quicksight_dashboard_role/QuickSightEmbeddingAnonymousPolicy”. The role session ID is made up of the role name from role-arn and the role-session-name value.
To get a signed URL for the dashboard, call generate-embed-url-for-anonymous-user from the app server. The following example shows how to generate the URL:
Step 4: On your application page, use the Amazon QuickSight JavaScript SDK to embed the dashboard
You can download the Amazon QuickSight JavaScript SDK here. Use it to place the signed URL obtained in Step 3 in your application page. The SDK lets you place the dashboard on an HTML page, pass parameters into the dashboard and also handle error states with messages that are customized to your application.
We’ve added more capabilities to let you embed dashboards and more in your applications. Check out the new hands-on tutorial and more details in the blog post, Embed multi-tenant analytics in applications with Amazon QuickSight.
Additional Reading
If you found this post useful, be sure to check out Create Amazon QuickSight dashboards that have impact with parameters, on-screen controls, and URL actions, and Advanced analytics with table calculations in Amazon QuickSight.
To go further, you can visit Visualizing Amazon SageMaker machine learning predictions with Amazon QuickSight and learn and you can integrate Amazon SageMaker ML models with QuickSight to analyze the augmented data and use it directly in your business intelligence dashboards.
About the Authors
 Retina Satish is a Solutions Architect at AWS, bringing her expertise in data analytics and generative AI. She collaborates with customers to understand business challenges and architect innovative, data-driven solutions using cutting-edge technologies. She is dedicated to delivering secure, scalable, and cost-effective solutions that drive digital transformation.
 Debaprasun Chakraborty is an AWS Solutions Architect, specializing in the analytics domain. He has around 20 years of software development and architecture experience. He is passionate about helping customers in cloud adoption, migration and strategy.
 Jose Kunnackal is a principal product manager for Amazon QuickSight.